Exposing Right

 Exposing Right
Talk to Rico (open forum for questions & feedback) – Rico’s Flickr sets – Expanded XQ1 Sample Images Set – Expanded X-E2 Sample Images Set – X-E2 AF tracking samples – Mastering the Fujifilm X-Pro1 reading samples (65 free pages) – Get my NEW book (print or DRM-free eBook/PDF): Mastering the Fujifilm X-E1 and X-Pro1 (use code FUJIRUMORS to save 35%!)

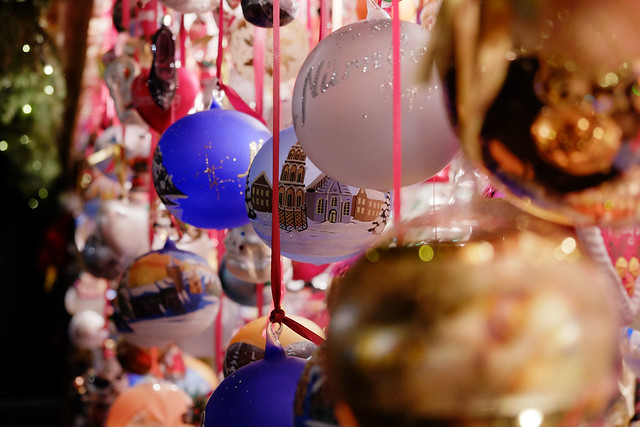
Welcome to the X-Pert Corner Holiday Edition!
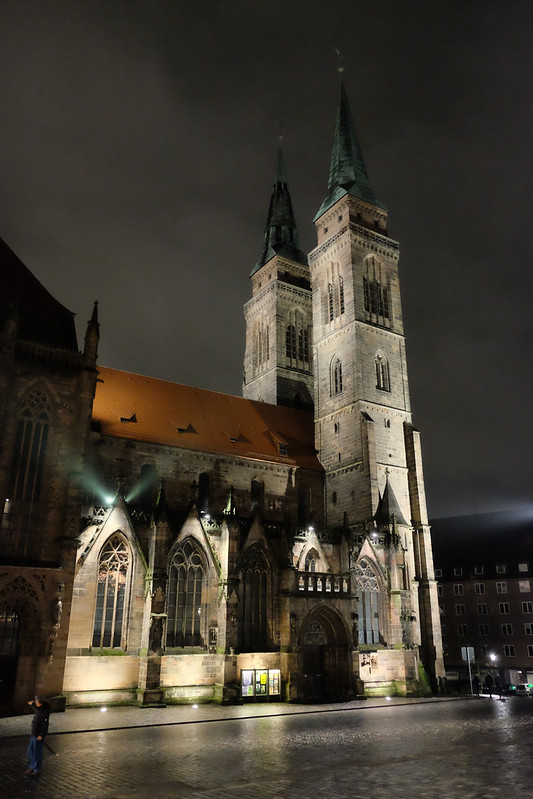
‘Tis the season of festive lights and crazy contrasts. Your X-series camera can master these challenging situations—but can you master your X-series camera? ;)
No worries! We are going to have a look at how Fuji’s latest firmware update can make your life easier, and we will also look into the DR expansion function of your camera. However, let’s start with the basics: ETTR, or “Expose To The Right”.
ETTR – “Expose To The Right”
ETTR is often misunderstood as “overexposing” an image, then correcting the exposure by “pulling the brightness back down” in an external RAW converter like Adobe Lightroom.
Well, that’s the theory. In reality, ETTR often means to perform quite the opposite: to underexpose an image in order to save important highlights from clipping, then “pushing” the shadows and midtones back up in an external RAW converter. You can read more about the background story of this method in my books, so let’s focus on the practical side of things.
Per definition, ETTR is best-suited for RAW-only shooters: They set the camera to DR100% and use the live histogram to settle with an exposure that won’t clip important highlights. All X-series photographers can use this method in P, A and S exposure modes. However, in order to also use it in M (manual exposure) mode, you need either an X-E2 or XQ1, or an X-E1, X-Pro1 or X100S with the latest 18DEC firmware update. Manual mode shooters should make sure that SETUP MENU > SCREEN SET-UP > PREVIEW EXP. IN MANUAL MODE is set to ON. This setting enables the WYSIWYG live view and the live histogram in manual exposure mode.
That said, here’s a quick ETTR example:
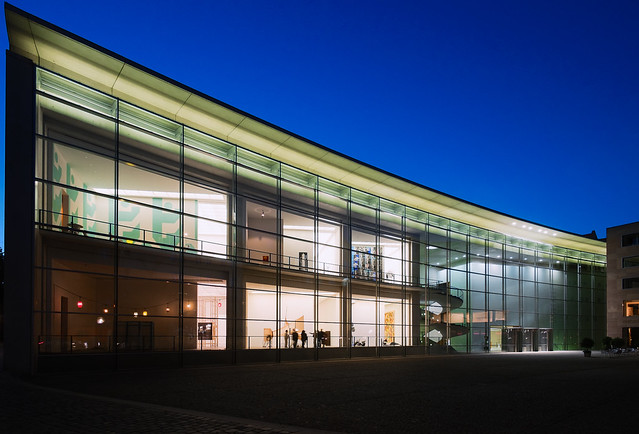
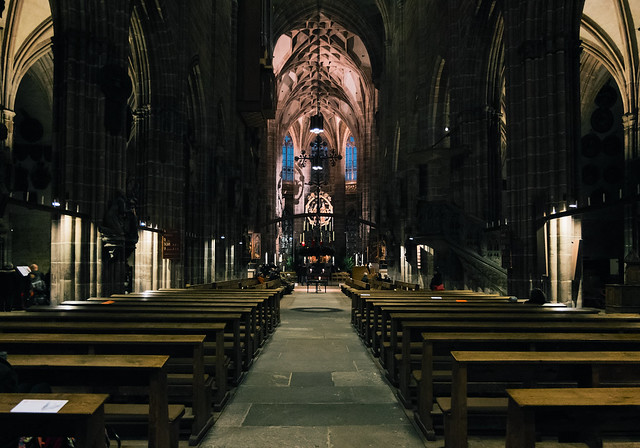
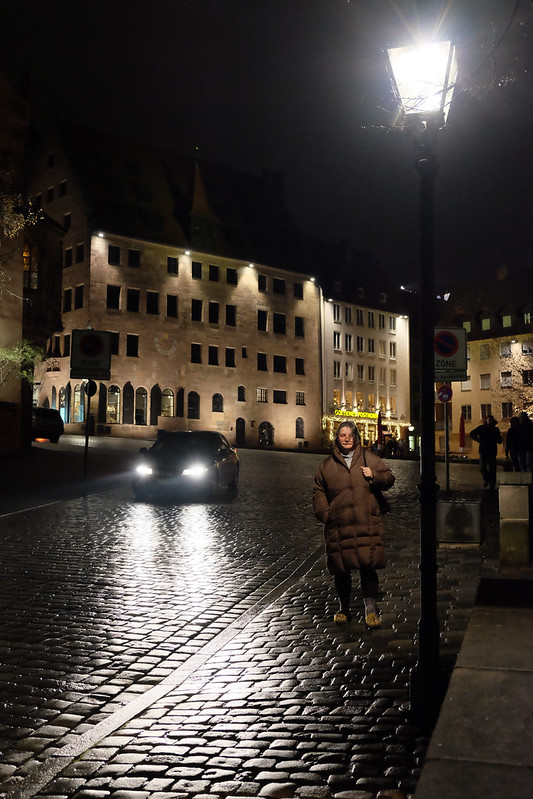
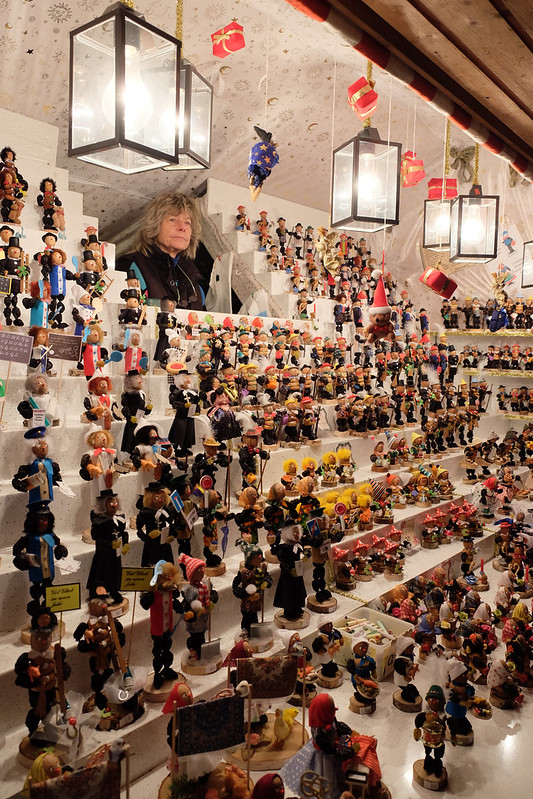
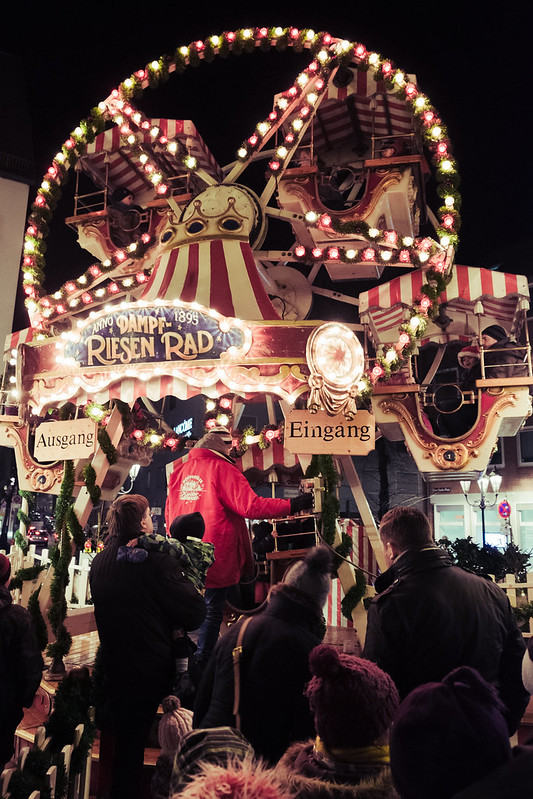
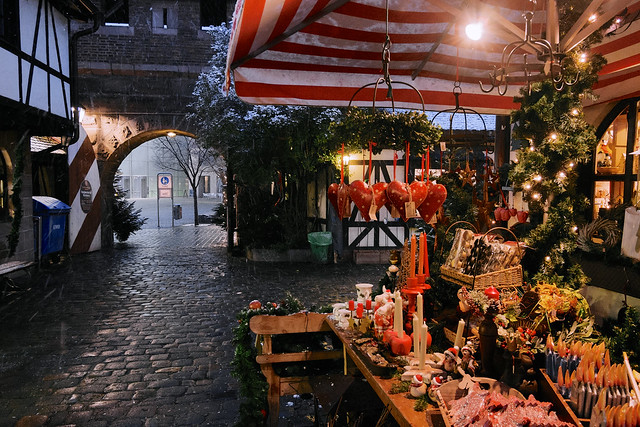
Using the 18-55mm kit zoom on an X-E2, I took this handheld shot at f/2.8 and 1/4s (yes, really!) using ISO 200. The exposure is right at the limit of not clipping important highlights like the christmas tree and the brightly lit rooms behind some windows.
You can click on the image for larger views and to access the EXIF data of this “straight out of camera” (SOOC) JPEG.
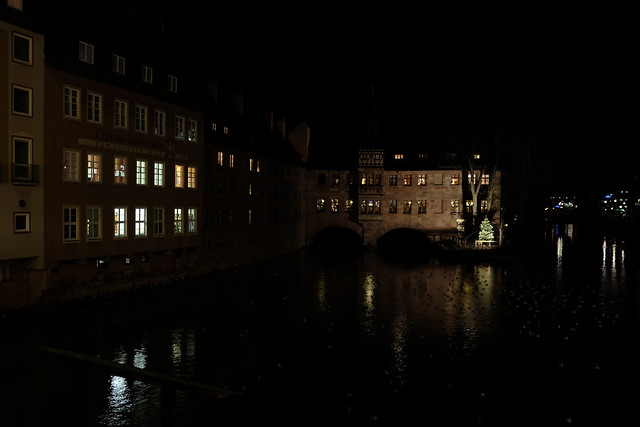
Preserving the highlights with ETTR has an obvious catch: The shadows and dark areas that make up most of this shot appear too dark. They are underexposed, but this can be fixed by moving the Exposure, White, Black, Highlights and Shadows sliders of your favorite RAW converter. Processing the RAW file in Adobe Lightroom and applying custom RGB curves in Apple Aperture, I came up with this result:
You may or may not agree that this version looks more interesting, but it certainly reveals more of the actual subject matter, as less parts of the image are literally “left in the dark”. Moving Lightroom’s Exposure slider to the right applies digital gain to the overall image, so you may have to move the White and Highlights sliders to the left in order to retain the highlight texture in the brightest image areas.
What can you do if you don’t want to use an external RAW converter? Well, you can always use the built-in RAW converter of your camera. This internal converter is a trademark feature of all X-series cameras, and it allows you to push (or pull) the overall exposure of your images, and to adjust the highlight and shadow contrast curves. Let’s have a look:
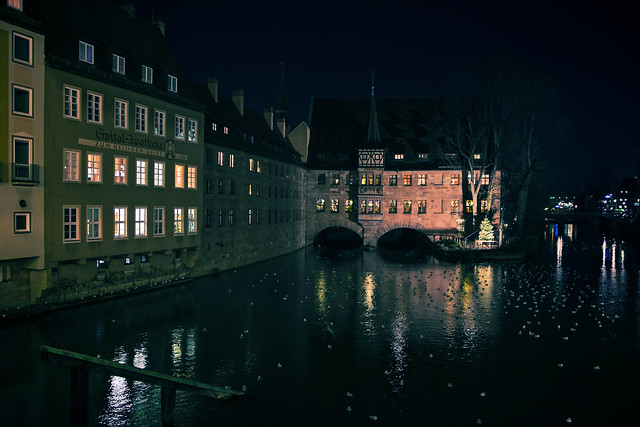
This is a reprocessed version of the original ETTR shot. To achieve a more balanced appearance, I opened the internal RAW converter (PLAYBACK MENU > RAW CONVERSION) and applied digital gain by pushing the RAW file up one stop (PUSH/PULL PROCESSING > +1 EV). I also reduced the shadow contrast by selecting SHADOW TONE > SOFT.
The result looks quite acceptable, but be careful: Pushing the overall image too far can lead to clipped highlights. While it’s true that the internal RAW converter will preserve (compress) highlights to a certain amount when digital gain is applied to an image, the in-camera converter lacks the more advanced tone-mapping features of external solutions like Adobe Lightroom. Don’t push it too far—literally!
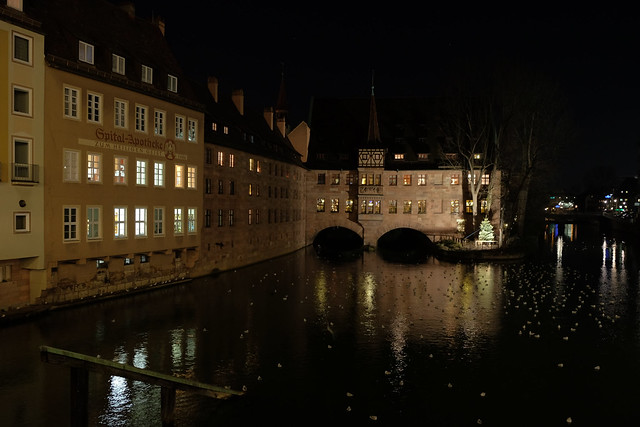
In oder to get a pleasing JPEG of this scene directly from your camera (and save yourself the manual RAW processing), the easiest and most effective way would have been to set ISO 800 (2 stops more overall gain), DR400% (2 stops more highlight dynamic range to compensate for the added overall gain) and the exact same aperture and shutter speed (f/2.8, 1/4s) as in the ISO 200 ETTR example. That way, the camera would have exposed the shadows two stops brighter (ISO 800 vs. ISO 200), while the highlights (christmas tree, bright windows) would have remained at ISO 200 thanks to the specific tone curve of the camera’s DR400% mode. The DR function automatically performs the tone-mapping for you. It’s a care-free package, and the RAW files of both versions (“ISO 200, DR100%, f/2.8, 1/4s” vs. “ISO 800, DR400%, f/2.8, 1/4s”) would contain exactly the same image data. If you don’t know why this is the case, you may want to revisit my “How to Expand Dynamic Range” X-Pert Corner article or read the pretty extensive chapter on Dynamic Range Expansion in one of my books.
DR Modes and the ISOless APS-C Sensor
You may have heard that Fuji’s APS-C cameras are all based on modern “ISOless” Sony sensors. These sensors are used by several leading camera manufacturers, such as Sony (of course!), Nikon, Ricoh/Pentax, Leica and Fujifilm.
The “killer feature” of ISOless sensors is their ability to rely on digital gain (as opposed to analog amplification) for the most part of their operation. Digital gain can be applied anytime during your workflow—before and after the RAW file has been created. As a matter of fact, it’s better to apply digital gain after the fact—when the RAW in processed in a converter. This is also the reason why Fujifilm RAWs don’t go beyond ISO 1600. They remain the same—any further gain between ISO 1600 and ISO 6400 is applied digitally during RAW conversion.
This means that in high-ISO scenarios, achieving “perfect exposure” before you press the shutter button doesn’t really matter. You can just as well change the exposure later in the RAW processing phase—either in-camera, or with Lightroom (or with another RAW converter) in the comfort of your home. Click here to read a forum thread with a demonstration of this feature.
Between base ISO 200 and ISO 1600, “mixed” analog/digital amplification maintains a slight quality advantage over “pure” digital gain. That’s why your camera is still using at least some analog signal amplification up to ISO 1600. Enabling the DR function basically switches the mixed analog/digital process over to a pure digital gain (or tone-mapping) process for either one (DR200%) or two (DR400%) analog signal amplification stops.
Let me give you an example: Shooting an image at ISO 800, DR100% will result in an ISO 800 RAW file that’s based on an ISO 200 exposure with two stops of mixed analog/digital amplification/gain. Shooting the same image at ISO 800, DR400% will result in an ISO 200 RAW file with digital tone-mapping being applied during RAW conversion. This tone-mapping is pushing the result to ISO 800 in the shadows and midtones, while retaining bright highlights at ISO 200. You would have a hard time telling the “analog” from the “digital” ISO 800 result when looking at the shadows and midtones. You will however recognize that the digitally processed DR400% version offers two additional stops of highlight dynamic range. This is exactly what we want when shooting scenes with high DR, like christmas markets with festive lights and very strong contrasts.
In other words: Yes, sensors have a fixed dynamic range, but the actual dynamic range that can fit into your actual image file is not just determined by the sensor, but by the signal processing and by whatever happens during RAW processing. By applying “adaptive ISO” during RAW processing, you can expand the actual dynamic range of any image by 1, 2, 3 or even more stops. The sky’s the limit, but for practical reasons, there will always be quality considerations, since the application of digital gain results in a similar image degradation as raising ISO values the old-fashioned way.
ISO 3200 = ISO 200?!
The ability of your ISOless sensor to digitally push/pull the ISO of an image (or parts of it) during RAW processing means that the ISO values that are recorded in the EXIF data of your files are often pointless. They simply don’t say much, and they certainly don’t prove anything. Let me demonstrate this by showing you two SOOC JPEGs from my X-E2. Both shots were recording the exact same “scene” (my laptop screen) at f/11 and 1/30s, but one did so at ISO 200 and the other at ISO 3200. That’s a difference of four exposure values (EV), so you’d expect the ISO 3200 image to be much brighter than the ISO 200 shot. Right? Well…
ISO 200, f/11, 1/30s:
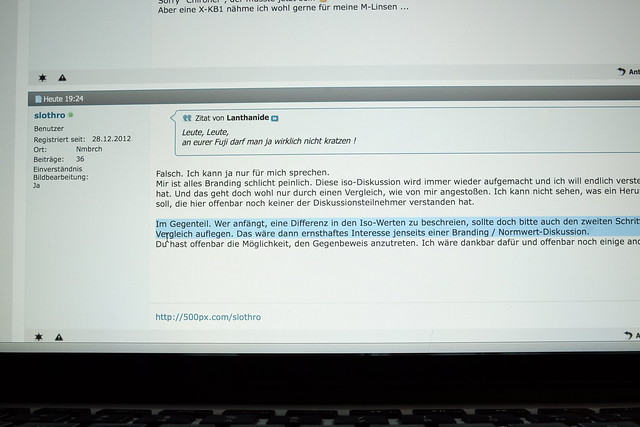
ISO 3200, f/11, 1/30s:
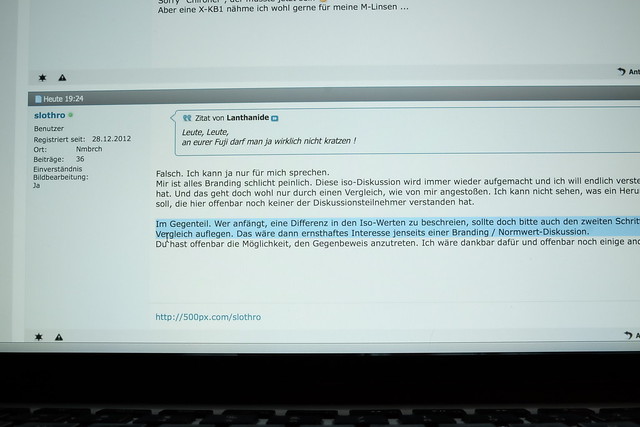
Oddly, the ISO 200 shot is actually brighter than the ISO 3200 shot! How can this be? Don’t overthink it! I simply pushed the ISO 200 sample up three stops in the internal RAW converter, and I pulled the ISO 3200 sample one stop down. The result is pretty much the same ISO 1600 image, even though the EXIF data tells a very different story.
Cameras and RAW converters do this all the time, they just don’t tell you, because they don’t want you to be “confused”. Remember that you cannot see an actual RAW file, you can only see processed results after the RAW data went through some kind of in-camera or external processing. You cannot see unprocessed RAW images! Here’s the catch: The RAW conversion/processing won’t change the ISO EXIF data of your shot, but it can certainly change the actual ISO of your image (or parts of it). So your ISO 200 shot can end up looking just as bright or even brighter than your ISO 3200 result. Amazing, huh?
Some people spend hours and days of their lives discussing “inflated” or “deflated” ISO settings of different camera models. I reckon their time would be better spent reading the Wikipedia article on this subject. They might be quite surprised to learn that in the digital realm, ISO calibration is a pretty arbitrary concept. And even if is wasn’t, ISO changes during RAW processing can (and often will) render even the most accurate ISO settings meaningless, often resulting in a large discrepancy between the ISO values in the EXIF data and the actual brightness of the final image.

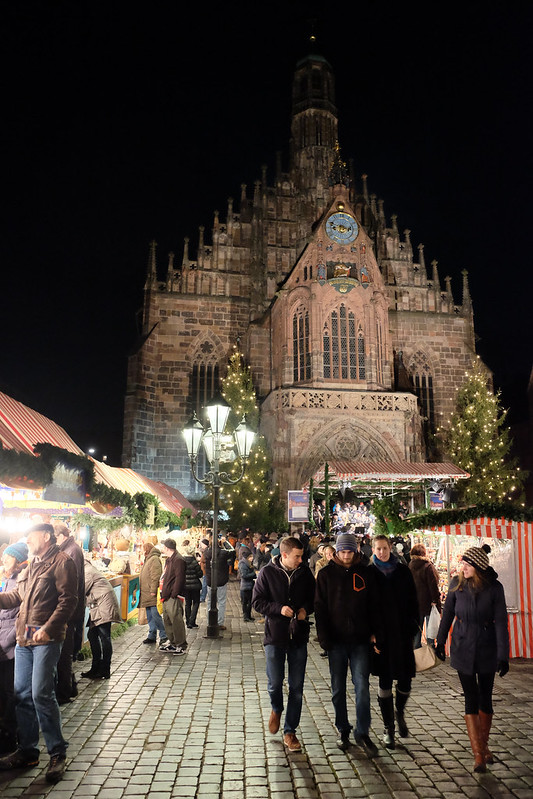
Let’s Shoot, Already!
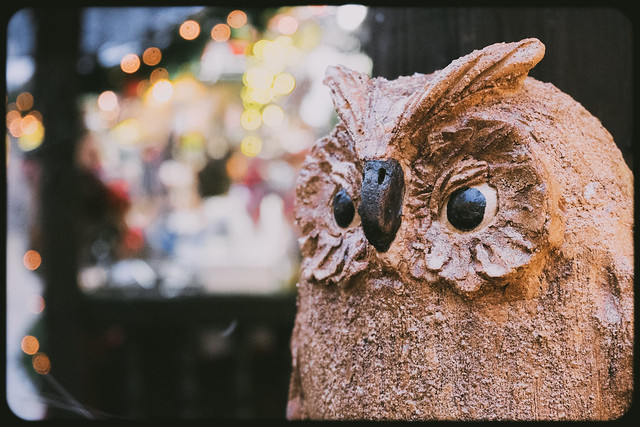
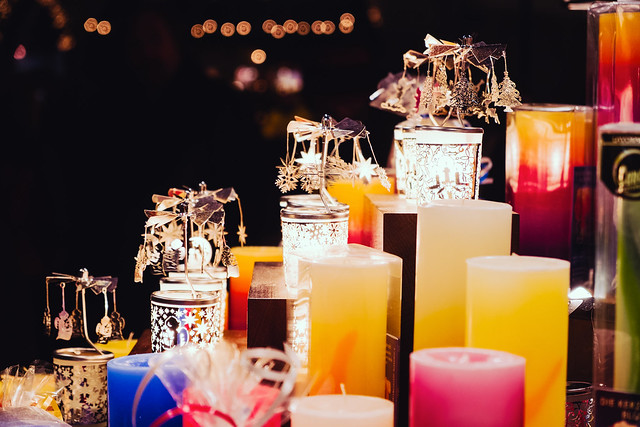
Okay, let’s get practical and shoot those festive lights. As a “RAW only” shooter, you could just take the ETTR approach that I described above. However, if you are also into pleasant JPEGs (you can still use the RAWs, no worries), you are better off with manually selecting DR400%. This should provide you with sufficient highlight headroom to preserve critical X-mas lights. At the same time, you can expose your image in a way that ensures that your main subjects (usually people, faces or objects) aren’t turning out too dark. We want to have it all, and thanks to Fuji’s ISOless sensor and our camera’s quite aggressive DR function we actually can have it all: textured shadows, pleasantly exposed faces and bright lights that do not clip. Yay!
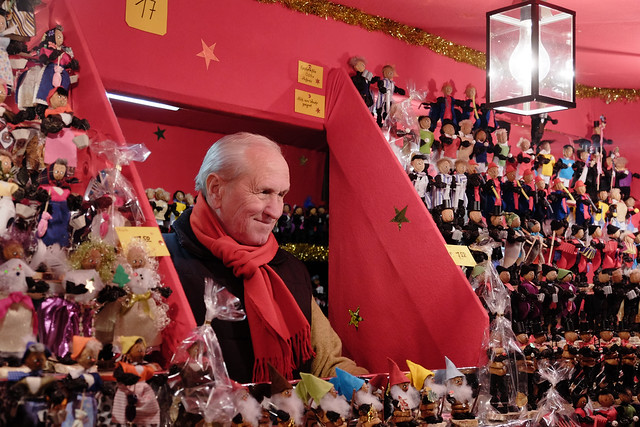
Let’s have a look at a few practical handheld examples, all of them unedited JPEGs straight out of the built-in RAW converter of my trusted X-E2:
Are you a member of the RAW shooters’ club? Relax! You can still process DR400% RAWs in Lightroom/ACR, Capture One, Iridient Developer or Photo Ninja. That said, you would have a harder time processing such RAWs in Apple Aperture due to Apple’s failure to correctly interpret DR metadata.
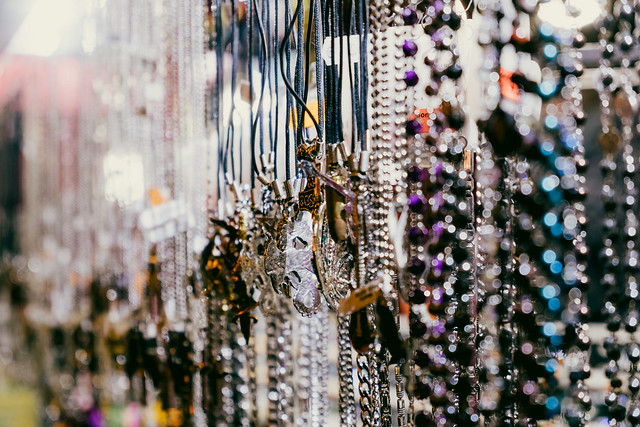
Below are a few more DR400% samples that I processed in Lightroom (with final touches made in Aperture):
Please note that recent X cameras like the X-M1, X-A1, XQ1 and X-E2 won’t automatically choose DR400% when in DR-Auto mode, so you must set DR400% manually with these models.
If you want to browse through a bunch of old and new sample images from my X-E1, X-M1 and X-A1, please click on the links listed below:
Using the Exposure Preview in Manual Mode
Apart from the new Auto-ISO menus, WYSIWYG exposure preview in manual mode is the most important feature of last week’s major firmware update for the X-E1, X-Pro1 and X100S. It brings these older X-series cameras up to speed with the X-E2 and XQ1 by offering a usable live view and live histogram in manual exposure mode (M).
By choosing SETUP MENU > SCREEN SET-UP > PREVIEW EXP. IN MANUAL MODE > ON, manual exposure mode will behave just like the three other exposure modes (P, A and S): You can assess your overall exposure with the live histogram along with a what-you-see-is-what-you-get (WYSIWYG) representation of the final image on your LCD or EVF display.
I recommend using this “new” version of your camera’s manual mode in concert with manual ISO, so you better switch off Auto-ISO. I also recommend choosing spot metering. Spot metering allows you to measure a specific part of your image and immediately see how far off middle gray (or zone 5) the measured area is by looking at the light metering scale at the left of your display. This is the same scale that serves as an exposure compensation indicator in P, A and S modes. However, in manual mode, it serves a different purpose and shows you how far off middle gray your metered subject is at your current manual exposure settings.
Manual mode with Auto-ISO off and spot metering on gives you three different indicators to measure and set the right exposure of your shot:
- You can see the overall exposure of your image in the live view display
- You can gauge the overall exposure of your image with the live histogram (and use it to detect potential highlight clipping)
- You can measure the brightness of specific image parts with spot metering by pointing the center of the frame (2% coverage) at a specific part of the image and watching the indicator dot move along the the exposure compensation scale.
How can you find the correct exposure in full manual mode?
I propose setting the desired/required aperture and shutter speed first. When you are done, you can select the appropriate ISO setting. To quickly change the ISO setting, I recommend putting the ISO function on a Fn button. In full manual mode, the ISO selection (up and down arrow buttons) basically replaces your exposure compensation dial. As you cycle through different ISO settings in the ISO pop-up menu, you will see how your live view image turns brighter or darker.
Please note that this improved functionality is not (yet) available in the X-M1, X-A1, X100, X20, X10, X-S1 and XF1. These cameras offer no exposure preview in manual mode, they always operate in manual “studio mode”. Studio mode is great for shooting with studio flash units, because the camera will always display a bright live view image, no matter what (high) aperture or shutter speed values have been set to lock out ambient light in favor of the flash setup.
What’s Next?
Look out for new product announcements in January! Plus, I am currently preparing my next book, the first eBook of our new “Beyond the Manual” series. I hope you’re going to like it.
Happy holidays and have a great 2014!
PS: The following sample pic is for those 96% who don’t consider Silkypix their favorite X-Trans RAW processor… ;)
For your convenience, here’s a TOC with links to my previous X-PERT CORNER articles:
- Using Auto-ISO
- Using Face Detection
- First Look: Fujifilm XQ1
- PDAF & LMO Lens Firmware Updates Coming in November
- First Look: Fujifilm X-E2
- How Fuji could save the X-M1
- X-A1 vs. X-M1: Photo Ninja Edition
- X-A1 vs. X-M1: the Shootout
- Using the Fujifilm X-A1 [& X-M1]
- First Look: Fujinon XF23mmF1.4 R
- RAW Converter Shootout Results
- Ultimate RAW Converter Shootout
- First Look: X-M1 with New Kit Zoom and Pancake Lens
- Zeiss Touit vs. Fujinon XF
- Remote Shutter Control for X Series Cameras
- Apple Camera RAW, X-Trans and EXR
- First Look: XF55-200mmF3.5-4.8 R LM OIS
- Studio X
- Using the X100S
- Using the X20
- X100S vs. X100
- X20 vs. X10
- RAW, JPEG, Silkypix and “Fuji Colors”
- Adapting Third-Party Lenses (updated with Speed Booster)
- RAW for JPEG Shooters…
- Tips for Updating your Firmware
- How to Clean the X-Trans Sensor
- Using the XF14mmF2.8 R
- Decoding XF18-55mmF2.8-4 R LM OIS
- Comparing RAW converters: JPEG vs. Lightroom, Capture One, Silkypix & RPP
- XF14mmF2.8 R appears to be almost distortion free
- How to Expand Dynamic Range
- How to Use Extended ISO
- EXR, anyone?
- Capture One – When the Going Gets Tough…
- Using Shooting Profiles and the Quick Menu
Rico Pfirstinger studied communications and has been working as journalist, publicist, and photographer since the mid-80s. He has written a number of books on topics as diverse as Adobe PageMaker and sled dogs, and produced a beautiful book of photographs titled Huskies in Action (German version). He has spent time working as the head of a department with the German Burda-Publishing Company and served as chief editor for a winter sports website. After eight years as a freelance film critic and entertainment writer in Los Angeles, Rico now lives in Germany and devotes his time to digital photography and compact camera systems. His book “Mastering the FUJIFILM X-Pro1” (Kindle Edition) (Apple iBook Store) (German version) is available on Amazon and offers a plethora of tips, secrets and background information on successfully using Fuji’s X-Pro1 and X-E1 system cameras, lenses and key accessories.