RAW for JPEG Shooters…

…and JPEG for RAW Shooters!
by Rico Pfirstinger
One of the most persistent flame wars on the “photographic Internet” is the endless fight between RAW and JPEG shooters. If it wasn’t so sad, it would be funny. Readers of my book know that I prefer a comprehensive approach to this hot topic by advising to shoot FINE+RAW (SHOOTING MENU > IMAGE QUALITY) at any time, no matter whether you consider yourself a part of the RAW or JPEG camp. There are plenty of good reasons for being inclusive instead of divisive.
Why “RAW only” shooters should use FINE+RAW
Even if you consider yourself a hardened “RAW only” shooter, FINE+RAW makes sense for you. Don’t forget that you can preview exposures on your camera only in JPEG format. This means that even in “RAW only” mode, your camera will produce a JPEG out of every RAW file it saves to provide you with a preview file. Otherwise there wouldn’t be anything to examine in playback mode.
However, these preview JPEGs in “RAW only” mode are low resolution—often so low that it is impossible to tell whether image details are in focus when you zoom-in to 100%. Shooting in FINE+RAW mode with an IMAGE SIZE of L obviates this problem. With this setting, the camera saves a high-resolution JPEG “print” in addition to the RAW “negative”: You can use this high-res JPEG for precise focus control immediately after you snap it by pressing the command dial, thereby enabling the 100% zoom function. Moreover, the high-res JPEG file is a good point of reference for developing the RAW file later in your personal computer.
Admittedly, you could also opt to shoot in NORMAL+RAW mode instead of FINE+RAW, which doesn’t actually affect the resolution of the JPEG. However, this setting produces files with greater compression, compromising image quality. Dedicated RAW shooters should pay attention to this fact, because in some modes, the camera saves only JPEGs without any RAW files! Think of motion panorama or of ISO, film simulation and dynamic range bracketing as examples for such modes. In all these cases, your X-Pro1 or X-E1 (or X100 and X100S) silently switch the image quality setting from NORMAL+RAW to NORMAL, which means the only image they write to the memory card is a quality-reduced JPEG! And what X-camera user likes to skimp on quality?
Wait, there’s more! The camera’s IMAGE SIZE settings (3:2, 16:9 or 1:1 format with resolutions L, M and S) aren’t available in “RAW only” mode. They are greyed-out. This feature can be valuable for RAW shooters, though, because the camera’s light metering is influenced by the current format settings. If you intend to shoot (and later crop) images to a ratio of 16:9 or 1:1, the light metering works more effectively when the camera’s image format is set accordingly. That’s because parts of the image that are superfluous will be automatically cropped out and won’t affect the camera’s exposure metering (which is based on the current live-view image). Furthermore, it’s easier to target your desired image area when the image format in the camera’s viewfinder matches up with your intended end result. Finally, the camera adjusts the size and shape of the autofocus fields and redistributes them according to your selected image format. This means that you can continue to use all 49 of the camera’s AF fields even when you are shooting in the exotic 1:1 format.
No worries: Independent from any IMAGE SIZE or IMAGE QUALITY settings you choose in the shooting menu, your X-Pro1 or X-E1 will always record a full-size L, 3:2 format RAW file. You will not lose a single pixel.
Why “JPEG only” shooters should use FINE+RAW
Now that the “RAW only” camp has been served, what about the “JPEG only” crowd? After all, this is what this article is supposed to mostly be about, right?
The reason to opt for FINE+RAW comes down to this: All X-series cameras feature an internal RAW converter (PLAYBACK MENU > RAW CONVERSION) that allows you to change an image’s JPEG settings anytime after you take a shot. However, before we examine the implications of this feature, let’s find out about those mysterious “JPEG settings” and let’s see what they actually are.
JPEG settings (or JPEG parameters) are camera settings that do not affect the RAW file. Instead, they only affect the look of any JPEG files your camera spits out. Thinking of RAWs as “digital negatives” and JPEGs as “digital lab prints”, the camera’s JPEG settings determine how the JPEGs actually look like.
JPEG settings are:
- White Balance
- WB Shift
- Film Simulation
- Color
- Sharpness
- Highlight Tone
- Shadow Tone
- Noise Reduction (NR)
- Color Space
As you have probably noticed, there settings are scattered over the shooting and setup menus of the camera. With the exception of color space, they are also directly accessible via the Quick Menu and can be saved in sets known as custom shooting profiles. The same JPEG settings are available when you activate the camera’s internal RAW converter.
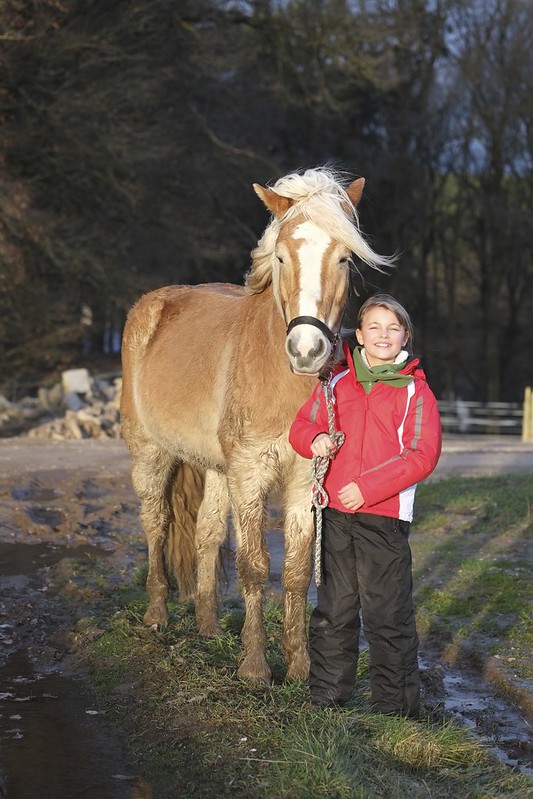
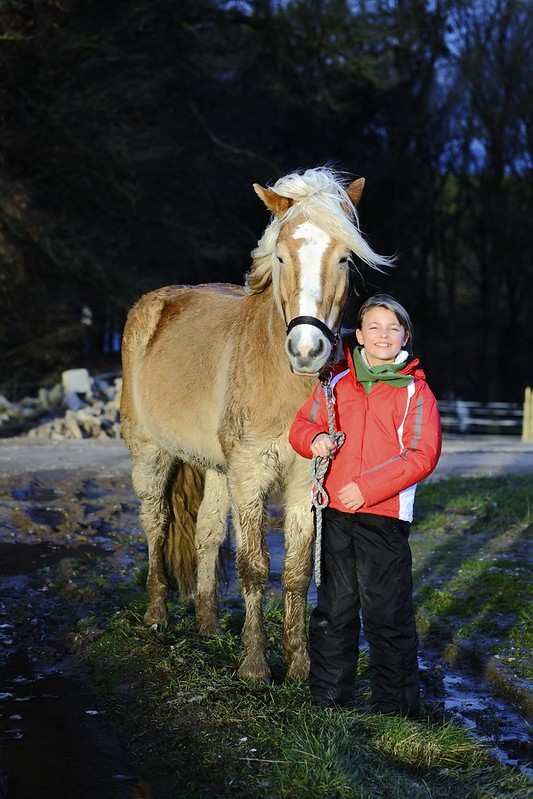
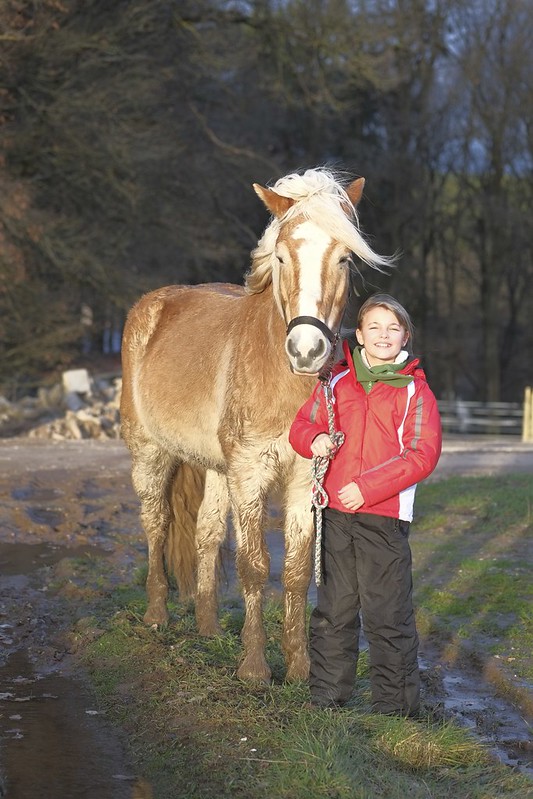
JPEG settings strongly affect the look of an image. The very same shot can look quite differently depending on what JPEG settings you have chosen. Here’s an example of a snapshot I took recently—the following pics all show the same RAW image (“digital negative”) processed with different camera JPEG settings to produce different “digital prints”.
Let’s start with three different color versions:

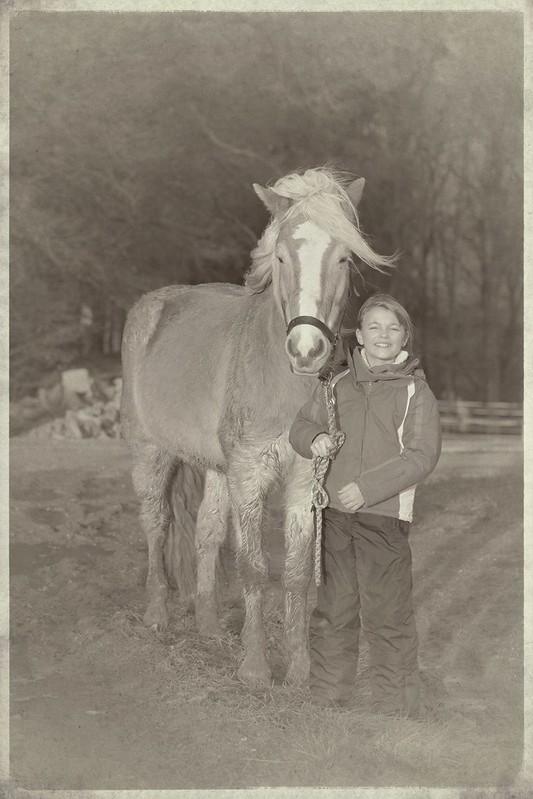
And here three different black&white versions, again all courtesy of the X camera’s flexible JPEG parameter settings:

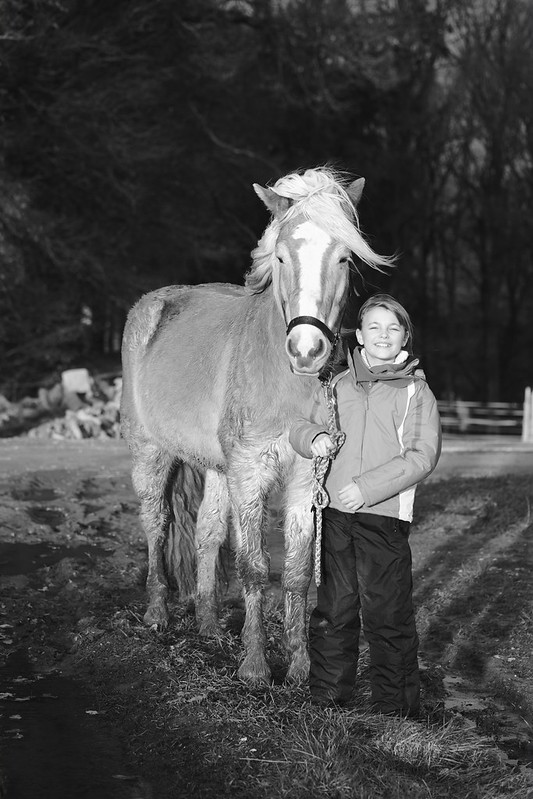
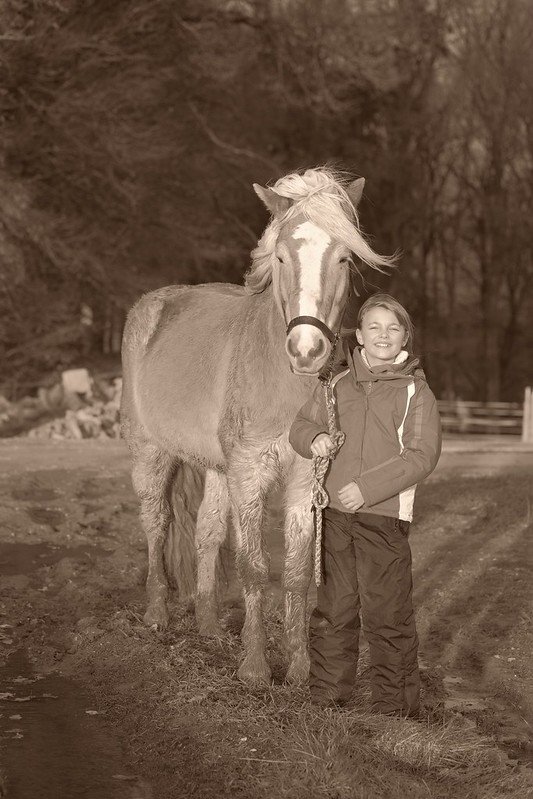
As you can see, there can be both strong and subtle differences between different “digital prints”. There are virtually billions of possibilities of how you can combine these JPEG settings to generate an actual image. Quite overwhelming! With normal cameras and as a “JPEG only” shooter, you would have to know/guess and then set the “perfect” JPEG parameter combination for each image in advance. Can you actually do this? Honestly, I can’t.
But even if you can, you’d still only get one single version of your shot. What if you want more than one version, like a punchy black&white rendering, a standard color version and a cool, high-contrast color version of an image? Sure, you could try to post-process your single JPEG multiple times on your computer, but as a matter of fact, most JPEG shooters don’t really know how to do that, or they simply do not want to post-process their images. They want their camera to output pleasant results, that’s all.
Additionally, due to their compressed nature, JPEGs aren’t the best medium to radically post-process an image. If you have to post-process a JPEG (Fuji’s JPEGs are quite robust), it’s always better to start with a file that already resembles the intended result as much as possible. The less you have to change, the less the quality will suffer.
This is where RAW comes in for dedicated, hard-core JPEG shooters. With the internal RAW converter, you don’t have to worry about which combination of “perfect” JPEG settings to choose before you take the shot. You can deal with that later—anytime, as often as you like. As long as you record and keep the RAW file of a shot (you can copy RAWs back from your PC to an SD card anytime), you can produce and compare as many different JPEG versions of it as you like. And by doing so, you will learn a lot about how those precious JPEG parameters practically work, what they do and how to use them.
In other words: If you are a hard-core JPEG shooter and you really want to learn how to maximize the camera’s JPEG potential, do keep the RAWs and play with them in the internal RAW converter. It’s the best “learning by doing” approach there is. Not only will you quickly become an expert in applying different JPEG parameters, you will also be able to generate better JPEGs with optimized looks for different applications. This is JPEG heaven!
For those with limited playtime, my book Mastering the Fujifilm X-Pro1 contains a comprehensive section explaining and illustrating the camera’s different JPEG settings. Another good thing is the fact that these settings are virtually the same between all Fujifilm X-series cameras. If you know one, you do know all.
In conclusion, the availability of the camera’s internal RAW converter is quite practical and reassuring. Instead of worrying about white balance, white balance shift, film simulation modes, color saturation, highlight contrast, shadow contrast, image sharpness, noise reduction or which color space to pick, we can concentrate on properly framing, exposing and focusing a shot. Honestly, that alone is challenging enough for most of us, isn’t it? It certainly is for me.
Let’s not forget that nobody is perfect. Even the most experienced JPEG shooters make mistakes. I do! There’s always a possibility of setting unpleasant JPEG parameters or accidentally mixing something up. By keeping the RAW, such errors will not matter, as you can change and improve all JPEG parameters anytime after the fact.
Why settle with this coming out of your camera…
…when you may actually have wanted something like this (or vice versa):
There’s an additional bonus in using the internal RAW converter: In case you didn’t nail the exposure of your shot, you can correct it using the converter’s PUSH/PULL PROCESSING function. That’s yet another safety net, and you can still consider yourself a bona fide JPEG shooter. No matter what parameters you change or fiddle with, your end result will always be a JPEG coming straight out of the camera, including “Fuji Colors” and all.
Finally, nothing is keeping you from post-processing such optimized out-of-camera JPEGs on your personal computer. For example, the Sepia version of the shot that I have shown above can easily be turned into an even more “effectful” image:
Any trade-offs?
There’s no free lunch, isn’t it? True. In order to cherish the wonderful world of FINE+RAW, performance and storage considerations have to be addressed.
For RAW-only shooters, picking FINE+RAW does not make much of a difference regarding camera performance and storage requirements. Just make sure to use the fastest SD card available on the market, as this really makes a difference handling the camera’s data flow. The additional high-res JPEG file will consume a few more megabytes, that’s all.
For JPEG-only shooters, saving the larger RAW file along with a smaller JPEG will significantly use up additional storage on SD cards, so using a card that’s large enough is certainly a good idea. For example, a 16 GB card in an X-E1 or X-Pro1 will hold more than 500 FINE+RAW shots. However, the most important aspect is using a card that’s really fast, like a Sandisk UHS-1 card with 95 MB/s nominal write speed. Don’t cripple your X-series camera with slow class 6 or class 10 cards.
To summarize the trade-offs: As long as you use the fastest SD cards on the market, you will be okay when setting your camera to FINE+RAW.
Using adapted JPEG settings to enhance EVF/LCD usability
There’s another aspect to this story: Since your camera’s EVF and LCD are “WYSIWYG” devices, they will always reflect your current JPEG settings.
Let’s say you want to take a high-contrast shot with stark shadows and highlights against the sun on a bright day. So you set SHADOW TONE to +2 in the shooting menu to emphasize shadow contrast and blacks. However, when you do so, much of your scene will appear all black in the viewfinder, making it difficult to precisely frame the shot.
In situations like this, setting SHADOW TONE to –2 would result in a much better user experience. Yes, your initial out-of-camera JPEG would not look as “high-contrasty” as intended, but you can always change the contrast settings of your JPEGs later to your liking by using the built-in RAW converter. So before you declare the EVF or LCD “unusable” in certain situations, consider making them “reusable” by adapting the camera’s JPEG settings.
So here we have it: With Fuji X-series cameras, RAW shooters are better off also recording JPEGs. And JPEG shooters are better off also keeping the RAWs. Everybody wins!
For your convenience, here’s a TOC with links to my previous X-PERT CORNER articles:
- Tips for Updating your Firmware
- How to Clean the X-Trans Sensor
- Using the XF14mmF2.8 R
- Decoding XF18-55mmF2.8-4 R LM OIS
- Comparing RAW converters: JPEG vs. Lightroom, Capture One, Silkypix & RPP
- XF14mmF2.8 R appears to be almost distortion free
- How to Expand Dynamic Range
- How to Use Extended ISO
- EXR, anyone?
- Capture One – When the Going Gets Tough…
- Using Shooting Profiles and the Quick Menu
Rico Pfirstinger studied communications and has been working as journalist, publicist, and photographer since the mid-80s. He has written a number of books on topics as diverse as Adobe PageMaker and sled dogs, and produced a beautiful book of photographs titled Huskies in Action (German version). He has spent time working as the head of a department with the German Burda-Publishing Company and served as chief editor for a winter sports website. After eight years as a freelance film critic and entertainment writer in Los Angeles, Rico now lives in Germany and devotes his time to digital photography and compact camera systems. His book “Mastering the FUJIFILM X-Pro1” (Kindle Edition) (Apple iBook Store) (German version) is available on Amazon and offers a plethora of tips, secrets and background information on successfully using Fuji’s X-Pro1 and X-E1 system cameras, lenses and key accessories.