X-A1 vs. X-M1: the Shootout

Mastering the X-PRO1 and X-E1: book here and Kindle edition (AVAILABLE) here)
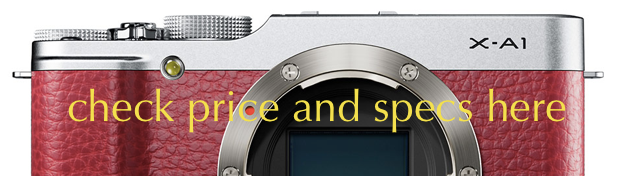
Fujifilm X-A1 in stock check
USA: AmazonUS (black in stock)/ eBay / BHphoto (blue in stock)/ Adorama (black in stock)/ Pictureline / DigitalRev EUROPE: AmazonUK (via DR) DigitalRev / eBay
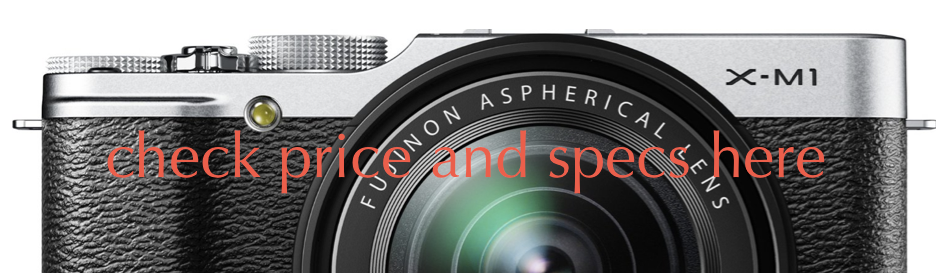
Fujifilm X-M1
USA: AmazonUS (save $72 on the silver version + kit lens) / BHphoto / Adorama / Pictureline / [shoplink 17242 ebay]eBay[/shoplink] ($70 price drop) / DigitalRev EUROPE: eBay / DigitalRev / AmazonDE (via DR) / wexcamerasDE / AmazonUK (via DR) / PCHstore
_ _ _
Talk to Rico (open forum for questions & feedback) – Rico’s Flickr sets – X-A1 sample images set – X-M1 sample images set – X-M1 vs. X-A1 shooutout set (private Flickr set, MUST use this link!) – Original X-A1 & X-M1 shootout RAW files for download (incl. Lightroom XMP files) – Mastering the Fujifilm X-Pro1 reading samples (65 free pages) – Pre-order my very soon to be released NEW book: Mastering the Fujifilm X-E1 and X-Pro1
Edit: I have updated the shootout with Photo Ninja samples, please read this separate article.
Welcome to this weekend edition of X-Pert Corner! Comparing the X-A1 and X-M1 is pretty popular these days. Since the hardware of both cameras is pretty much identical, such comparisons usually boil down to an X-Trans vs. Bayer color filter array (CFA) pissing contest. Since we are on the Internet, it is a fact of life that much of what has been and will be written on this issue is inaccurate or just plain wrong, mostly due to flawed methodology. For example: Instead of comparing the output of different sensor CFAs, many “reviewers” are simply showing differences between the two cameras’ JPEG engine default settings.

X-M1
There are indeed visible differences between the X-A1’s and X-M1’s default JPEG processing: The X-A1 is targeting entry-level customers who prefer sharp, clean, brilliant, contrasty and noise-free JPEGs straight out of the box (at least that’s what Fuji thinks), and this preference is mirrored by the camera’s default JPEG engine calibration at its factory settings. In other words: With everything set to factory defaults, the X-A1 delivers sharper (aka more sharpened) results with a bit more contrast and stronger noise reduction than the X-M1. It is however possible (and advisable) to change the default JPEG settings in both cameras to achieve different results that are much harder to distinguish. This is where things become more interesting, but this is also where most “expert comparisons” come to a frustrating halt.
X-A1
In any real-world scenario, it is impossible to compare the performance of different sensor CFAs without processing the RAW images on which we want to base such a comparison. The processing can either be performed in-camera or with an external RAW converter. It is very difficult to remove this processing part from any sensor comparison equation, because different CFAs require different processing in order to achieve the same or at least similar results. Using identical RAW converter settings on comparable images from the X-A1 and X-M1 won’t do the job, quite to the contrary. In order to get comparable results, one has to apply different parameter settings that correspond to the unique qualities and properties if each sensor’s CFA.

X-A1
Please forget comparisons that are based on factory default settings of cameras and RAW converters. They are a waste of our time, because they won’t tell us how each camera performs with optimized real-world settings that most of us would choose to achieve specific precessing results, such as revealing “maximum detail”.
The Setup
In order to compare both cameras (and CFAs), I shot several different subjects in manual mode, each with exactly the same exposure settings and the same lens. This setup made sure that each camera’s sensor was exposed with the same amount of light, at least in theory. Practically, there may still be subtle brightness differences due to the fact that corresponding shots had to be taken in sequence (exchanging cameras and the lens on a tripod and reframing the shot could take a minute or two).
X-M1
Using this setup, I found that my X-A1 production camera produced slightly darker images than my pre-production X-M1. The difference (somewhere around 0.1 EV) is within specifications and could easily be adjusted by moving the exposure slider in the RAW converter. By the way: The reason why I couldn’t get my hands on an X-M1 production sample for this shootout is that Fujifilm Germany has 250 of these cameras tied up in their X-M1 roadshow workshops held in Germany, Austria and the Netherlands.
X-A1
In order to achieve optimal input quality, all four sample subjects were shot with optically corrected Fujinon XF14mm and XF23mm prime lenses. I understand that it’s not very realistic to use lenses that cost about twice as much as the X-A1 camera body, but using a less expensive kit zoom lens could at least theoretically obscure some image detail.
The fact that I actually had to use expensive primes is a testament to the similarity of both cameras’ output quality. This is major pixel peeping territory. While X-Trans output certainly looks different from Bayer output at 100% magnification, I am unable to say which CFA’s output looks better. It may well depend on the specific subject and can quickly boil down to your personal tastes and RAW processing skills. Of course, it will also make a difference which RAW conversion software you are using to process a particular image file. In my opinion, these factors are more important in determining the final quality of processed images than a sensor’s CFA, but hey, that’s just me trying to inject some sanity in this often quite emotional discussion.
X-M1
That said, there’s no reason for you to trust my opinions or processing skills. Please make up your own mind! Click here to access a Dropbox folder containing the RAW files that I used for this little shootout, complete with the respective XMP files, so you can open the RAWs in Lightroom with the settings I have used to process each image. I am sure that you will soon find different settings that you like better.
X-M1
Click here to access a private Flickr set with SOOC JPEGs and processed Lightroom versions of these RAWs. In Flickr, you can inspect and download full-size (100%) images: Just pick “Original” as a viewing option when right-clicking on an image. You can also look at the EXIF information by clicking on the “show more” link next to the “Additional info” text below each Flickr image.
X-A1
The SOOC JPEGs in the Flickr set come in two versions: Version 1 (named “JPEG standard” in the respective image titles) are renderings using each camera’s default settings for sharpness and noise reduction. Version 2 (named “JPEG custom” in the respective image titles) are custom renderings with noise reduction set to -2 for the X-A1 and X-M1, plus an additional sharpness setting of +1 only for the X-M1. Setting the in-camera noise reduction to a minimum reveals and preserves as much detail as possible, while the additional sharpening for the X-M1 partly compensates for the stronger default sharpening of the X-A1’s JPEG engine.
The Shootout
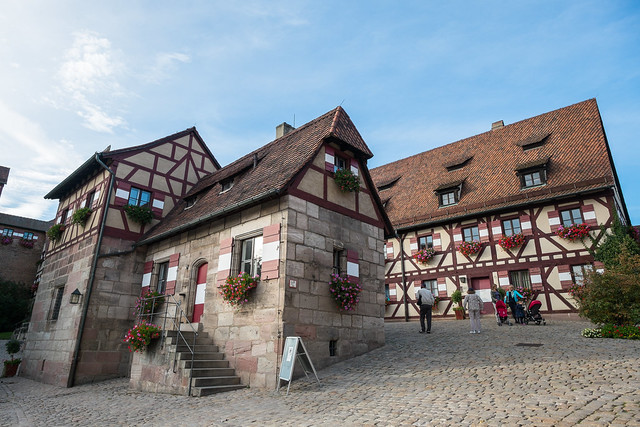
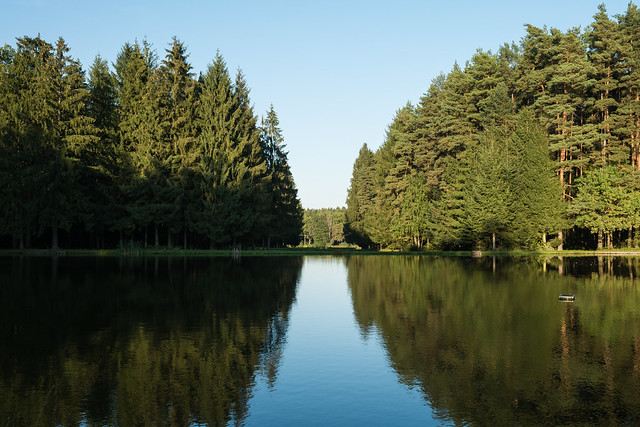
Our first test subject is a common scenario with plenty of dynamic range (the cameras were set to DR200% and hence ISO 400) and an abundance of detail:
Camera A
Camera B
Click on one of the images to access the Flickr set with several full-size versions of this shot.
First observation: The white balance tint of X-M1 files is always leaning more towards magenta than the white balance tint setting of corresponding X-A1 files. I assume this is to compensate for the relative overweight of green pixels in the X-Trans CFA compared to the Bayer CFA. That’s why you should never compare X-A1 and X-M1 images by choosing identical white balance tint settings in a RAW converter. You may well choose the same color temperature, but do keep the differences in the tint settings. They are there for a reason.
Second observation: The default colors of the X-A1 and X-M1 are similar, but not identical. This applies to both the internal JPEG engine and Adobe Lightroom. It may also apply to other RAW converters (at the time of this writing, only Lightroom/ACR offered support for both camera models), but it’s eventually up to the makers of each RAW converter to determine the default color gradation when importing RAW files of a specific camera model. As for Lightroom, it’s possible to achieve a pretty accurate color match between both cameras by properly adjusting the Camera Calibration sliders.
Third observation: Since in-camera noise reduction appears to work selectively, dark areas (shadows) lose significantly more detail than midtones and highlights. This effect is particularly pronounced in the X-A1. Using Lightroom, I feel that I was able to extract more (shadow) detail from both sensors than with the cameras’ respective built-in JPEG engines.

X-M1 vs. X-A1 Lightroom 5.2 (click on the image for a 100% view)
So again, not the sensor CFA but the processing is the major contributing factor for revealing maximum detail and eliminating noise. It’s an open secret that X-Trans RAWs require “different” RAW processing parameters, especially in Lightroom/ACR. For example, X-Trans needs less chroma noise reduction than Bayer, so Lightroom’s default color noise reduction setting of 25 is usually overkill. Depending on your subject and your ISO settings, a value of 0, 5 or 10 will usually do the job (and reveal more detail in the process).
In a similar fashion, X-Trans cameras require less luminance noise reduction. Luckily, Lightroom’s default setting for luminance noise reduction is zero, and you can usually keep it like that even up to ISO 6400. Not so with Bayer RAWs, where high-ISO shots will often require at least some luminance noise reduction in order to look pleasant.
Another frequently discussed issue is detail sharpening. With X-Trans, I usually crank up the detail slider (sometimes to the maximum), but I am quite conservative using the sharpness slider. With Bayer, my sharpening approach is more conventional.
Of course, these are just a few examples telling you how I like to process my images, so feel free to think that I’m an idiot. You may find completely different settings far more suitable. I have no problem with that, so let’s not even consider arguing what settings are “the best”. Simply pick the ones that work for you. Just be aware of the fact that identical settings will never result in identical looking results when applied to an X-Trans and a Bayer sensor version of the otherwise exactly same shot.
This brings us to the topic of using either the X-M1 or the X-A1 as an add-on body to an existing X-Trans camera like the X-E1 or X-Pro1. Obviously, this is easier with an X-M1, because to a very large degree, you will be able to apply the same (or very similar) RAW converter settings in order to get similar results. With the X-A1, you may still be able to get great looking results, but you should be aware of the fact that in order to get there, you’ll have to use different settings.
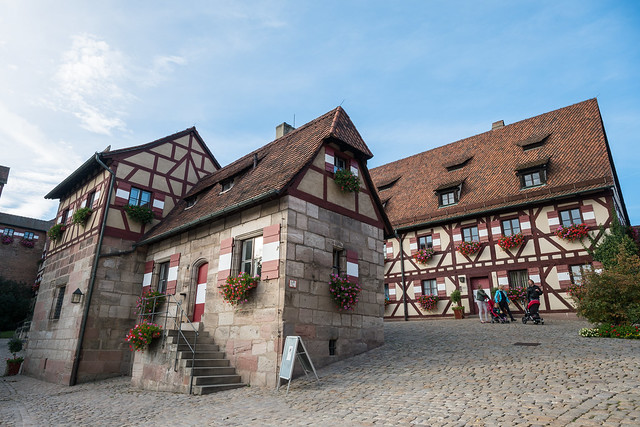
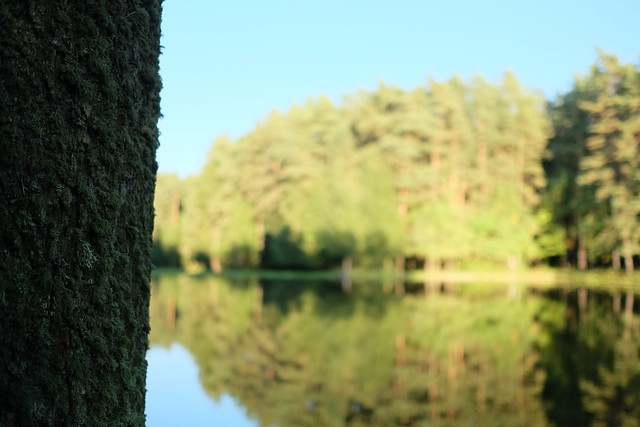
Let’s have a look at our second sample:
Camera A
Camera B
Once again, I chose a subject with plenty of dynamic range in order to preempt any rumors that X-Trans offered more (or less) dynamic range than Bayer. This time, I was able to shoot at base ISO 200 (DR100%) and still capture the subject’s tonal range. Click on any of the two images to access the Flickr set showing different JPEG and Lightroom versions of this shot in full-size views.
First observation: Even at base ISO, the default noise reduction of both cameras’ JPEG engines is already kicking in and smoothing shadow areas. This is mitigated in the custom JPEGs, and my custom-processed Lightroom versions appear to reveal the most shadow detail.
Second observation: You will notice the different handling of certain (but not all) kinds of foliage, not only in the Lightroom versions, but also in the SOOC JPEG versions. Using a different converter like Iridient, Aperture, Silkypix or Capture One can lead to different (more Bayer-like) results.

X-M1 vs. X-A1 SOOC JPEG custom (click on the image for a 100% view)
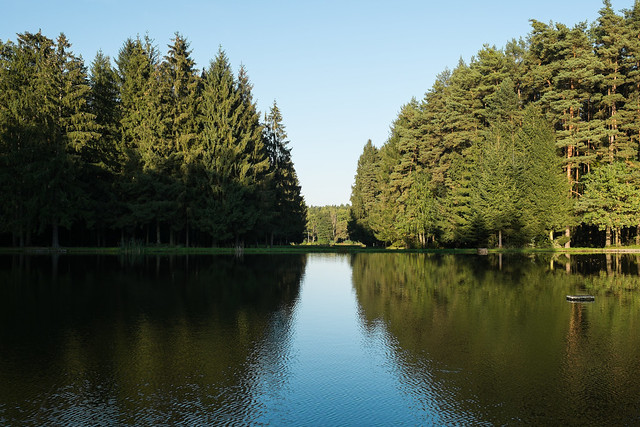
Our third sample is a pretty much “impossible” subject with huge dynamic range, large of out-of-focus areas and difficult shadow detail thanks to DR400% (and hence ISO 800).
Camera A
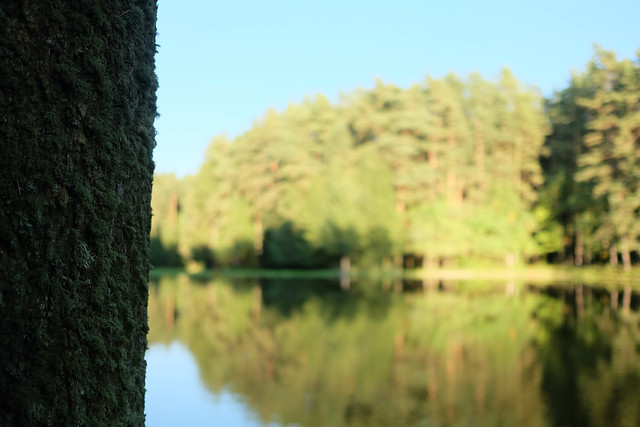
Camera B
Both cameras’ built-in JPEG engines smear DR400% shadow details. Applying less noise reduction helps, but once again, only the external RAW processing reveals maximum detail.
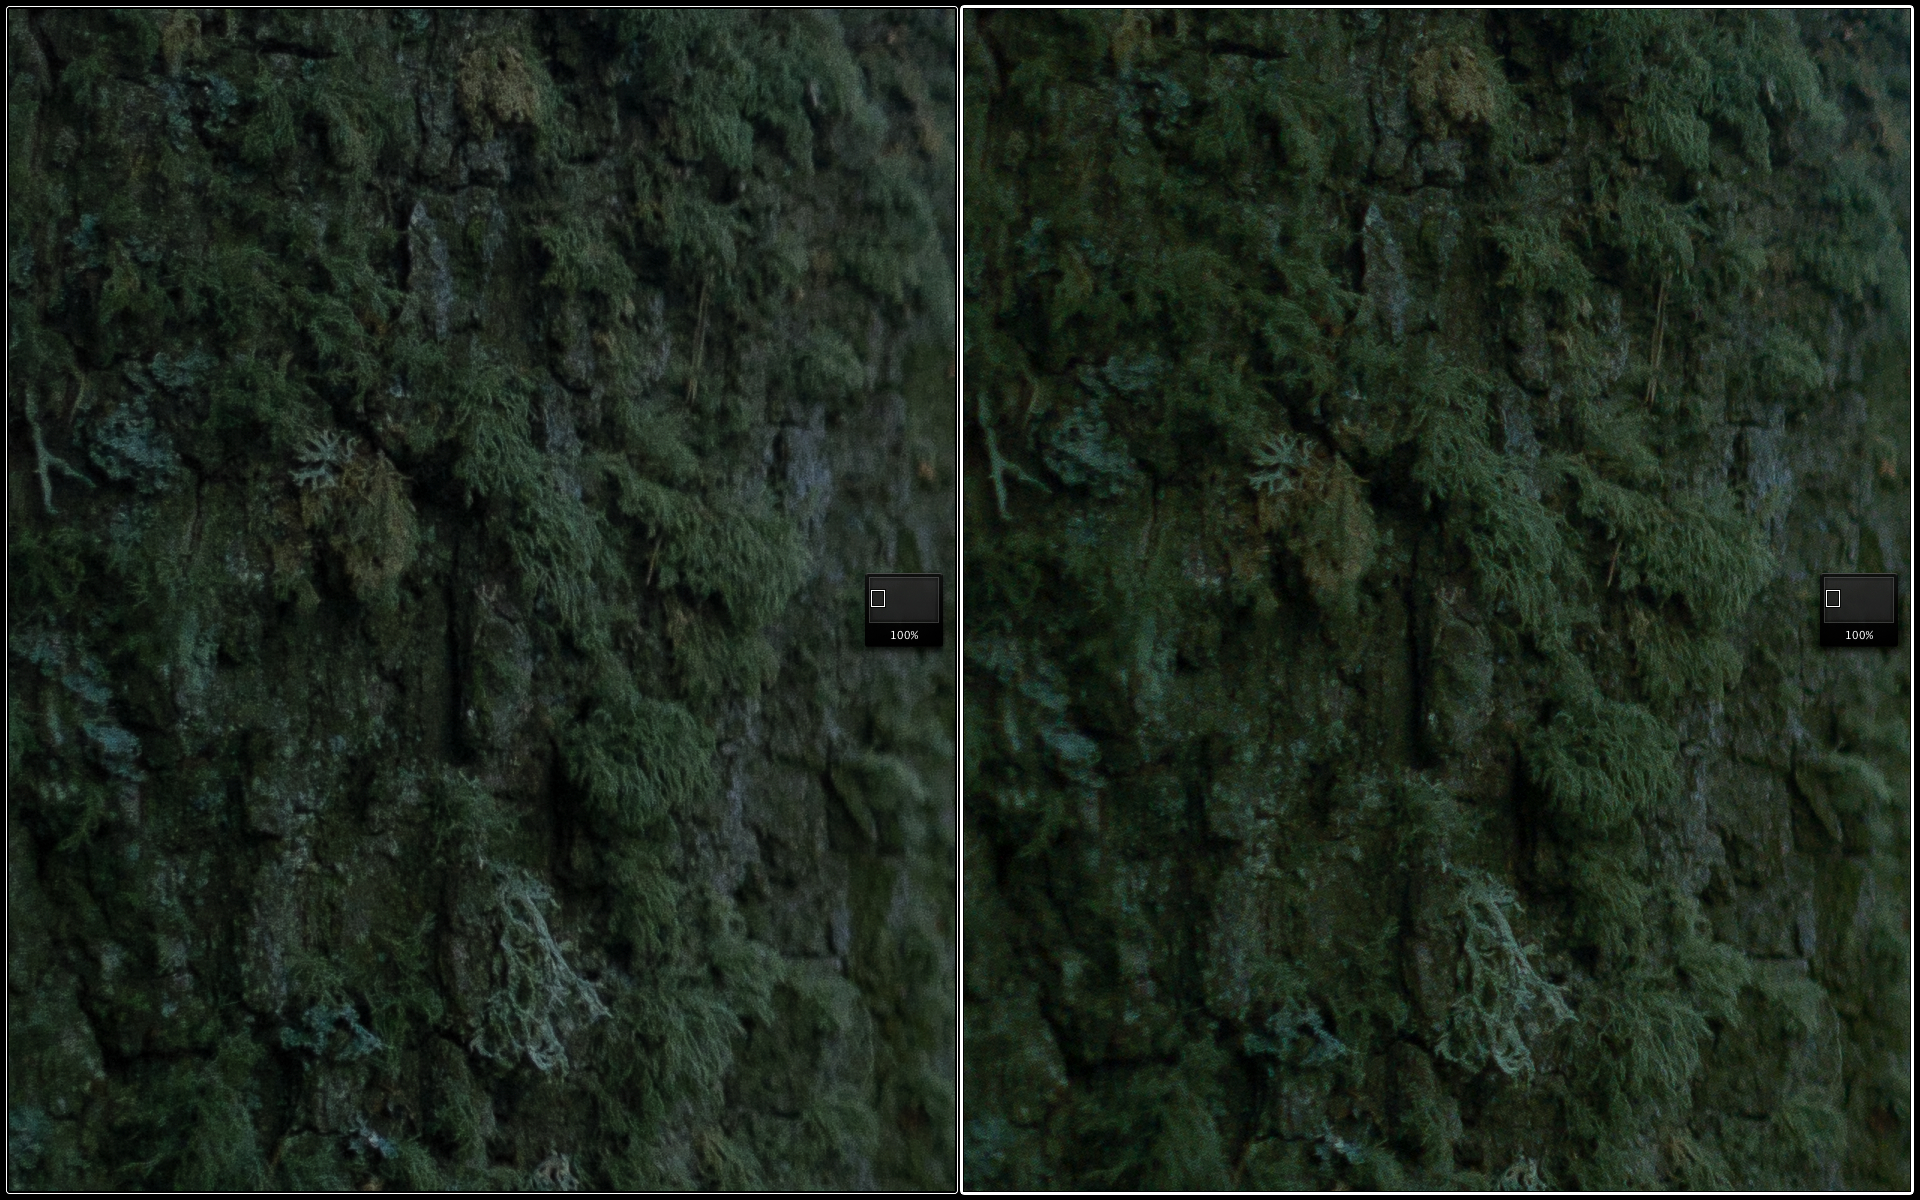
X-M1 vs. X-A1 Lightroom 5.2 (click on the image for a 100% view)
To maintain comparable noise levels, I had to apply some luminance noise reduction to the X-A1 file in Lightroom. No luminance noise reduction was required for the X-Trans version from the X-M1.
Our fourth and final subject illustrates how the JPEG engine of the X-A1 works differently from the engine in the X-M1. This is also our high-ISO test, as I shot the same subject with ISOs 800, 3200 and 6400 (using DR400% to capture the scene’s dynamic range).
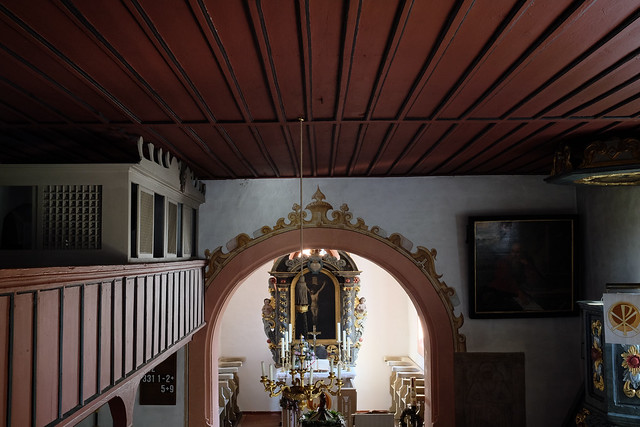
Camera A
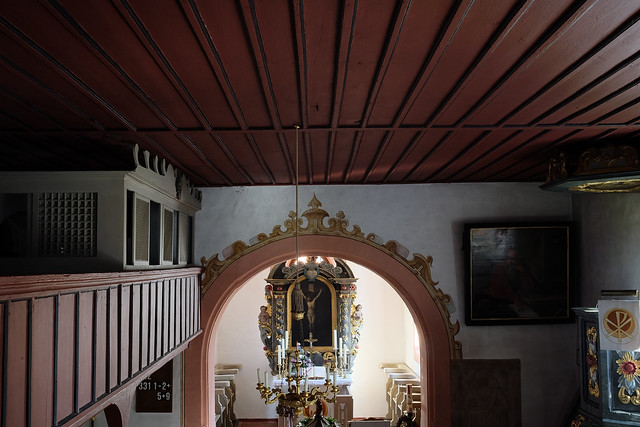
Camera B
The X-A1’s JPEG engine appears to work like the popular Topaz Clean plug-in: Processing noisy areas (like walls or ceilings), is will smoothen everything below a certain threshold and sharpen everything above it. This leads to pretty clean out-of-camera JPEGs, but is also results in a dramatic loss of fine detail. Have a look at this direct comparison at ISO 800:
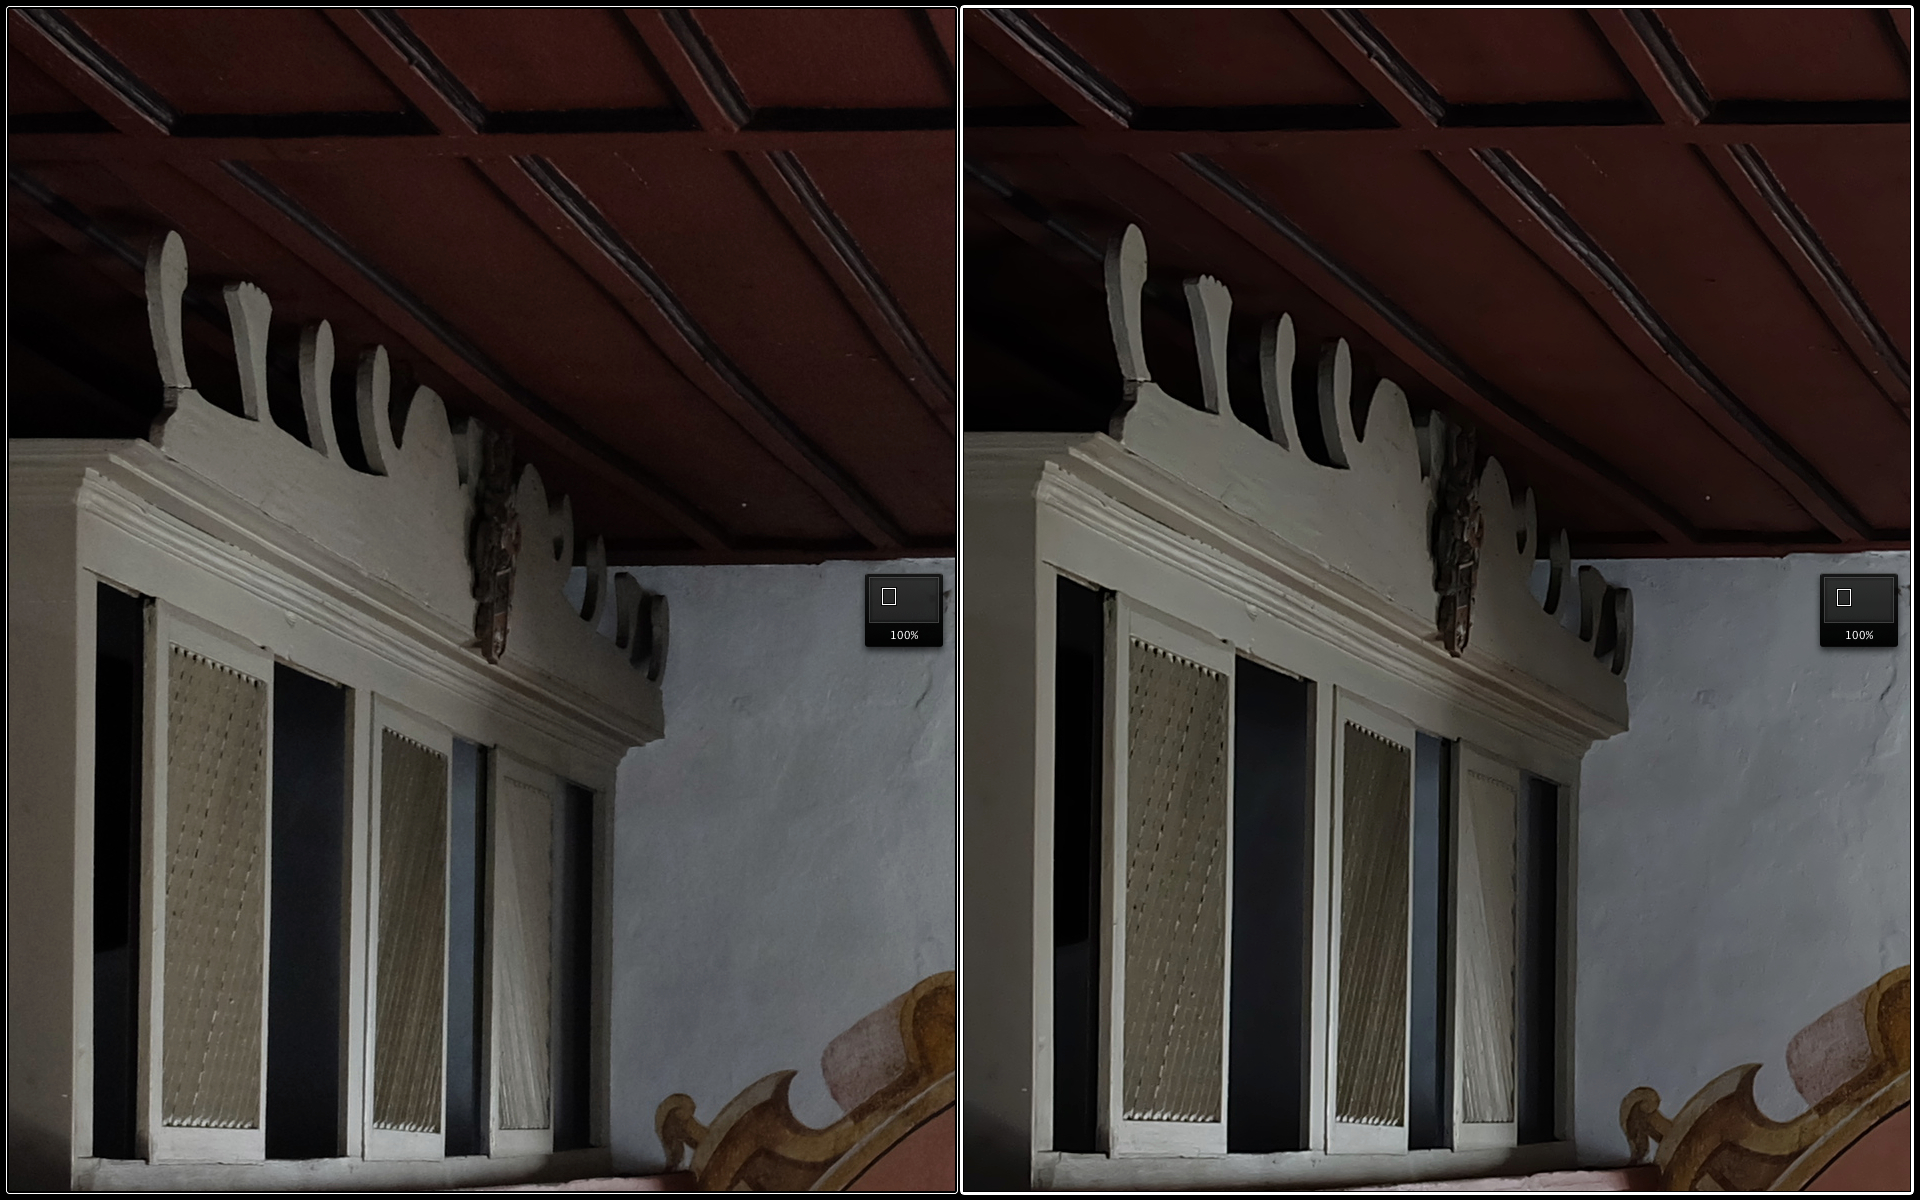
X-M1 vs. X-A1 SOOC JPEG standard ISO 800 (click on the image for a 100% view)
To view additional direct comparisons at higher ISO levels and with different JPEG noise reduction settings, please visit my private Flickr set.
I would have loved to include Lightroom versions of this final series, but as it turns out, Adobe has messed up its RAW support for the X-M1 in a very peculiar way, importing high-ISO DR400% RAWs with a wrongly calibrated digital gain, over-amplifying the ISO 6400 shot one full stop in the process. Ironically, the newer X-A1 is perfectly supported.
That said, feel free to download the RAWs from my Dropbox and process them with any RAW converter of your choice. If you insist in using Lightroom, just make sure to manually correct the exposure of each important X-M1 sample to match the brightness of the corresponding X-A1 image sample.
Conclusion
The different results you get from either the X-A1 or X-M1 depend more on the settings of the JPEG engine (or the external RAW converter) than on the sensor CFA or leaving out the anti-alias (AA) filter. While lab tests and test charts will certainly prove a resolution and noise advantage for the AA filterless X-Trans sensor, carefully processed real-world shots may paint a different picture. At views below 100%, properly processed samples from both camera will be almost indistinguishable. In fact, if you are looking for identical results from both cameras/sensors, the most challenging part may be perfectly matching the color gradation rather than matching detail, sharpness and noise response.
As I already pointed out in my previous column, the X-A1 appears to the better deal due to its price advantage, at least in an isolated comparison. However, if you are looking for a second body as an addition to your existing X-Pro1 or X-E1, you may be better off getting an X-M1. Don’t underestimate the convenience of an X-Trans-only workflow.
What’s next?
I have just received word from my publisher that the shipment of my new book “Mastering the X-E1 and X-Pro1” has been received at the warehouse. I expect pre-orders to be fulfilled as early as next week. Thank you all for your continued support!
The next edition of this column should be up in the wee hours of 18OCT, covering another second-generation X-Trans sensor camera. That’s when I am also going to announce my next book project here on Fujirumors. Stay tuned, and don’t spend too much time with pixel peeping. Also look at the big picture!
Fujifilm X-A1 in stock check
USA: AmazonUS (black in stock)/ eBay / BHphoto (blue in stock)/ Adorama (black in stock)/ Pictureline / DigitalRev EUROPE: AmazonUK (via DR) DigitalRev / eBay
Fujifilm X-M1
USA: AmazonUS (save $72 on the silver version + kit lens) / BHphoto / Adorama / Pictureline / [shoplink 17242 ebay]eBay[/shoplink] ($70 price drop) / DigitalRev EUROPE: eBay / DigitalRev / AmazonDE (via DR) / wexcamerasDE / AmazonUK (via DR) / PCHstore
For your convenience, here’s a TOC with links to my previous X-PERT CORNER articles:
- Using the Fujifilm X-A1 [& X-M1]
- First Look: Fujinon XF23mmF1.4 R
- RAW Converter Shootout Results
- Ultimate RAW Converter Shootout
- First Look: X-M1 with New Kit Zoom and Pancake Lens
- Zeiss Touit vs. Fujinon XF
- Remote Shutter Control for X Series Cameras
- Apple Camera RAW, X-Trans and EXR
- First Look: XF55-200mmF3.5-4.8 R LM OIS
- Studio X
- Using the X100S
- Using the X20
- X100S vs. X100
- X20 vs. X10
- RAW, JPEG, Silkypix and “Fuji Colors”
- Adapting Third-Party Lenses (updated with Speed Booster)
- RAW for JPEG Shooters…
- Tips for Updating your Firmware
- How to Clean the X-Trans Sensor
- Using the XF14mmF2.8 R
- Decoding XF18-55mmF2.8-4 R LM OIS
- Comparing RAW converters: JPEG vs. Lightroom, Capture One, Silkypix & RPP
- XF14mmF2.8 R appears to be almost distortion free
- How to Expand Dynamic Range
- How to Use Extended ISO
- EXR, anyone?
- Capture One – When the Going Gets Tough…
- Using Shooting Profiles and the Quick Menu
Rico Pfirstinger studied communications and has been working as journalist, publicist, and photographer since the mid-80s. He has written a number of books on topics as diverse as Adobe PageMaker and sled dogs, and produced a beautiful book of photographs titled Huskies in Action (German version). He has spent time working as the head of a department with the German Burda-Publishing Company and served as chief editor for a winter sports website. After eight years as a freelance film critic and entertainment writer in Los Angeles, Rico now lives in Germany and devotes his time to digital photography and compact camera systems. His book “Mastering the FUJIFILM X-Pro1” (Kindle Edition) (Apple iBook Store) (German version) is available on Amazon and offers a plethora of tips, secrets and background information on successfully using Fuji’s X-Pro1 and X-E1 system cameras, lenses and key accessories.