[UPDATE: with Speed Booster] Adapting Third-Party Lenses

Talk to Rico (questions & feedback) – X-E1 sample images set – X-Pro1 sample images set
Last week, we had a very interesting article by Jan Vogelaar about the performance of Carl Zeiss and Leica M lenses on a X-Pro1. So I guess it makes sense to cover some practical aspects of adapting vintage lenses to your X-Mount camera in today’s X-PERT CORNER column.
One highlight of the X-Pro1 and X-E1 is undoubtedly the small flange-back distance of the X-Mount lens connector at only 17.7mm. This means you can attach practically any third-party lens from other camera systems—with the appropriate adapters—to your X-Mount camera. Manufacturers like Kipon have already announced X-Mount-compatible adapters for more than 40 third-party systems, and the high-quality German manufacturer Novoflex has also dutifully added X-Mount adapters for some 13 established third-party mounts.
The X-Pro1 is not a rangefinder camera. It’s a pure-bred autofocus camera and as such—despite its hybrid viewfinder—it is only marginally equipped to work in combination with manual focus lenses. Currently, the only tool that the X-Pro1 and X-E1 feature to assist with manual focusing is a magnified digital viewfinder. The camera also offers some kind of focus peaking when you magnify the viewfinder image: It will enhance contrasty edges, indicating that they are in-focus.
Unfortunately, there are a few further aspects that render the X-Pro1 and X-E1 not yet perfectly equipped for working with third-party lenses: When a lens is attached to the X-Pro1 via an adapter, Auto-ISO operates with a minimum shutter speed of 1/30 second—independently of the actual focal length that was set in the adapter menu. 1/30s may be too fast for many wide-angle lenses and too slow for most standard and telephoto lenses. The cameras also set the minimum flash sync speed at a fixed 1/15 second when a third-party lens is attached, which is largely useless for lenses with larger focal lengths. In other words, the cameras “know” exactly what the current focal length is, but doesn’t use this information to the benefit of the photographer.
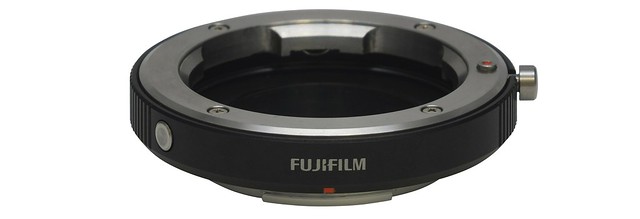
Fuji’s own Leica M mount adapter (pictured above) includes X-Mount signal contacts as well as a function button on the adapter ring that brings up the adapter menu on the monitor or in the viewfinder. Furthermore, this adapter unlocks extra camera functions that allow you to correct several optical errors such as vignetting, distortions, or color shifts at the borders of an image. However, due to these extra contacts occupying extra space, Fuji’s own adapter is not compatible with all M lenses. Fuji maintains a compatibility chart showing which lens will fit and which will not. The adapter also comes with a gauge that will tell you if a particular lens that’s not on the chart will fit.
In the X-Pro1, the display frame for the OVF uses the selected focal length setting from the adapter menu (SHOOTING MENU > MOUNT ADAPTER SETTINGS), as long as it’s between 18 and 60 millimeters. Focal lengths less than 18mm are indicated in the optical viewfinder with yellow arrows in the corners, and focal lengths of greater than 60mm, with a red frame calibrated to 60mm.
Within the acceptable range of focal lengths for the OVF—18mm to 60mm—two frame indicators will appear in the viewfinder: one white, one blue. The white frame is corrected for parallax for objects at infinity and the blue frame, for objects at a distance of about two yards.
Third-party lenses that are attached to the X-Pro1 or X-E1 over an adapter can only be focused manually. The only exposure modes that are available are the aperture-priority (A) and manual exposure (M) modes. Other functions such as auto ISO, TTL flash, and DR extension, however, are still available.
Connecting and Recognizing Third-Party Lenses
After you have mechanically attached a third-party lens to your camera via an adapter, you should first make sure that SHOOTING MENU > SHOOT WITHOUT LENS > ON is selected—otherwise your X-Pro1 won’t take any pictures. Using Fuji’s own M adapter will automatically enable and grey-out this option for you.
Next go to SHOOTING MENU > MOUNT ADAPTER SETTINGS. Here you will have six lens settings to choose from: four focal length presets (21mm, 24mm, 28mm, and 35mm) as well as LENS 5 and LENS 6—two focal lengths that you can set manually.
If you happen to be using an M-adapter from FUJIFILM, you will also have a number of correction settings available, which I’ll cover in part two of this article.
Focusing with Third-Party Lenses
The only way to focus precisely when using a third-party lens is to use the magnified display of the electronic viewfinder (EVF) or the LCD monitor. Your camera will need to be in manual focus (MF) mode, so turn the focus mode selector on the front of the camera to M. As usual, you can magnify the digital displays by pressing the command dial.

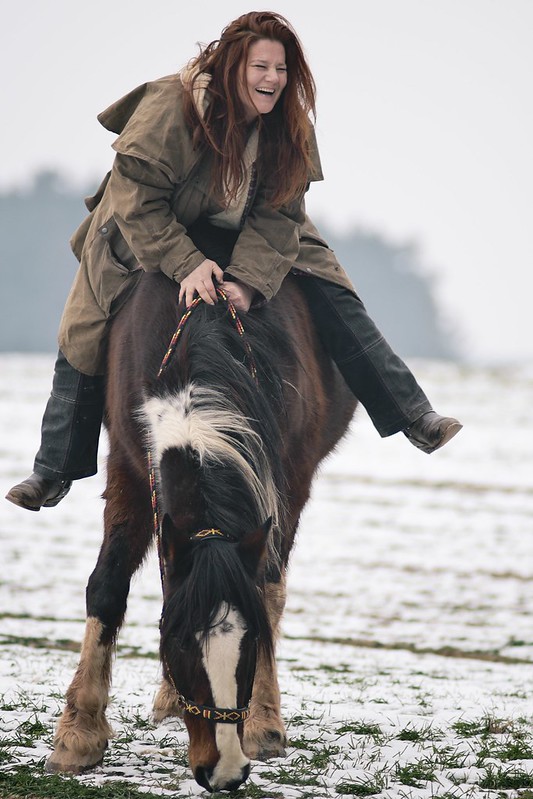
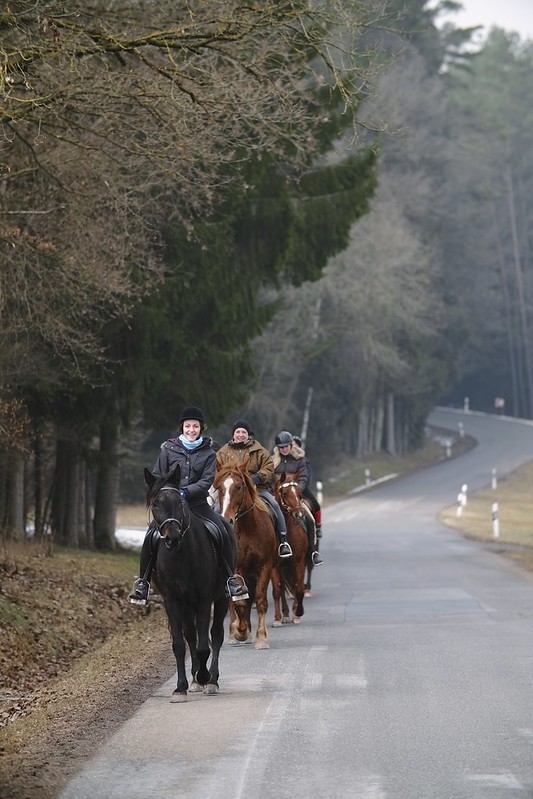
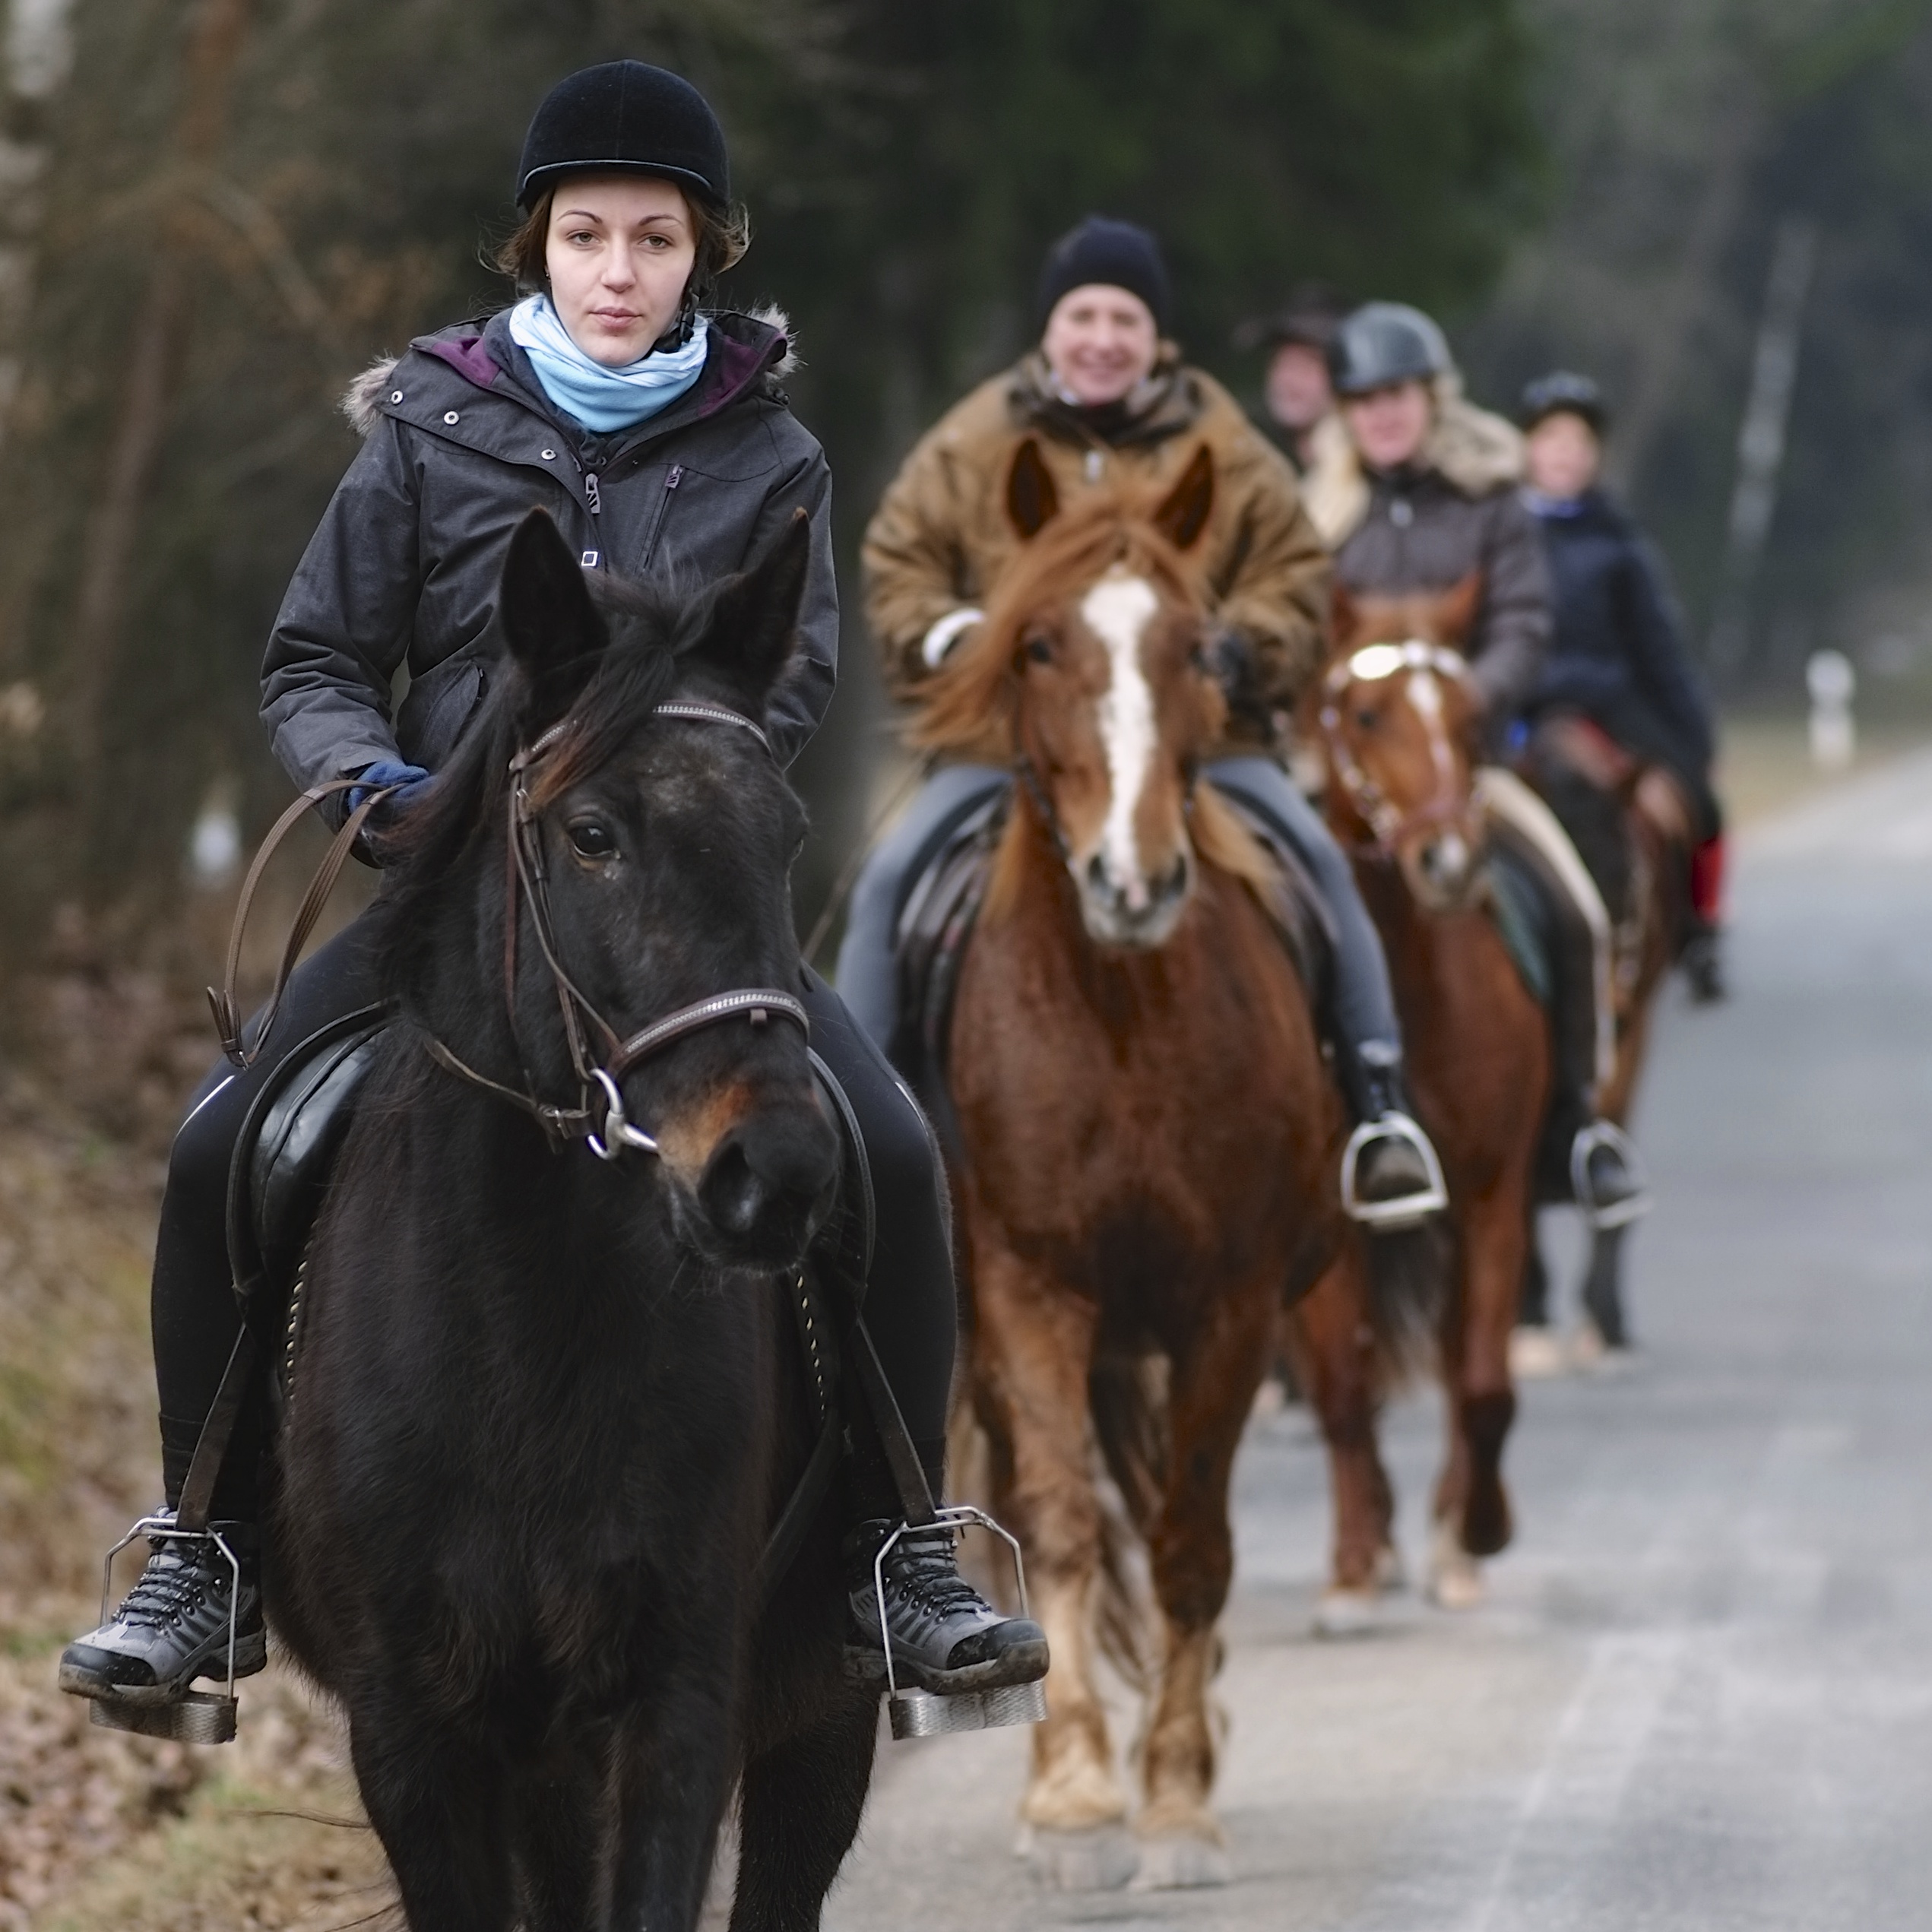
The sample shot above was taken with a (probably) at least 20 years old Carl Zeiss Sonnar T* 180mmF2.8 MM-G C/Y lens and a no-name C/Y > XF adapter. It’s an OOC JPEG shot with an X-E1 (using the internal RAW converter as described here) and post-processed with Apple Aperture. To preserve and enhance the pleasing vintage look, colors and gradation of such “analog” lenses, I often use film simulations from VSCO (available for Lightroom, Photoshop and Aperture) as starting points. I took the picture at open (or almost open) aperture and focused with the 3x magnifier tool. Click on the image for a higher-res view and more exposure parameters.
To focus as exactly as possible, you’ll want to open the aperture as wide as possible. The reduced depth of field will help you to find the correct focus point. After you’ve found it, you can then close the aperture to your desired setting. The focus point should not move, but the depth of field should become larger. You can observe this effect in the EVF. The viewfinder’s distance and depth of field indicators will be nonfunctional. Of course, you need be careful with this method when using a lens that shifts its focus plane on changing the aperture. This often occurs in spherically under-corrected lenses that feature nice background bokeh (and harsh/swirling foreground bokeh). With such lenses, you may be better off focusing with the actual working aperture of your shot.
To refine your focus at any time you can always reactivate the magnified digital display. Well, almost at any time: the magnified display will not be available while the camera is transferring data from the buffer memory to the memory card. As soon as that finishes, you can activate it again. Let’s hope that Fuji takes care of this annoying quirk in future firmware updates. In the meantime you can make do with a bit of patience and a super-fast memory card.

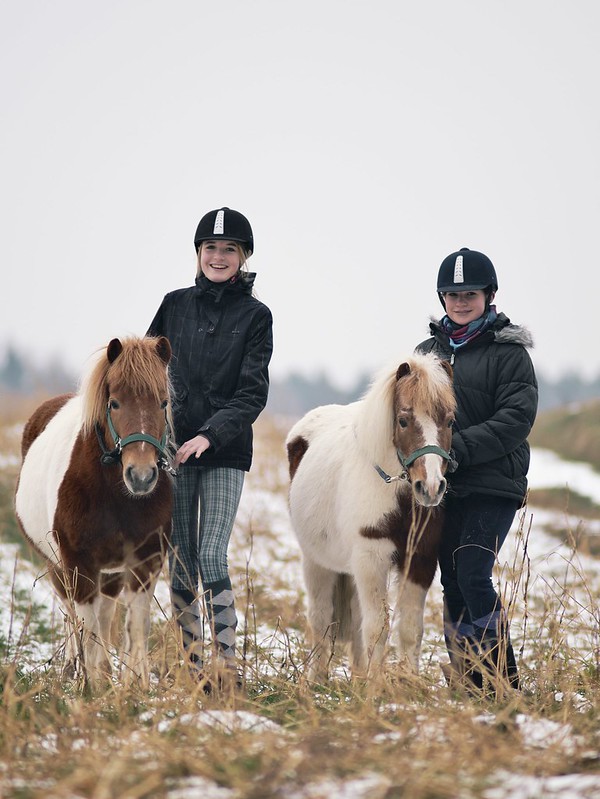
The image above is a sample shot with a [shoplink 8026 ebay]Voigtländer Heliar F1.8/75mm[/shoplink] with M Adapter. It was shot with a Kipon M adapter and developed from the RAW in Silkypix 5, no further post-processing and no VSCO Film. Click on the image for larger views and more exposure parameters. Here’s another sample with the Voigtländer, shot at f/2.8 with a single studio flash from above:

Exposing Correctly with Third-Party Lenses
When a third-party lens is attached, the X-Pro1 works exclusively in the aperture-priority (A) or the manual (M) exposure modes. However, neither of these modes functions exactly as they do with Fuji’s own XF lenses.While X-Mount lenses don’t set the aperture until the shutter button is pressed halfway in A and M modes, third-party lenses reduce the aperture immediately after setting a larger f-number. This not only causes the depth of field to increase in the EVF display; it also causes the live view image to get darker, since less light is able to enter the lens and reach the sensor.
The camera attempts to counteract this loss of light and enhances the display in the viewfinder. This works, but only up to a point.
With current firmware, that the live histogram doesn’t relay any useful information in M mode. With a very dark subject, however, the live histogram also can’t deliver any useful information in the other exposure modes (P, A, and S). Using a third-party lens with a narrow aperture is similar to creating “a very dark subject,” because we’ve reduced the amount of light that reaches the sensor and darkened the effective viewfinder display. This causes “dusk” to become “night” quickly in the live image, which in turn renders the live histogram useless because it relies on the live image for its data.
Keep these relationships in mind when you want to expose precisely with third-party lenses in combination in aperture priority mode (A) with the help of the histogram. A simple solution for this problem is to use a very large aperture when setting the exposure for your shot. Then you can use the histogram and the exposure compensation dial to optimize your exposure settings. Finally, you can stop the aperture down once you’re satisfied—this will change (shift) the aperture and the shutter speed, but won’t change the overall exposure of your image.
You can get the best exposure preview of your image in poor lighting conditions in the EVF or on the LCD monitor by pressing the shutter button halfway. The camera then enhances the live image display as much as possible.
Special Features of the FUJIFILM M Adapter
In principle, FUJIFILM’s own M adapter functions in the same way as other third-party adapters. But it offers a few additional features that are contained in the camera’s firmware and unlocked only when you attach Fuji’s adapter to the camera. So basically, Fuji’s M adapter is acting like a dongle. Fuji’s adapter also sports a dedicated little Fn button on the barrel that, when pressed, will automatically bring up the lens adapter menu.
When you use the Fuji M adapter with your X-Pro1, this adapter menu for each of the six lenses expands to include three additional settings:
- DISTORTION CORRECTION corrects pincushion or barrel distortions caused by the lens. There are three correction levels available for each of these distortion types.
- COLOR SHADING CORRECTION counteracts color shifts near the edges of an image, which occur most often with wide-angle lenses. Each of the four image corners can be independently corrected.
- PERIPHERAL ILLUMINATION CORRECTION reduces (or increases) vignetting. There are five levels available to decrease or amplify vignetting effects.
You can set correction values separately for each of the six focal lengths available in the adapter menu (SHOOTING MENU > MOUNT ADAPTER SETTINGS). You’ll need to handle all of these corrections manually—they aren’t automatically applied. Also, you have to set the correction settings for each lens individually, which will require you to take test shots and compare the results.
If you don’t exactly know what these three correction options actually do, there is an illustration at FUJIFILM’s international product site.
The corrections you apply in the adapter menu are applied during the RAW conversion. In other words, the JPEGs will be corrected according to your inputs. Furthermore, the external RAW converters Silkypix, RAW File Converter EX, Adobe Lightroom, Adobe Camera RAW and Capture One can recognize the correction settings in the RAW file’s metadata. For technical reasons, however, they are only able to apply the distortion and the vignetting corrections when developing the RAW file. The correction for the color shading unfortunately gets left by the wayside, which means you’ll need to refer back to the camera’s JPEGs.
Quality Considerations
If the sensor of the X-E1 or X-Pro1 was “full-frame” as in 35mm, it would sport a resolution of more than 36 megapixels, just like the [shoplink 8029]Nikon D800E[/shoplink], which, like the X-Trans sensor, is built by Sony and doesn’t use an anti-aliasing (AA) filter. On other words: If you crop a shot made with a D800E to match APS-C sensor size in Photoshop, you will get a 16 MP image cut out from the center of the frame that will very much match the image you get when you put the same lens on an X-Pro1 or X-E1 and use the full APS-C image area.
We all know that vintage analog full-frame lenses were not made to take advantage of the resolution of a 36 MP D800E. In those days, not many people thought about digital photography. This means that such lenses weren’t engineered to take full advantage of current APS-C sensors with 16 MP or even higher resolution, either. So please dial back your expectations, even when you are adapting vintage analog lenses from legendary brands like Leica or Carl Zeiss. Some of these lenses may be works of art, but that still doesn’t make them state-of-the-art.
There is another consideration to be made: Analog lenses were built for 35mm film emulsions that absorb and reflect light differently from digital sensors. This means that your results can vary, depending on which particular lens you are using on a particular camera and sensor. For example, with the X-E1 and X-Pro1, users of Voigtländer’s 15 mm F 4,5 Super Wide Heliar report some smearing in the corners of their images, while users of Voigtländer’s 12mm F5,6 Ultra Wide Heliar report crisp results over the entire image frame.
My suggestion when using vintage lenses: Don’t peep pixels at 100% magnification and don’t hunt for maximum resolution. Use these lenses like you still had an analog film camera. Embrace their colors, their bokeh and all their flaws, as those flaws are part their distinct character. Don’t show-off their weaknesses, instead shoot them in a way that emphasizes their strengths and makes them (and you) look good. Here are a few more examples shot with my vintage Zeiss Sonnar. Maybe they can help to illustrate my point:


If you are interested in further reading about lens bokeh and depth-of-field, I recommend this white paper from Carl Zeiss. It is a 1.7 MB PDF download. And if you are uncertain about what adapted “full-frame” lenses are actually doing (and not doing) to your APS-C image (there are quite many myths and legends surrounding this topic), you may be interested in reading this standard article on equivalence.
Speed Booster
Did you read the article on equivalence? Good, because you might need that knowledge to immediately understand what Speed Booster is all about. With Speed Booster, adapter expert Metabones recently introduced a quite innovative solution for APS-C and MFT cameras, including Fuji X-Mount cameras.
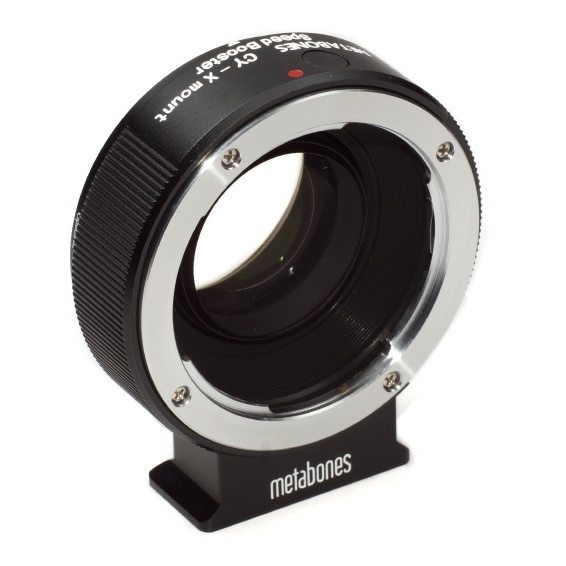
This illustration shows the Contax/Yashica SLR mount to XF mount version of Speed Booster. As you can see, it comes with its own tripod mount (quite practical for adapting heavier optics). However, at USD 399 plus shipping, it’s certainly not cheap.
With its hefty price tag, Speed Booster isn’t your regular adapter. Instead, it converts full-frame format SLR lenses into APS-C format lenses by reducing their focal length by a factor of 0.71. At the same time, maximum aperture is increased by the same factor, which equals about 1 stop. So my F2.8/180mm Carl Zeiss prime for Contax cameras turns into a fast F2.0/128mm APS-C format X-Mount lens. Here’s what dpreview had to say about Speed Booster in their initial “First Impressions” article. And here’s a white paper PDF from Metabones that explains even more.
Since you can attach a (D)SLR lens to either Speed Booster or a regular adapter, you can now get two lenses for the price of one. When I bought my vintage German-built Zeiss F2.8/180mm Sonnar, I did that with Speed Booster in mind. Here are two JPEG samples from last week:

Click in the images for larger viewing options. There is a little corner vignetting (the shots were taken one stop down at f/2.8, meaning a setting of f/4 on the lens aperture ring), but apart from that, I am quite happy with these results. After all, this is an analog lens that was built more than 20 years ago. Speed Booster lets me use this classic tele prime with its original full-frame field of view, speeding it up to F2.0 in the process, so ISOs can stay low even when shooting action. Of course, you need to focus carefully with those analog lenses in order to actually nail it. Here’s a crop:
Due to the thickness of the adapter and the resulting longer flange-back distance, it’s not possible to adapt Leica M lenses (or similar rangefinder style formats). However, there are versions for several SLR formats. For Fuji X-Mount, you can currently get Speed Boosters for Leica R, Contax/Yashica (Zeiss), Contarex and Alpa.
For your convenience, here’s a TOC with links to my previous X-PERT CORNER articles:
- Using the X100S
- Using the X20
- X100S vs. X100
- X20 vs. X10
- RAW, JPEG, Silkypix and “Fuji Colors”
- Adapting Third-Party Lenses
- RAW for JPEG Shooters…
- Tips for Updating your Firmware
- How to Clean the X-Trans Sensor
- Using the XF14mmF2.8 R
- Decoding XF18-55mmF2.8-4 R LM OIS
- Comparing RAW converters: JPEG vs. Lightroom, Capture One, Silkypix & RPP
- XF14mmF2.8 R appears to be almost distortion free
- How to Expand Dynamic Range
- How to Use Extended ISO
- EXR, anyone?
- Capture One – When the Going Gets Tough…
- Using Shooting Profiles and the Quick Menu
Rico Pfirstinger studied communications and has been working as journalist, publicist, and photographer since the mid-80s. He has written a number of books on topics as diverse as Adobe PageMaker and sled dogs, and produced a beautiful book of photographs titled Huskies in Action (German version). He has spent time working as the head of a department with the German Burda-Publishing Company and served as chief editor for a winter sports website. After eight years as a freelance film critic and entertainment writer in Los Angeles, Rico now lives in Germany and devotes his time to digital photography and compact camera systems. His book “Mastering the FUJIFILM X-Pro1” (Kindle Edition) (Apple iBook Store) (German version) is available on Amazon and offers a plethora of tips, secrets and background information on successfully using Fuji’s X-Pro1 and X-E1 system cameras, lenses and key accessories.