RAW, JPEG, Silkypix and “Fuji Colors”

Since pretty much everybody wrote about Lightroom 4.4RC in the past few days, I won’t. After all, what’s the big story? It took Adobe a full year to get their paying customers what the free RAW File Converter EX software and Fuji’s internal JPEG engine delivered from day one: decent X-Trans demosaicing quality. Big deal! But for those who are still interested in LR4.4RC, I have updated my RAW converter comparison set on Flickr with several new renderings.
Let’s take a look at colors, so-called “Fuji Colors” in particular. It’s often noted that Fujifilm’s built-in JPEG engine is one of the best in the entire industry. Obviously, people either love it, hate it or are just plain ignorant about it, but if you belong to the “I love it” crowd, there’s a good chance that “Fuji Colors” have played a role when you made your decision to buy an X-series camera.
The heart of these colors are the different film simulations Fuji’s cameras are offering in either the shooting menu or in the camera’s internal RAW converter. X-Trans sensor cameras feature five different color film modes, named after famous analog slide and negative FUJIFILM brands: Provia, Astia, Velvia, Pro Neg. Std and Pro Neg. Hi. Make no mistake: These aren’t accurate recreations of analog films. Instead, you get modern, state-of-the art color gradations that feature key qualities of their vintage role models: Provia is a more-or-less neutral all-purpose film mode, Astia delivers more distinct “Fuji Colors” with added pop in the shadows and smooth highlights, while Velvia offers high-contrast JPEGs with strong, saturated colors. Pro Neg. Std and Hi deliver accurate and pleasant skin tones, with “Std” acting as the neutral option and “Hi” as the one giving additional pop and contrast.
Here’s a practical example illustrating the five different film simulation modes:

This example was shot with an X-Pro1 and the Fujinon XF 60mm Macro prime lens at f/4.0, 1/480s and ISO 200. The top row is showing Provia, Astia and Velvia, the bottom row shows Pro Neg. Std, Pro Neg. Hi and a Lightroom development that looks like something in-between Provia and Pro Neg. Std. You can click on the image for a hi-res view, but even if you don’t, you can clearly see that Fuji’s different film modes can deliver quite distinct results. Remember, this is all the same shot, just developed with different film simulation modes in the camera’s internal RAW converter (aka JPEG engine).
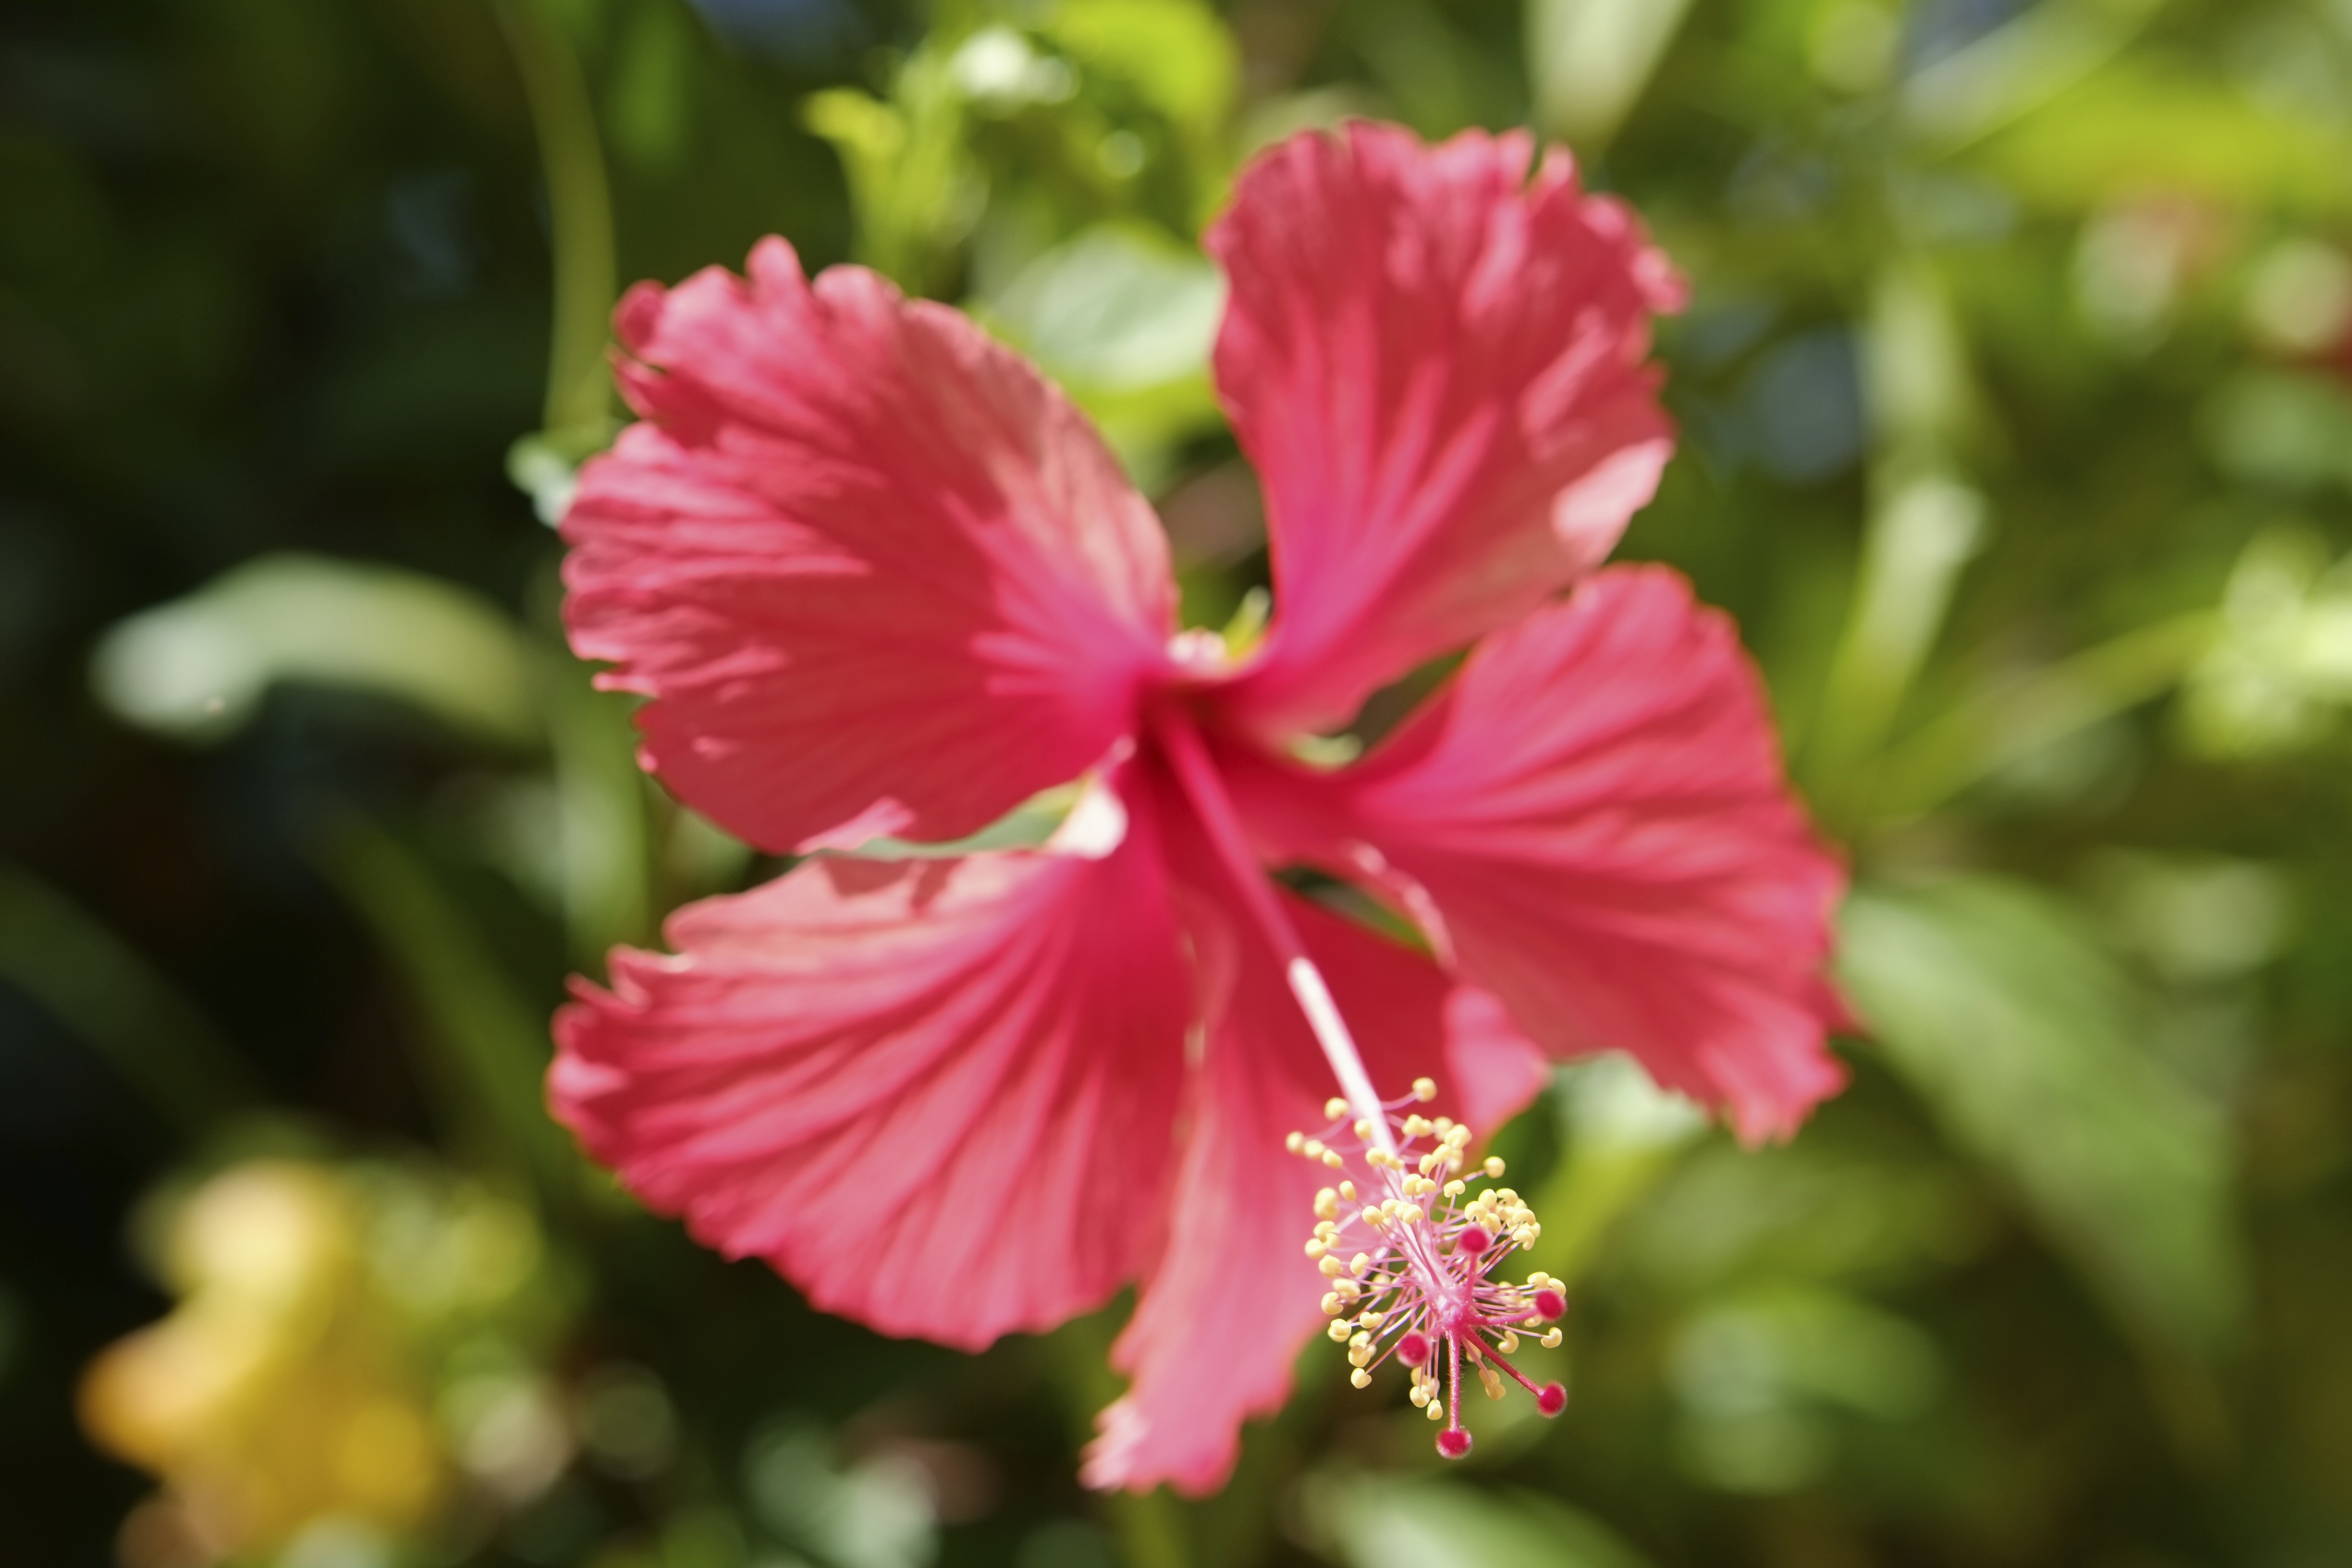
Let’s decide for Astia at this time, as it offers a very distinct purple-red rendering of the flower, with smooth highlights and nice contrast in the darker shadows. A typical problem of mono-colored subjects like this one are overflowing RGB color channels, in this case the red color channel. Here’s a magnified view of our Astia shot, showing three different color saturation level settings that can be applied either in the shooting menu or when (re-)developing the RAW file in-camera:

The color settings used here were -2 (left), 0 (center) and +2 (right). Clearly, too much color saturation in the reds goes at the cost of image detail, so we are better off using a saturation setting of -2 (aka “low” when you are using the internal RAW converter). Here’s the less color saturated Astia JPEG of this shot, straight from the camera’s built-in RAW converter:
As usual, click on the image for a full-size view. This was a hand-held macro shot, so I used the smallest available AF field size and moved it precisely over the area I wanted to be in-focus.
So far, so good. We now have an image with quite distinct “Fuji Colors”. Some people may like it, some may not, it doesn’t matter. What matters is that many of those who like their own JPEGs with Fuji colors would often also like to achieve similar looking results with external third-party RAW converters like Silkypix or the free RAW File Converter EX (which is an older version 3 of Silkypix).
How can we do it? Let’s play it through! Here’s the RAW file as it looks in Silkypix 5 with the software’s default settings:
Uh-oh! While this default rendering proves that claims about X-Trans sensors being incapable of delivering saturated reds are wrong, this is obviously not the result that we had in mind. In order to emulate the Astia rendering of the in-camera JPEG engine, we need to make some changes. But there’s more! If you click on this image for a full-size view, you will see ugly artifacts in the deep reds, almost like dirt soiling the colors of the flower. Here’s a zoomed-in view of this phenomenon, just click on it to see it in full size:

This doesn’t look nice, not to mention that the red is somewhat over-saturated and obscuring image details. So let’s correct this, shall we? After a few modifications in Silkypix, the image looks like this:

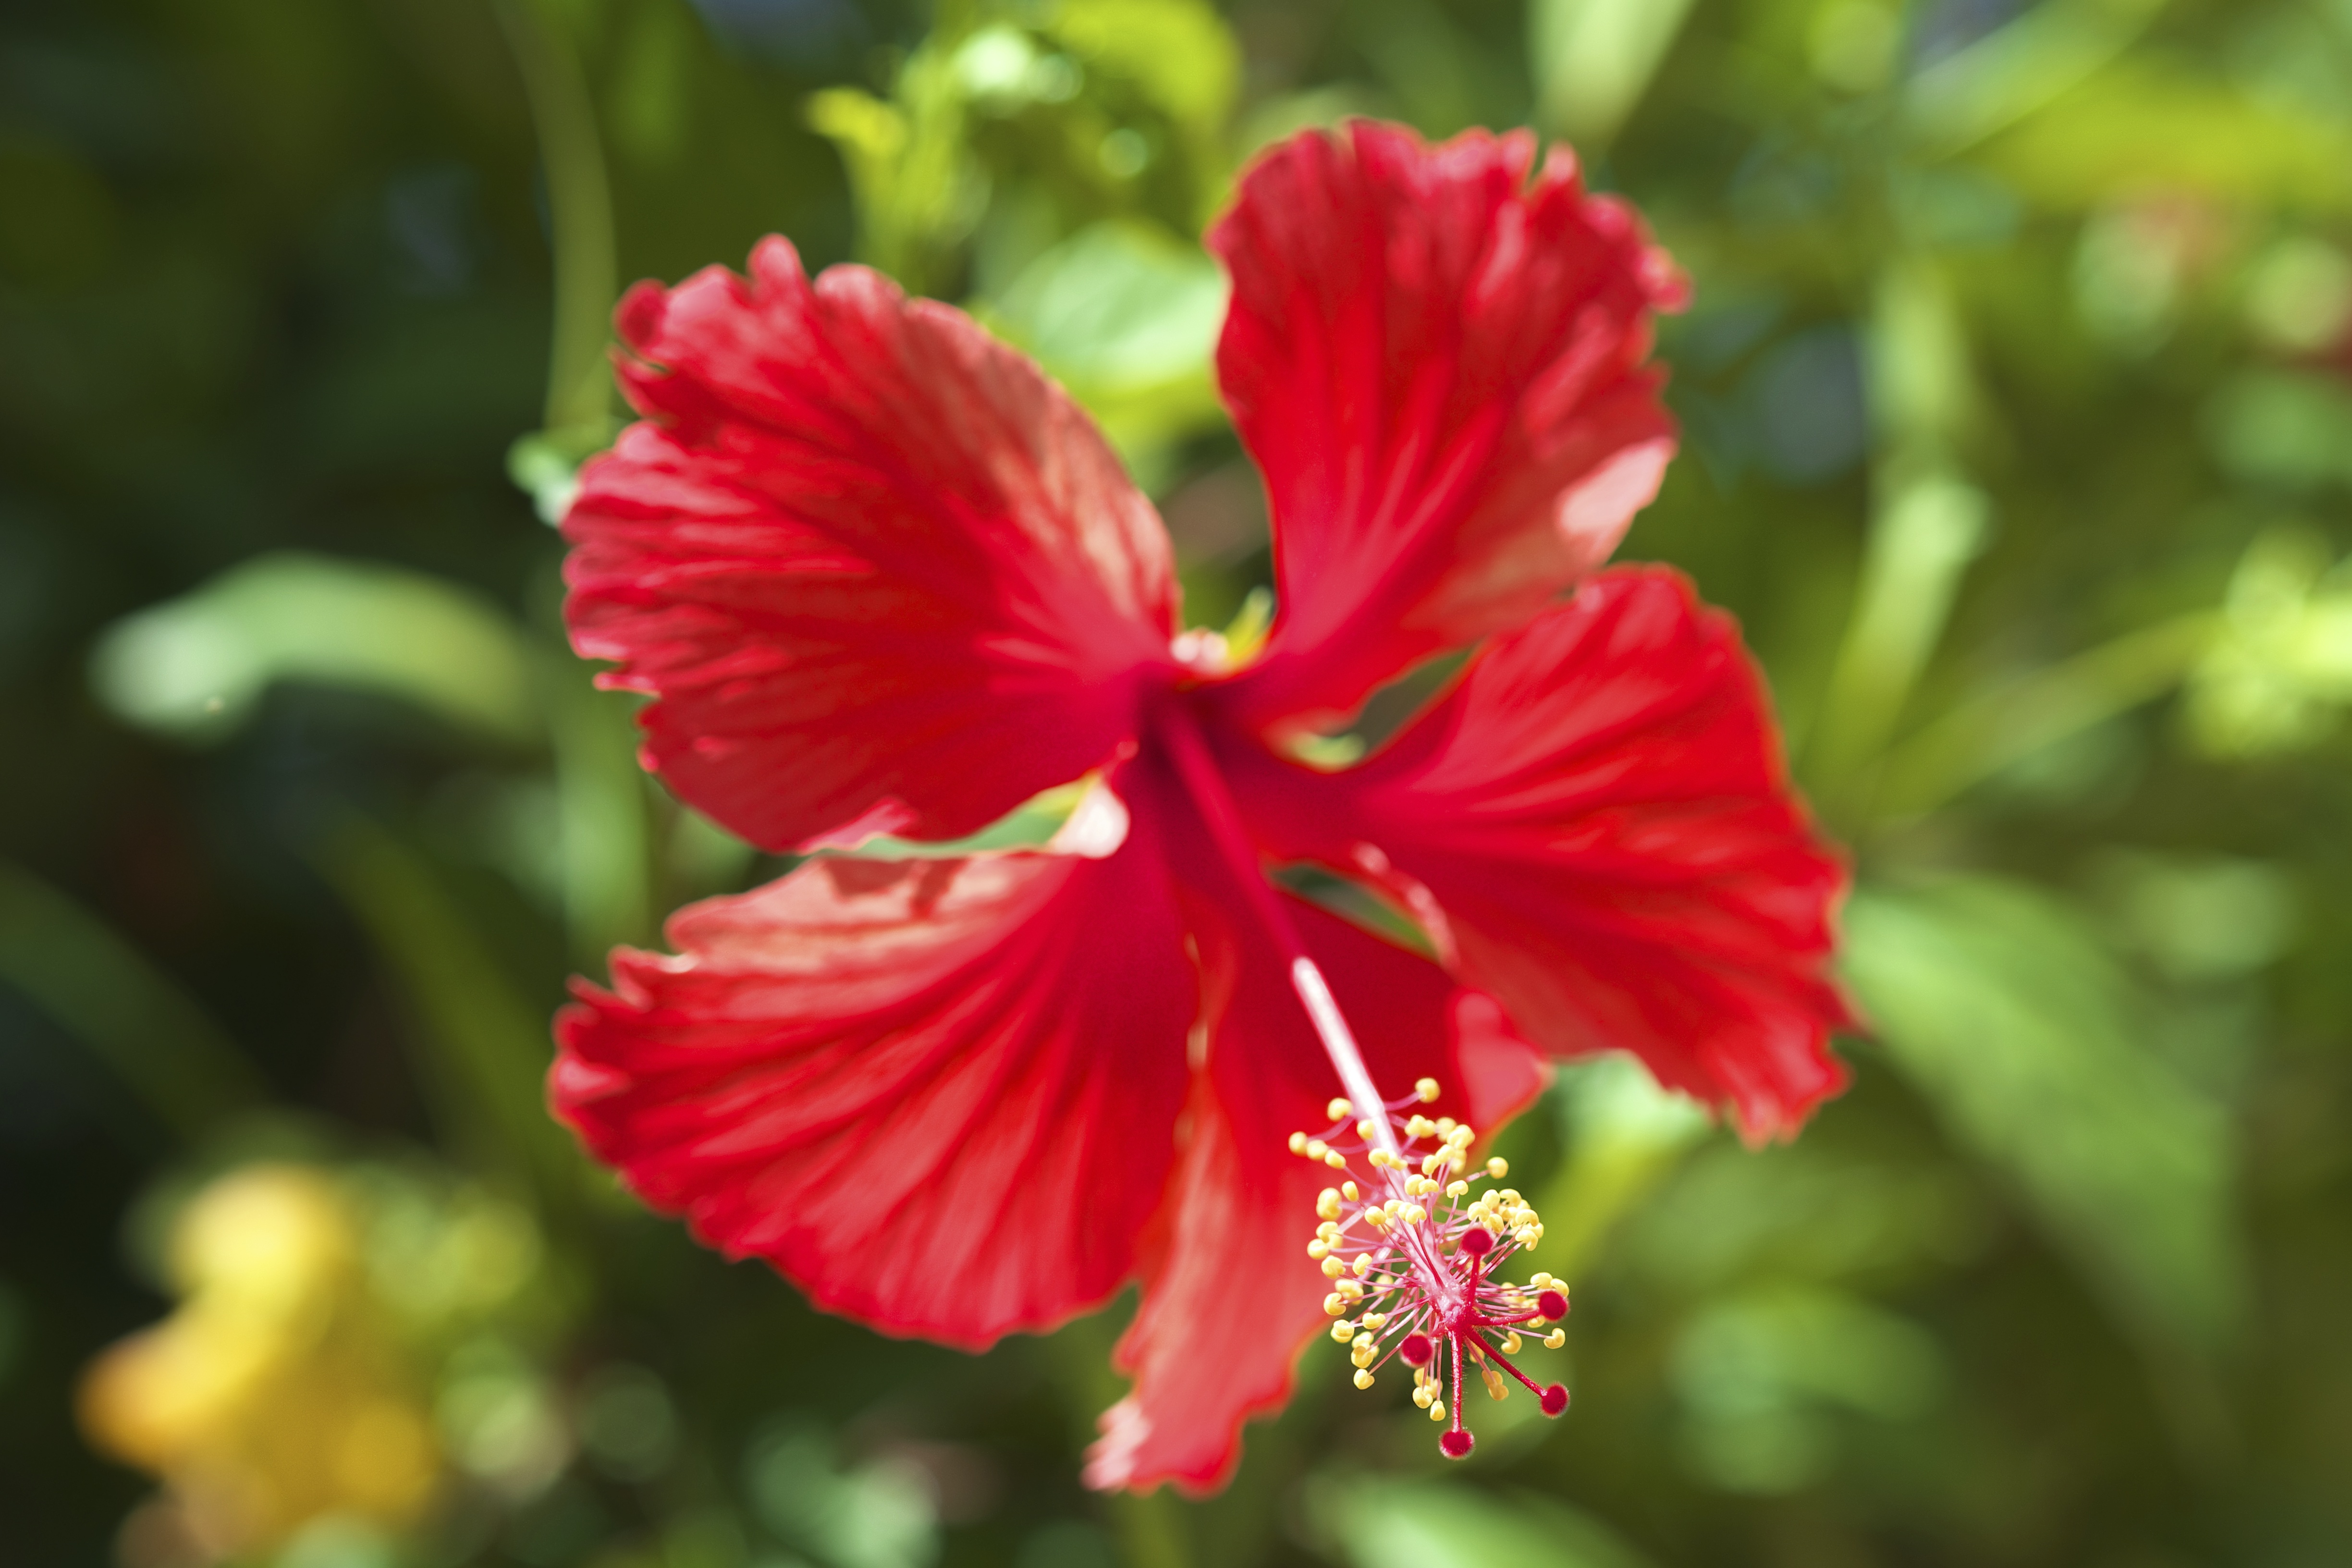
To make the comparison a little easier for you, here’s the original Astia JPEG again:
It’s not exactly the same, but it’s close enough for me. Of course, you could achieve a perfect match with a few further adjustments in Photoshop, Lightroom, Aperture or any other powerful image editor, but maybe an exact match wouldn’t really improve the image, anyway? Also note that the “dirt” and other color artifacts in the red flower are now gone.
So what exactly did I do to make it work?
Well, buy my next book to find out.
Good night, and good luck!
Just kidding.
Here’s a screenshot with the settings I have used:
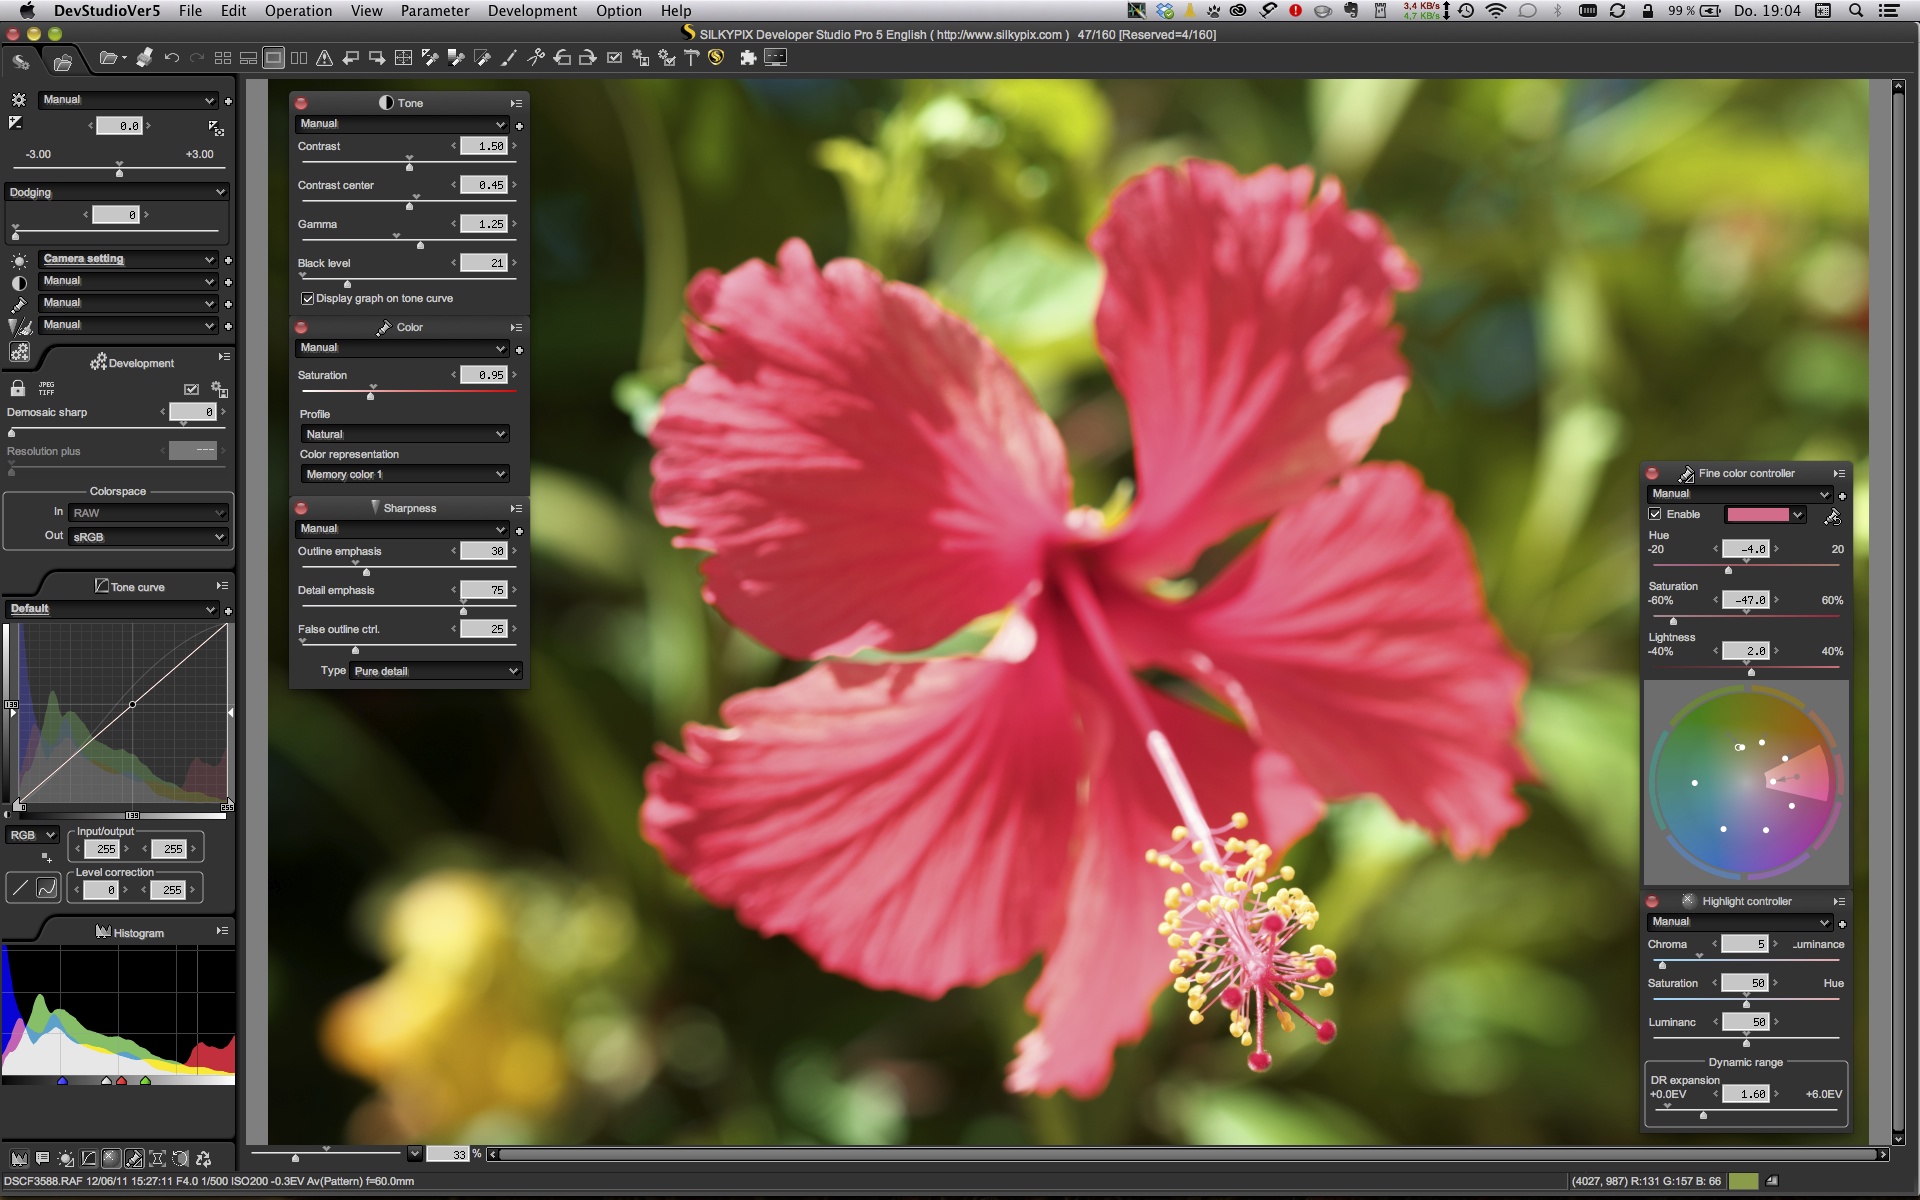
I didn’t change exposure or white balance. I also didn’t apply any dodging or HDR. So not only Silkypix 5 users, but also those using RFC EX could basically apply these changes. I did change Silkypix’ film mode from Standard to Memory Color 1, tough. Typically, I switch the color profile to “Version 4 compatible” in order to get rid of a green color cast—but not this time! Instead, I left the color profile at “Natural”, as it simply came closer to what I wanted to achieve. I made minor adjustments to contrast and tone, such as adding gamma (brightness), moving the contrast center a bit to the left and adding black to shadows by moving the Black Level slider to the right.
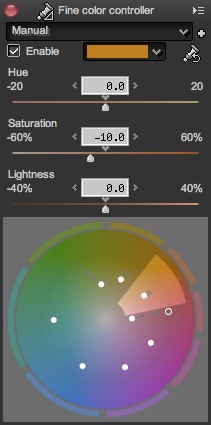
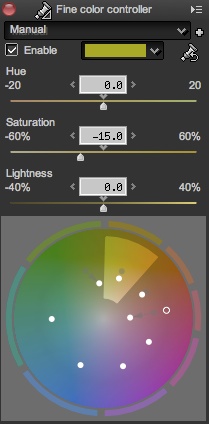
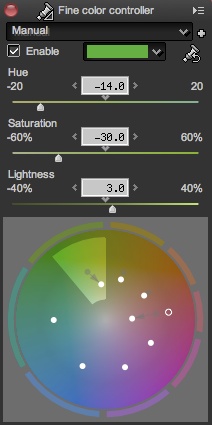
Obviously, the most important changes had to be made in the color department, so I opened the Fine Color Controller panel to adjust the reds and greens. The screenshot above shows the changes I made to the reds, and the three images below show what I did to orange/yellow and the two green sectors. By the way, Capture One offers a quite similar “color sector tool”.
Finally, I opened the Highlight Controller panel and moved the Chroma/Luminance slider to the left while adding some dynamic range by moving the DR Expansion slider to the right from 0.40 EV (which is the default setting for DR100% RAWs) to 1.60 EV. This basically emulates the softer highlight color transitions of our Astia JPEG.
To get rid of “dirty” color artifacts, we need to move the “Demosaic Sharp” slider in the Development module. At ISO 200, Silkypix 5 uses a default setting of 80, but for this shot, we need to slide it all to the left to Zero. And bingo! The ugly artifacts are gone. To compensate for any loss of image sharpness, I increased Outline Emphasis in the Sharpness module and used Pure Detail as my sharpening method in order to preserve maximum detail in areas that are actually in-focus. Since Pure Detail also minimizes artifacts in areas that are out-of-focus, this method lends itself to this particular shot. For the same reason, I also added some False Outline Control. Noise Reduction was kept at Silkypix’ default settings.
The following screenshot illustrates what reducing Demosaic Sharpness from 80 to Zero did for us. All remaining settings stayed the same in this direct comparison:

What a difference a slider makes! I’m not sure how many RFC EX / Silkypix users have been unaware of its existence—until now!
If you take a closer look at the in-focus part of our image, you’ll see that Silkypix (left) was able to extract more fine detail than the camera’s built-in JPEG engine (right). Click on the image for a magnified view:

Our Silkypix image can now be saved in a robust, lossless 16 Bit format (like TIFF) for further post-processing, printing or display.
For your convenience, here’s a TOC with links to my previous X-PERT CORNER articles:
- Adapting Third-Party Lenses
- RAW for JPEG Shooters…
- Tips for Updating your Firmware
- How to Clean the X-Trans Sensor
- Using the XF14mmF2.8 R
- Decoding XF18-55mmF2.8-4 R LM OIS
- Comparing RAW converters: JPEG vs. Lightroom, Capture One, Silkypix & RPP
- XF14mmF2.8 R appears to be almost distortion free
- How to Expand Dynamic Range
- How to Use Extended ISO
- EXR, anyone?
- Capture One – When the Going Gets Tough…
- Using Shooting Profiles and the Quick Menu
Rico Pfirstinger studied communications and has been working as journalist, publicist, and photographer since the mid-80s. He has written a number of books on topics as diverse as Adobe PageMaker and sled dogs, and produced a beautiful book of photographs titled Huskies in Action (German version). He has spent time working as the head of a department with the German Burda-Publishing Company and served as chief editor for a winter sports website. After eight years as a freelance film critic and entertainment writer in Los Angeles, Rico now lives in Germany and devotes his time to digital photography and compact camera systems. His book “Mastering the FUJIFILM X-Pro1” (Kindle Edition) (Apple iBook Store) (German version) is available on Amazon and offers a plethora of tips, secrets and background information on successfully using Fuji’s X-Pro1 and X-E1 system cameras, lenses and key accessories.