X20 vs. X10

Talk to Rico (questions & feedback) – Sample images set – Comparison images set
Same, same, but different! That’s what Fujifilm’s new X20 compact camera is for those who know its predecessor, the X10. From the looks of it, the X20 and X10 are quite the same, so X10 users will immediately feel at home. However, it’s a new and different home, one with a more conventional X-Trans sensor. Yep, compared to EXR even an X-Trans sensor is pretty old-fashioned. So in order to get the best results from an X20, you might want to shoot it less like an X10 and more like a X100(S), X-E1 or X-Pro1.
In order to compare the image quality of the X10 and the X20, we have to shoot with image resolution M, aka 6 megapixels. That’s because the X10 is an EXR camera with a split-sensor of 2 x 6 MP. Sure, you can also use it in HR mode to get full-size 12 MP output, but why would you buy an EXR camera in the first place if you weren’t interested in its unique features, such as hardware-based DR expansion, or pixel binning to reduce noise and artifacts under low light?
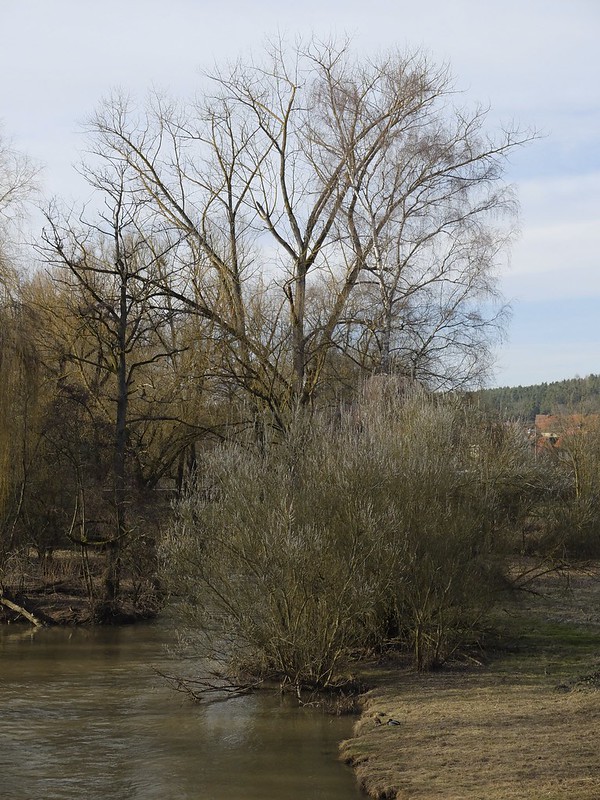
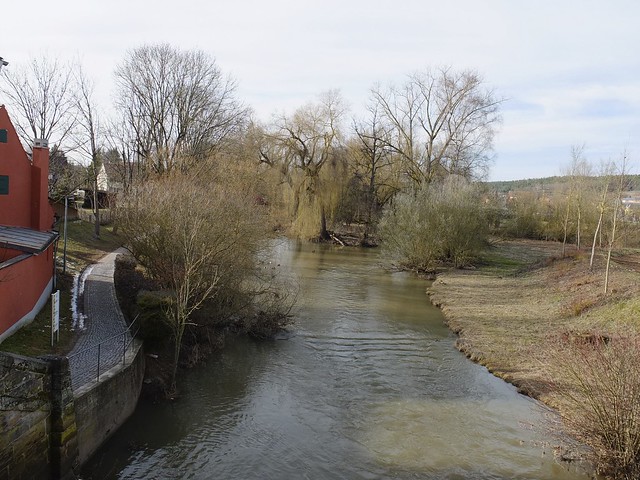
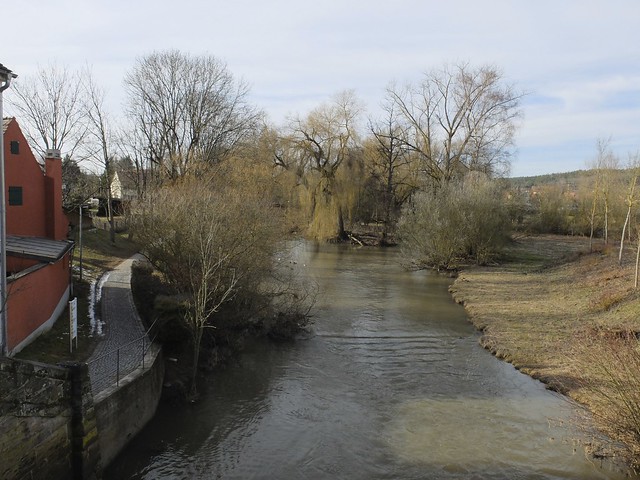
So I took both cameras and shot a series of samples. Click here to open the X20 vs. X10 shootout set on Flickr. While you are at it, you might also want to take a look at my ever growing X20 samples set.
In order to get comparable results, I put both cameras in 6 MP (size M) mode, set DR to Auto (or DR100% for some shots) and also used matching film simulation modes (Astia, Provia and Velvia). Noise reduction was set to -1, the rest was all default settings. After completing the series, I redeveloped each X20 image in 12 MP resolution using the camera’s internal RAW converter. This way we got two versions of each shot from the X20, one with 6 and one with 12 MP.
Looking at the full-size samples, you will recognize that even at 6 MP, the X20 is able to resolve better midtone and highlight detail while keeping noise levels lower and the image cleaner. Have a look at this example:
X10:

X20:
However, it’s a different situation when you look at dark shadow details in images that were shot with DR200% and, even more so, DR400% dynamic range expansion modes:
X10:
X20:
This doesn’t come unexpected, as the X20 has to rely on conventional DR expansion, aka “underexposing and tone mapping”. You can have a look at this X-PERT CORNER article if you want to learn more about the basics of dynamic range expansion. In any case, the typical drawbacks of conventional DR expansion don’t apply to the X10 with its EXR sensor, but this comes at the cost of losing half of the sensor’s pixel resolution.
What does this practically mean? It means that you should not shoot your new X20 exactly like you shoot an X10. Instead, apply DR expansion more carefully! You often will not need it, anyway, and if you do, DR200% will mostly be sufficient. If you decide to use DR expansion, make sure that the main subject (the part of the scene that’ shows plenty of detail and is in-focus) isn’t dark and in the shadows. DR200% and DR400% work great if your main subject belongs to highlights or upper midtones of an image, like in clouds, a white face, or a snowy mountain top illuminated by sunlight. These are typical situations where conventional DR expansion will perfectly work its magic and deliver great results.
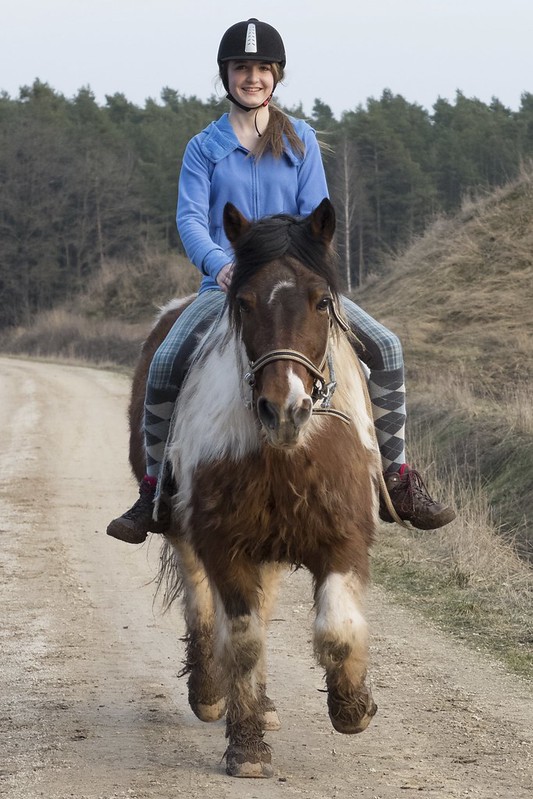
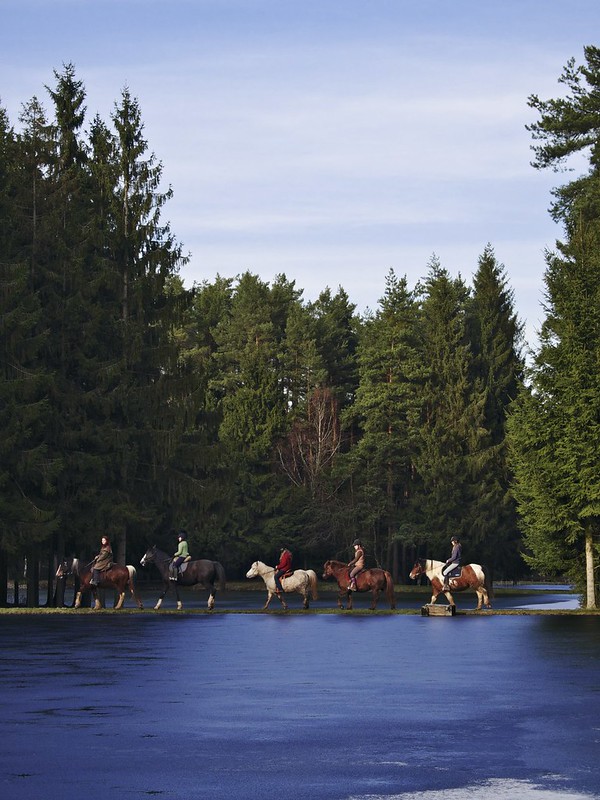
However, if you encounter a lighting situation like the one shown below, you might be forced to push the camera (with its compact 2/3″ sensor) beyond its technical limits. Take a look:

This image shows how the camera will record the subject in DR400% mode in order to preserve the sunset with a pleasing orange sky in the background. As you can see, the main subject (horse with rider) is literally in the dark, as the immense dynamic range of this scene is well beyond the capabilities of any normal camera sensor.
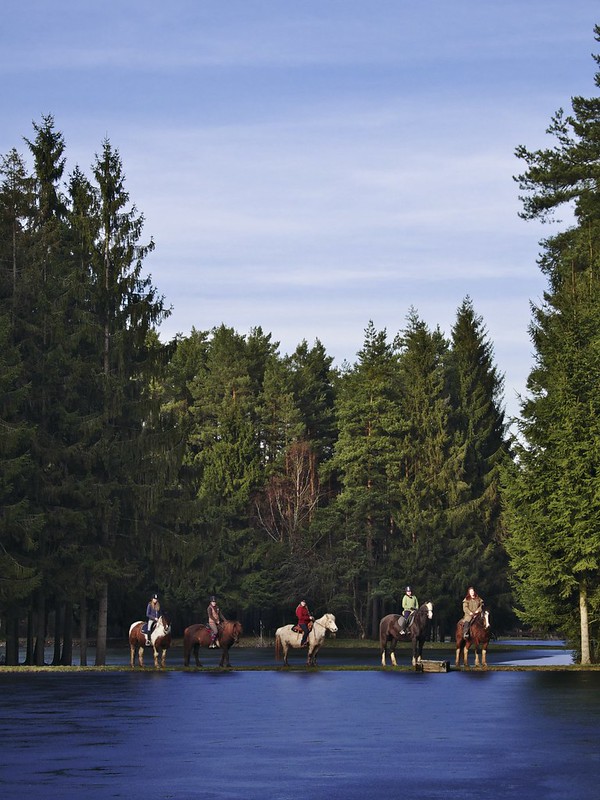
The automatic DR400% processing of the camera’s JPEG engine will turn this image into something more presentable:
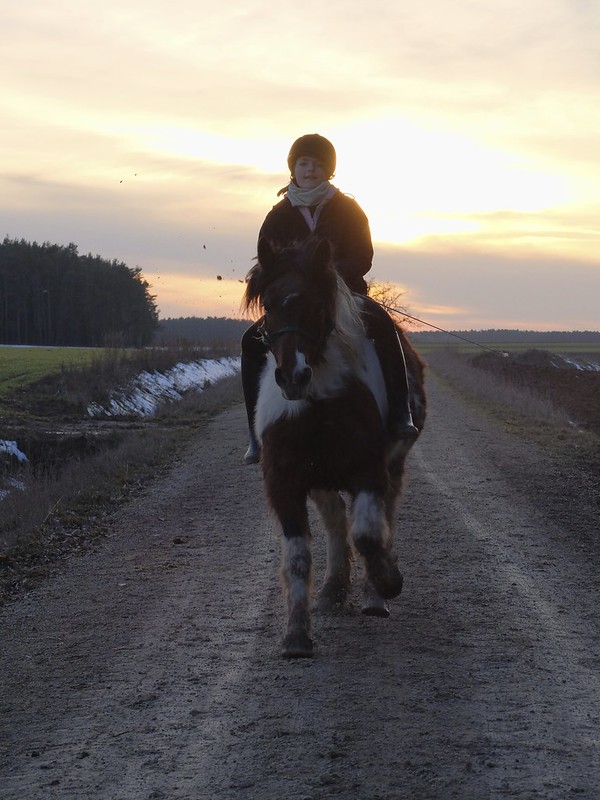
We can now actually see the horse and the girl in the scene, and the sky in the background is still intact. The camera has successfully expanded its dynamic range, but this comes at a cost, which you can spot once you click on the image and select a full-size view in Flickr. Obviously, there are noisy artifacts in shadow areas that were pushed up by the camera by roughly 2-3 EV. Why 3 EV? Well, 2 EV come from DR400%, as this means the shot was underexposed by 2 EV, and this underexposure must be compensated by tone-mapping shadows and dark areas. The remaining 1 EV of shadow pushing comes from using a Shadow Tone soft (-2) setting in the internal RAW converter.
If you load this RAW file into Lightroom (or another RAW converter), you can literally push things even further. Like this:

Wow, the things you can do with RAW! But handle it with care! When you inspect this image in a larger view, you will notice heavy noise and artifacts within the main subject of the shot. At the same time, the sky in the background remains spotless and noise-free. It was rescued by the DR expansion function of the camera, but at a heavy cost to our much darker subject in the foreground.
Be advised that if you apply this kind of extreme tone mapping to shots from any APS-C or full-frame sensor camera, you will experience similar effects and artifacts, but often to a lesser degree thanks to the larger sensor. Please bear in mind that the X20 is a compact camera, not a Nikon D4.
In order to extract the best quality from an X20, I recommend shooting RAW using DR100% and exposing to the right (ETTR) with the help of the camera’s live histogram, then process the RAW externally with Lightroom, Silkypix or another RAW converter of your choosing. If you want to use JPEGs from the camera (or the camera’s internal RAW converter) instead, I recommend shooting (or processing) with a noise reduction setting of -1 or even -2, depending on your actual scene.
While you can’t get noise-free results from Lightroom or Silkypix without sacrificing detail (especially when processing high-ISO shots), both RAW converters feature a welcome habit of presenting X20 luminance noise like analog film grain. In other words: The kind of noise from these converters can actually look quite pleasing, at least to some of us (like me). For example, if you have a look at the following ISO 1600 / DR100% shot that was once custom processed with Lightroom & Aperture and once developed in the camera with Provia and noise reduction set to -2, I personally prefer the grainy and more detailed look of Lightroom (with minimal NR) over the look offered by the camera’s JPEG engine.
Lightroom & Aperture RAW treatment:
OOC JPEG (Provia):
Click on the images for a choice of larger views. Obviously, any kind of CAs (chromatic aberrations) can easily be dealt with in Lightroom, as well. By the way, here’s what happens when you take the “grainy look” thingie too literally…. ;)
I agree, that wasn’t half as funny as I thought it might be.
Moving on.
Here’s another example comparing an OOC Astia JPEG with minimal NR with a custom Silkypix 5 rendering.
OOC JPEG (Astia):
Silkypix 5 treatment:
In my opinion, the X20 is a bit more of an enthusiast camera (like the X100) and a bit less of a point & shoot camera. While the X10 enjoys only limited external RAW support, Silkypix and Lightroom/ACR (version 4.4RC and beyond) already offer decent RAW support for the X20. Not bad for a new camera that is still barely available in most parts of the world.
RAW shooters may actually fall in love with the new X20, as it offers them the same control over the files as an X100S or X-Pro1. You could think of the X20 as a compact version of an X100. Of course, the X20’s new optical viewfinder with exposure and AF field information overlays also points in this direction.
Compared to the X10, the new X20 offers improved speed and better handling. The camera shoots 9 fps in FINE+RAW quality, and it only takes a few seconds to write a full burst of 9 such images from the buffer to the card—but only if you are smart enough to use the fastest SD card available (like a [shoplink 8807]SanDisk Extreme Pro UHS-1[/shoplink] card with 95 MB/s). Autofocus is very reactive, but I have to admit that am just as happy with the AF of my “old” X10. For me, it just works, and I have yet to experience a distinctive difference between PDAF and CDAF focusing with this camera.
There are several other improvements, like Fuji exchanging the AF button and the DRIVE button to facilitate moving the AF field around. Or take the light metering scale in manual mode: It didn’t really work with Auto-ISO in the X10, but does so now in the X20. Another improvement: When you magnify a portrait image in playback mode, the camera will now use the entire display area. Additionally, the X20 features the same Auto-ISO implementation as the X100S, so you can now select your own minimum shutter speed (up to 1/125s). Previous limitations regarding slowest possible shutter speeds in AE modes have also been lifted thanks to the omission of an EXR sensor. Some users will also appreciate the fact that unlike the X10, the X20 doesn’t squeeze JPEG images when it applies digital lens corrections to a scene. This also means that there aren’t be any notable size differences between JPEG output from the camera and output from external RAW converters such as Lightroom or Silkypix.
On the other hand, being forced to use conventional DR expansion (or manual exposure compensation) to preserve highlights can, at least in bright daylight, quickly lead to shutter speeds that are beyond the camera’s scope at wide-open aperture. At f2.0, the X20’s fastest shutter speed is 1/1000s. It will increase up to 1/4000s once you start stopping down the lens, which is perfectly normal behavior for cameras with leaf shutters. But throw in DR400%, which translates into an ISO 400 exposure, and you may quickly start to miss the built-in ND filter of the X100 and X100S.
Should X10 users upgrade to the X20? It depends! If you are happy shooting JPEGs with only 6 MP image resolution and very good hardware-based dynamic range expansion, the X10 could very well remain your favorite P&S camera, even though you can’t extract the same amount of detail from its EXR sensor that the X-Trans sensor (without an AA filter) will offer you. If you are into larger files, more resolution and fine detail, the X20 will give you just that, plus an external RAW conversion workflow that will actually supersede the quality of the camera’s JPEGs. Also, if you never fully understood how to master EXR in the first place, the X20 offers you a more conventional approach.
It’s notable that while X10 RAWs in Lightroom (or Silkypix) cannot really outperform the camera’s JPEGs with regards to detail resolution, it’s quite the opposite with the X20. Here’s a 12 MP sample shot from the X10 that has received the full Lightroom treatment:
And here’s the same scene shot with an X20, once again processed for maximum detail in Lightroom 4.4RC:

If you care to look at full-size versions of these shots, you can hardly miss the differences. However, don’t forget that pixel peeping isn’t as important as using a camera with a sensor concept that “just fits” your individual needs and preferences. Personally, while I’m looking forward to more shooting with my new X20, I’ll also continue to use my trusted X10.
By the way: The good old “AF trick” (also known as “shutter mash”) that I’ve described in “Mastering the X-Pro1” seems to work with the X20, too. So shooting objects that quickly move towards the camera ain’t no rocket science. :) Just press the shutter all the way through (no half-pressing). This works in AF-C and AF-S.
Of course, that’s just about IQ. Leaving pixel peeping aside, the X20 handles faster and better than the X10, it features a much improved optical viewfinder, and it neatly integrates in an existing RAW workflow. And, as you can see, its AF will capture moving objects.
A few more current X20 shots, developed from RAW with Silkypix 5:
Next week: X100S vs. X100.
For your convenience, here’s a TOC with links to my previous X-PERT CORNER articles:
- RAW, JPEG, Silkypix and “Fuji Colors”
- Adapting Third-Party Lenses
- RAW for JPEG Shooters…
- Tips for Updating your Firmware
- How to Clean the X-Trans Sensor
- Using the XF14mmF2.8 R
- Decoding XF18-55mmF2.8-4 R LM OIS
- Comparing RAW converters: JPEG vs. Lightroom, Capture One, Silkypix & RPP
- XF14mmF2.8 R appears to be almost distortion free
- How to Expand Dynamic Range
- How to Use Extended ISO
- EXR, anyone?
- Capture One – When the Going Gets Tough…
- Using Shooting Profiles and the Quick Menu
Rico Pfirstinger studied communications and has been working as journalist, publicist, and photographer since the mid-80s. He has written a number of books on topics as diverse as Adobe PageMaker and sled dogs, and produced a beautiful book of photographs titled Huskies in Action (German version). He has spent time working as the head of a department with the German Burda-Publishing Company and served as chief editor for a winter sports website. After eight years as a freelance film critic and entertainment writer in Los Angeles, Rico now lives in Germany and devotes his time to digital photography and compact camera systems. His book “Mastering the FUJIFILM X-Pro1” (Kindle Edition) (Apple iBook Store) (German version) is available on Amazon and offers a plethora of tips, secrets and background information on successfully using Fuji’s X-Pro1 and X-E1 system cameras, lenses and key accessories.