Apple Camera RAW, X-Trans and EXR

Talk to Rico (questions & feedback) – Rico’s Flickr photosteam
Considering the lively discussion that is going on about Apple Camera Raw and Aperture finally supporting Fujifilm cameras with X-Trans sensors, earlier reports about Aperture’s death appear to be a bit premature. As was to be expected, most of the discussion focuses on heavy pixel peeping, so this is what I am not going to talk about in this edition of my X-Pert Corner column. That’s because with all the pixel peeping, it’s easy to lose sight of the big picture. There’s more to processing a RAW file than looking at perceived artifacts in 100%-400% magnification modes. Let’s instead focus on the following:
- How usable is Apple Camera Raw for highlight recovery?
- How is Apple Camera Raw dealing with digital lens correction and RAW metadata?
- How is it handling RAW files that were taken in extended dynamic range modes, like DR200% and DR400%?
If you open a “standard” (that is DR100%) X-Trans RAW file in Apple Aperture using the latest Apple Camera Raw, chances are it won’t look that much different from a standard Provia SOOC JPEG file. Why bother, then? We could just use the JPEGs from the camera (maybe with additional tweaking in its internal RAW converter) and carry on with our lives, right? Yes, we could, at least in many instances. However, there are situations that the camera’s built-in JPEG engine cannot handle. This is where external RAW processing options shine—at least some of them, because not all external RAW processors are equally well-suited for specific tasks, such as highlight recovery.
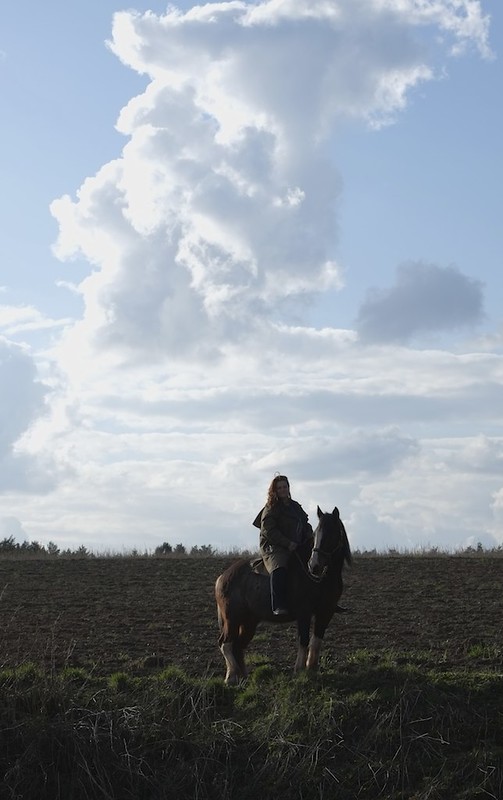
Let’s have a look at a practical example. This is a (cropped to taste) SOOC JPEG image I recently recorded with a XF55-200mmF3.5-4.8 R LM OIS prototype lens:

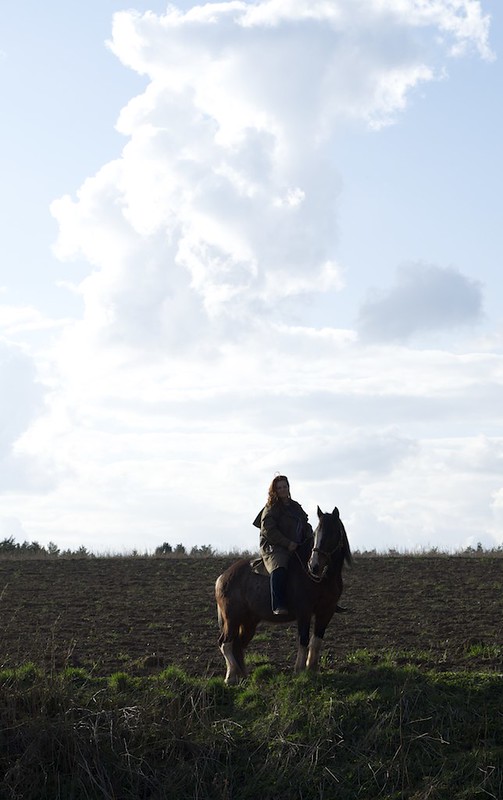
You can immediately see that the dynamic range of this subject grossly exceeds the range of the JPEG: shadows are blocked, highlights (clouds and sky) are blown-out. No matter how you deal with this RAW file in the camera’s internal converter, you won’t get a balanced result showing the full tonal range of the scene. For example, redeveloping the JPEG in-camera with soft (-2) shadow and highlight tone settings won’t rescue the clouds:

Neither will “pulling” the image -1/3 or -2/3 EV using the built-in converter’s push/pull function:

-1/3 EV
-2/3 EV
It is important to note that both -1/3 EV and -2/3 EV versions shown here don’t induce any any clipped highlight warnings, neither in the camera’s “info display” view nor in Apple Aperture. This means that no matter how much further I might pull the RAW in-camera, the texture in the clouds won’t magically re-appear. The internal RAW converter simply cannot rescue this shot. However, a state-of-the-art external converter can.
I shot this sample using the basic “ETTR exposure technique for RAW shooters” that I am recommending in my book. This means setting the camera to DR100% and using the live histogram to set the “right” exposure, clipping the relevant highlights in the histogram just so much that they can still be recovered in Lightroom/ACR or, in this case, Apple Camera Raw and Aperture.
Here’s what the standard import of the RAW file looks like in Apple Aperture:
It’s easy to notice the similarities between this RAW import and the default SOOC JPEG rendering. Again, the clouds and sky are blown-out, while the shadows are blocked and need some heavy lifting. So let’s do that along with some highlight recovery in Aperture, et voilà:
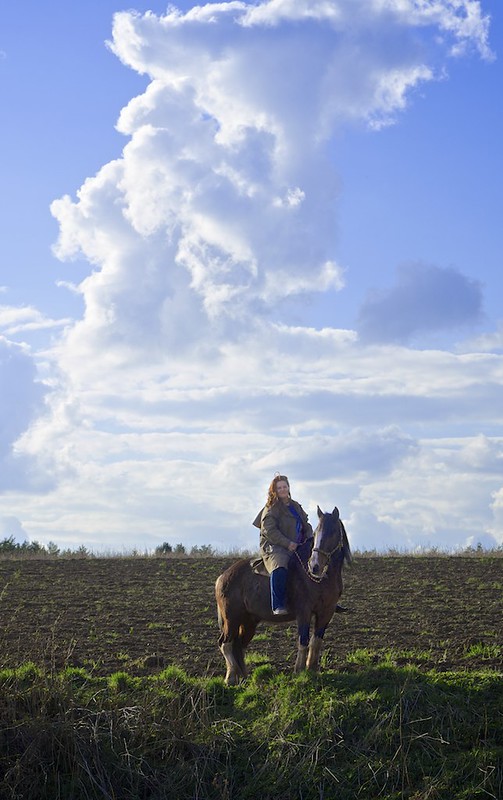
Apple Camera Raw and Aperture are indeed usable for problem cases that the internal RAW converter cannot solve. At least that is the case for DR100% shots. As a JPEG shooter, you wouldn’t have recorded the above sample in DR100%, but in either DR200% or DR400% modes in order to preserve highlight tones while retaining shadow tones. However, you might still want to reprocess a resulting (underexposed) DR200% or DR400% RAW file with Lightroom or Apple Camera Raw and Aperture. So let’s do the latter and see what happens, but before we actually go there, let me point you to my article about expanding dynamic range here on X-Pert Corner, where you can learn more about the inner workings of your camera’s DR function.
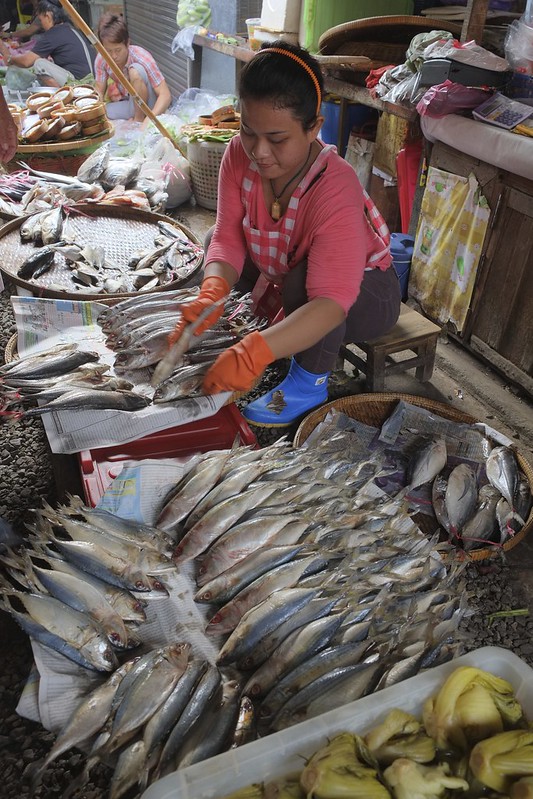
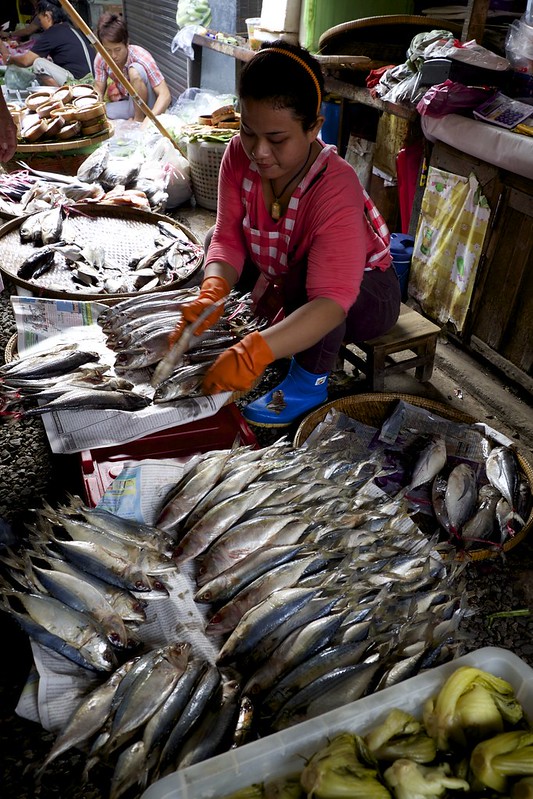
Here’s another high-contrast scene. I shot it in DR400% in order to create a JPEG with enhanced dynamic range:
The camera did a good job balancing the dark parts in the foreground and the bright parts in the background of this scene. However, it’s not perfect, and reducing the contrast with the built-in RAW converter isn’t totally convincing, either:
Let’s import the RAW to Apple Aperture and process it with Apple Camera Raw in order to achieve a more pleasing result. Here’s what the standard import looks like:
Whoa! What’s that? This certainly doesn’t resemble the SOOC JPEG shown above! The highlights in the back are even brighter (and blown-out), while the shadows are even darker and more blocked.
Two things have happened here:
- Apple Camera Raw is still doing a very poor job handling the import of DR200% and DR400% RAWs. I say “still” because we already know this phenomenon from the classic X100. Apple has made zero improvements regarding this matter in the past two years.
- Apple Camera Raw is using RAW metadata do apply distortion correction (the SOOC images and the RAW imports overlap almost perfectly), but it is NOT applying any de-vignetting, resulting in even darker image corners.
Of course, you can still process this RAW file in Apple Aperture, but it’s a more challenging endeavor, as tonality, white point and black point are all over the place. Here’s what I eventually came up with:
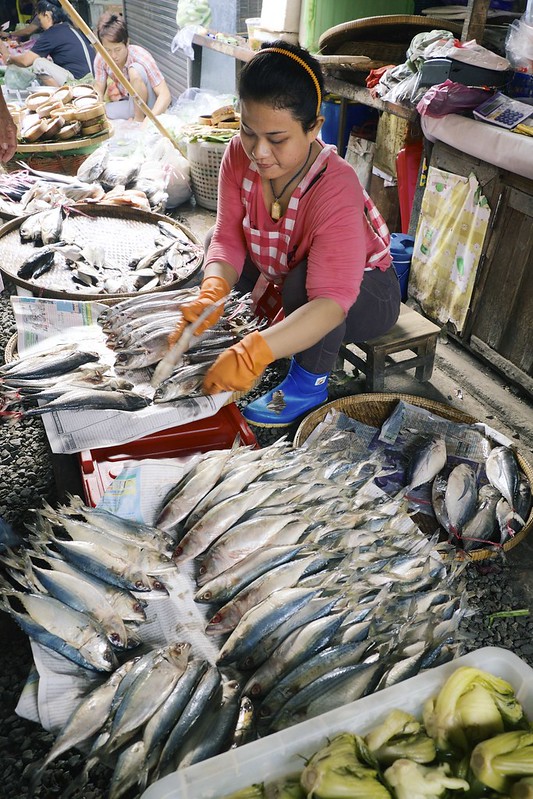
I deliberately chose not to rescue more specular highlights in the background, as I wanted to retain a natural, analog film look with plenty of contrast.
For RAWs with DR200% or DR400% “underexposure”, Russian RPP can be a quite powerful alternative due to its built-in “compressed dynamic range” function. Here’s what the original RAW import looks like in RPP:

Don’t be scared by the extreme underexposure displayed here. Instead, simply use the software’s Compressed Exposure tool to change the curve:
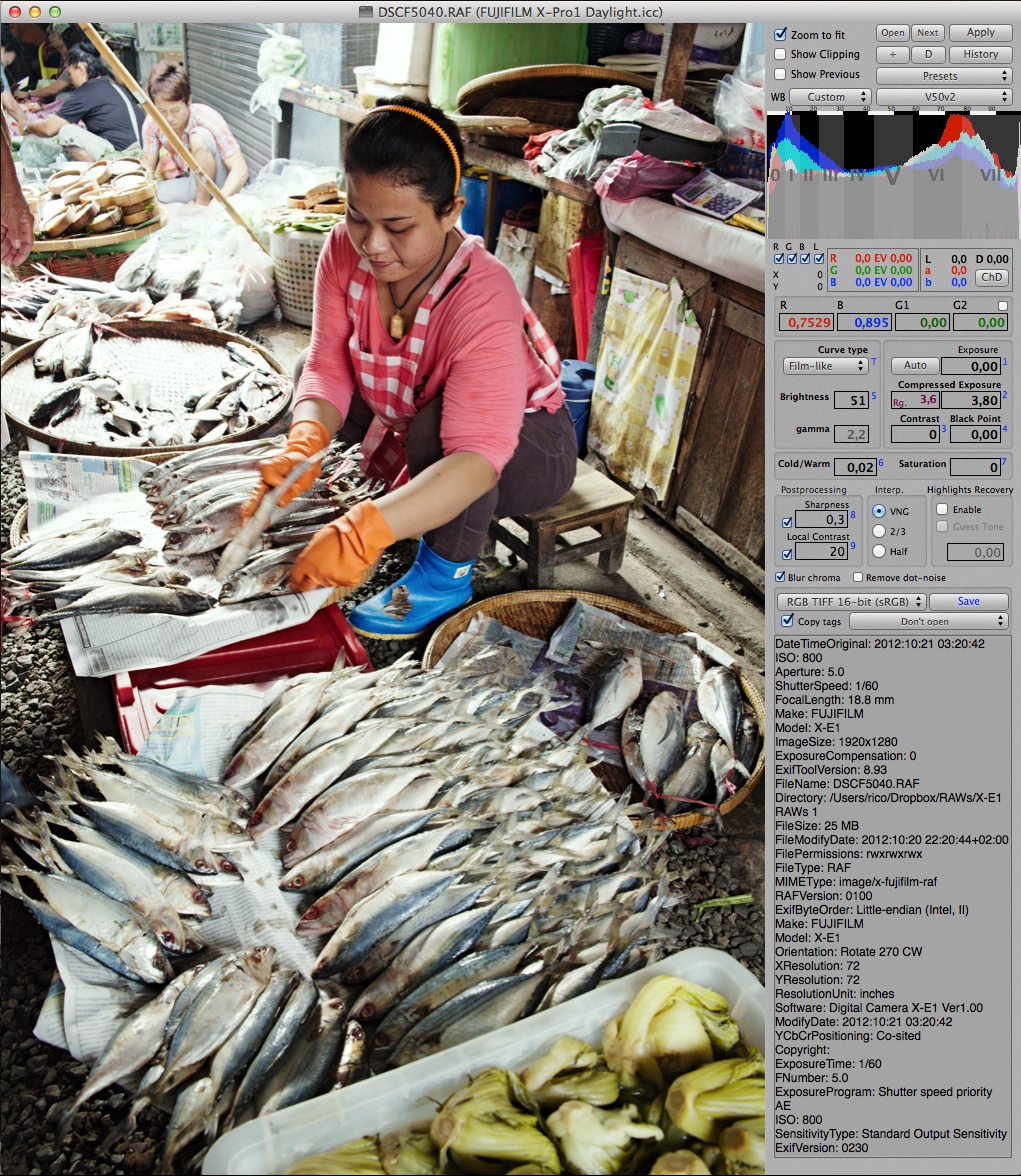
With some additional minor tweaks, I find the RPP result quite pleasing:
Comparing the results from Aperture and RPP, you will note that RPP shows more of the scene than Aperture and the SOOC JPEG. This has two reasons:
- RPP output is using the full 16.3 megapixels of the sensor, not just 16.0 MP (or even less) like most other converters.
- RPP doesn’t apply any lens correction, neither for distortion nor vignetting.
Feel free to download and play with this RAW file on your own. However, please respect my copyright and don’t show anything out of this context.
Let’s summarize:
- In principle, Apple Camera Raw and Aperture are a useful and capable RAW conversion combo to “rescue” problematic X-Trans shots with plenty of dynamic range and other issues.
- With Apple Camera Raw, it’s recommended to shoot and process RAW files in DR100%. While it is somewhat possible to work with DR200%/DR400% RAW files in Aperture, you will run out of luck in Apple iPhoto, as this software is simply lacking the necessary sliders and functions.
- Apple Camera Raw automatically applies digital lens distortion correction based on metadata in the RAW file. However, it doesn’t apply any de-vignetting.
Apple Camera Raw and EXR cameras
While Apple’s latest edition of Camera Raw officially supports all current X-Trans cameras, is also provides unofficial support for several EXR sensor cameras, including the X10, X-S1 and XF1. This means that you can import and open such files in Apple Aperture and iPhoto, and you will be able to see icon image previews of your RAW files in the Finder and the file system.
Actual support of the EXR sensor is very limited, though: Apple’s RAW converter can only deal with half of the sensor’s pixels. This means that HR RAWs are presented with only half their actual resolution, and only the higher exposed sensor half of EXR DR RAWs can be processed. EXR SN RAWs can be processed without losing half the sensor information, but you will run into the same tonality problems we ran into above once its DR exceeds DR100%. So practically, Apple Camera Raw is pretty much useless for seriously processing RAWs from EXR cameras. Lightroom or the camera’s built-in converter will deliver much better results.
For your convenience, here’s a TOC with links to my previous X-PERT CORNER articles:
- First Look: XF55-200mmF3.5-4.8 R LM OIS
- Studio X
- Using the X100S
- Using the X20
- X100S vs. X100
- X20 vs. X10
- RAW, JPEG, Silkypix and “Fuji Colors”
- Adapting Third-Party Lenses (updated with Speed Booster)
- RAW for JPEG Shooters…
- Tips for Updating your Firmware
- How to Clean the X-Trans Sensor
- Using the XF14mmF2.8 R
- Decoding XF18-55mmF2.8-4 R LM OIS
- Comparing RAW converters: JPEG vs. Lightroom, Capture One, Silkypix & RPP
- XF14mmF2.8 R appears to be almost distortion free
- How to Expand Dynamic Range
- How to Use Extended ISO
- EXR, anyone?
- Capture One – When the Going Gets Tough…
- Using Shooting Profiles and the Quick Menu
Rico Pfirstinger studied communications and has been working as journalist, publicist, and photographer since the mid-80s. He has written a number of books on topics as diverse as Adobe PageMaker and sled dogs, and produced a beautiful book of photographs titled Huskies in Action (German version). He has spent time working as the head of a department with the German Burda-Publishing Company and served as chief editor for a winter sports website. After eight years as a freelance film critic and entertainment writer in Los Angeles, Rico now lives in Germany and devotes his time to digital photography and compact camera systems. His book “Mastering the FUJIFILM X-Pro1” (Kindle Edition) (Apple iBook Store) (German version) is available on Amazon and offers a plethora of tips, secrets and background information on successfully using Fuji’s X-Pro1 and X-E1 system cameras, lenses and key accessories.