First Look: X-M1 with New Kit Zoom and Pancake Lens

by Rico Pfirstinger

Talk to Rico (open forum for questions & feedback)Rico’s Flickr sets – X-M1 sample images – Mastering the Fujifilm X-Pro1 reading samples (65 free pages)

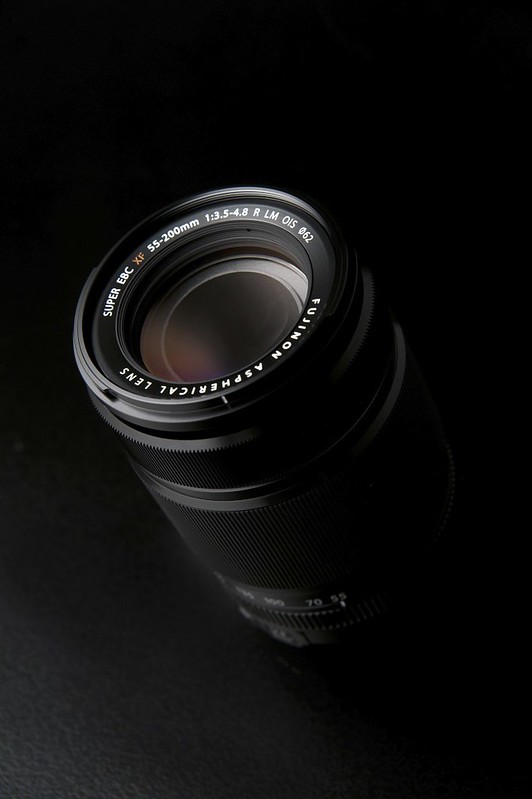
Click here to read Andy Westlake’s excellent preview of the X-M1 on DPR – Click here to jump directly to my set of sample images taken with my pre-production camera and lenses

Edit [16/9/13]: Added additional findings to the “pro” section of this article.

Edit [1/8/13]: Added plenty of new samples, both JPEG and RAW (Lightroom & Silkypix) to the Flickr set. Updated Pro/Con comparison with X-E1.

Edit [30/6/13]: Added several SOOC JPEG portrait samples taken with the X-M1 and the two new lenses to the Flickr set.

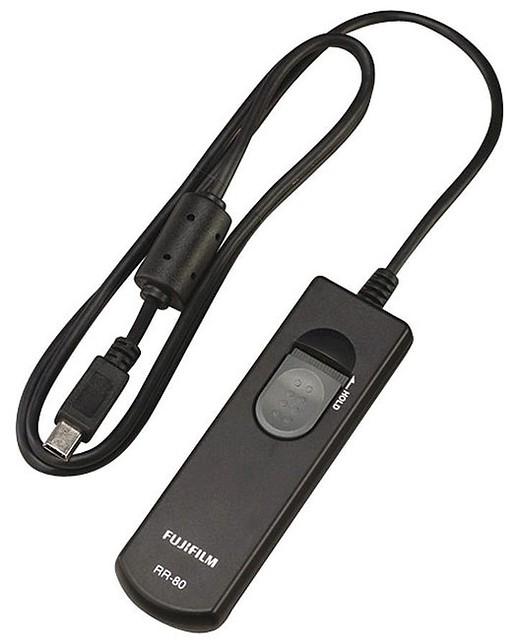
Edit [29/6/13]: Added my experiences using an USB adapter to get RR-80 remote controls to work with the X-M1

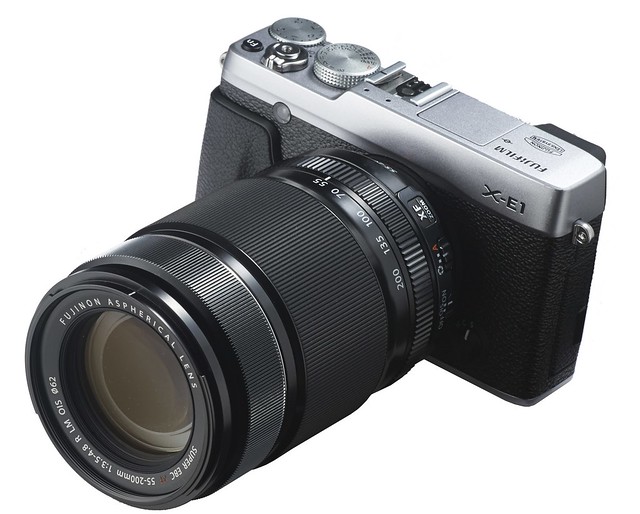
Fujifilm’s new X-M1 mid-range system camera is targeting users and fans of premium compact cameras (like the Sony RX100 or Fujifilm X10, X20 and XF1) as well as users of entry-level DSLR cameras who do not want to compromise on image quality, but prefer a small, lightweight and still affordable package. It’s important to recognize that the X-M1 was at least as much inspired by the Fujifilm X20 and XF1 as was by its older and more expensive system camera sibling, the X-E1.

In other words: This is as much a smaller X-E1 as it is an APS-C sensor sized system camera version of the XF1 or X20. Believe it or not, but the X10/X20 is actually a little bit larger than the body of the X-M1.

A Little Bit of Everything

This turns the X-M1 into kind of a hybrid system: It features the mode dial, scene modes, additional AF modes (including face recognition and pattern tracking), an additional OIS mode and the “art filters” of Fuji’s premium compact and bridge cameras. At the same time, it records images with the same 16 MP APS-C X-Trans sensor found in the larger and more expensive X-Pro1 or X-E1.

In terms of image processing, the tiny X-M1 even surpasses its bigger siblings with the faster EXR Processor II engine already known from the X100S and X20, with conventional 12 Bit RAW image recording. This turns the X-M1 into a pretty responsive camera (at least in Fuji terms). A 95 MB/s SD card (such as a [shoplink 13681]SanDisk Extreme Pro[/shoplink]) certainly pays-off when used in concert with this camera. It takes the X-M1 just about 2 seconds to copy 3 FINE+RAW images from its internal buffer to the card. With its modest burst rate of 5.6 frames per second, this means that the camera can shoot 13 frames in a row at full speed, even though the buffer is just large enough to hold 10 FINE+RAW images at any given time.

Welcome to Plasticland!

** CLICK HERE to Read the Rest of the Article **

Zeiss Touit vs. Fujinon XF

by Rico Pfirstinger

Talk to Rico (open forum for questions & feedback)Rico’s Flickr sets – Touit 1.8/32 samplesTouit 2.8/12 samplesTouit vs. Fujinon comparative samples (Flickr Guest Pass) – Mastering the Fujifilm X-Pro1 reading samples (65 free pages)

DSCF7781 - f/2
Carl Zeiss Touit 1.8/32, Fujifilm X-E1 (ISO 200, f/2, 1/1200s), RAW, Lightroom 5, DxO FilmPack 4

Why would a business-savvy lens manufacturer like Carl Zeiss decide to introduce two prime lenses for X-Mount cameras that compete head-to-head with already existing, smaller and cheaper Fujinon offerings, while at the same time ignoring obvious gaps like a fast 23mm lens?

It’s a Sony

The answer is: they wouldn’t. And they didn’t! The new Zeiss Tout 1.8/32mm and 2.8/12mm prime lenses are quite obviously targeted at customers of Sony’s NEX camera system. They perfectly fit into Sony’s current lens lineup, and their design is pretty much in line with the sleek NEX appearance. A fast 23 mm lens to satisfy the cravings of the X-Mount crowd? No such luck, because Zeiss and Sony already offer such a lens (a 1.8/24) for NEX. This is apparently all about what Sony NEX customers want and need.

 
DSCF7301 - f/2.8 Carl Zeiss Touit 2.8/12, Fujifilm X-E1 (ISO 200, f/2.8, 1/480s), RAW, Lightroom 4.4

So the X-Mount versions of the Touit lenses were clearly one of those “me too” decisions. But why did Fuji go along with it and invite a formidable competitor like Carl Zeiss into their home, not only offering full technical support and cooperation, but even co-marketing the Touit lenses? I know the real answer but don’t want to spill the beans just yet, so let’s just say that Fujifilm is making money with each X-Mount Touit lens that’s sold. They also like the Zeiss brand’s premium image and the resulting image transfer to the Fuji brand. After all, Panasonic also loves to put a Leica logo on their cameras and MFT lenses.

** CLICK HERE to Read the Rest of the Article **

Remote Shutter Control for X Series Cameras

by Rico Pfirstinger

Talk to Rico (questions & feedback)Rico’s Flickr photosteam

Releasing the shutter of your camera remotely can have several advantages. For once, not touching the camera reduces shake and vibrations, which is especially important at slow shutter speeds. Mounting the camera on a tripod is only half of the solution. Yes, you can use the camera’s self-timer function for hands-free operation, but it’s hard (if not impossible) to catch decisive moments with this method.

Other applications of remote shutter release devices are placing the camera at hard to reach locations or producing a series of well-timed shots for time-lapse or HDR photography. Advanced timing solutions incorporate wireless operation (infrared, radio-controlled, Bluetooth or WLAN), and they can be triggered by certain GPS coordinates or position changes (like taking a shot every 50 meters while moving in a car), by a person stepping in front of the camera (recognizing faces or movement) or by rather exotic stuff like changes in the magnetic field.

Sadly, Fujifilm doesn’t offer a common remote triggering interface in its X series: With the XF1, there’s no option to externally trigger the shutter at all, so all you can do is using the self-timer. The X10, X20, X100, X100S, X-Pro1 and X-E1 offer classic threads for manual screw-in cable releases. The X-S1 and X-E1 feature an option to electronically release the shutter through the so-called RR-80 port (which hides in the Mini-USB port of these cameras, using pins number 4 and 5), and in addition to that, the X-E1 allows the microphone input socket to moonlight as a remote trigger input that is compatible with a substantial range of camera makes and models, offering a large number of options of remote triggering devices that can be used in concert with this camera.

Classic Mechanical Cable Release

Cable releases can perform the same three basic functions as your camera’s shutter button:

  • half-pressing the shutter to establish/lock focus and exposure
  • fully depressing the shutter to take the shot
  • keeping the shutter depressed (and locked) for an extended period of time to take long-time exposures (bulb mode)

Cable releases come in several forms and usually don’t cost much. There’s no need to get a fancy model (unless you like fancy stuff), just make sure it operates smoothly.

As mentioned earlier, cable releases are compatible with the X10, X20, X100, X100S, X-Pro1 and X-E1.

RR-80 Electronic Release

Just because its interface is electronic doesn’t mean that connecting an [shoplink 12241]RR-80[/shoplink] based remote shutter release adds additional functionality beyond  a mechanical cable release. An electronic RR-80 trigger will merely perform the very same three functions:

  • half-pressing the shutter to establish/lock focus and exposure
  • fully depressing the shutter to take the shot
  • keeping the shutter depressed (and locked) for an extended period of time to take long-time exposures (bulb mode)

Beyond that, there’s no communication going on between the camera and the remote: The remote isn’t aware of any camera settings, and the camera isn’t aware what’s set on the remote. Here’s an example of a simple electronic RR-80 trigger that’s available as an accessory from Fujifilm:

There are several RR-80 compatible “no-name” options available, with some of them offering wireless operation or sophisticated interval timers. Here’s an example of an intervalometer…

** CLICK HERE to Read the Rest of the Article **

Apple Camera RAW, X-Trans and EXR

by Rico Pfirstinger

Talk to Rico (questions & feedback)Rico’s Flickr photosteam

Considering the lively discussion that is going on about Apple Camera Raw and Aperture finally supporting Fujifilm cameras with X-Trans sensors, earlier reports about Aperture’s death appear to be a bit premature. As was to be expected, most of the discussion focuses on heavy pixel peeping, so this is what I am not going to talk about in this edition of my X-Pert Corner column. That’s because with all the pixel peeping, it’s easy to lose sight of the big picture. There’s more to processing a RAW file than looking at perceived artifacts in 100%-400% magnification modes. Let’s instead focus on the following:

  • How usable is Apple Camera Raw for highlight recovery?
  • How is Apple Camera Raw dealing with digital lens correction and RAW metadata?
  • How is it handling RAW files that were taken in extended dynamic range modes, like DR200% and DR400%?

If you open a “standard” (that is DR100%) X-Trans RAW file in Apple Aperture using the latest Apple Camera Raw, chances are it won’t look that much different from a standard Provia SOOC JPEG file. Why bother, then? We could just use the JPEGs from the camera (maybe with additional tweaking in its internal RAW converter) and carry on with our lives, right? Yes, we could, at least in many instances. However, there are situations that the camera’s built-in JPEG engine cannot handle. This is where external RAW processing options shine—at least some of them, because not all external RAW processors are equally well-suited for specific tasks, such as highlight recovery.

Let’s have a look at a practical example. This is a (cropped to taste) SOOC JPEG image I recently recorded with a XF55-200mmF3.5-4.8 R LM OIS prototype lens:

You can immediately see that the dynamic range of this subject grossly exceeds the range of the JPEG: shadows are blocked, highlights (clouds and sky) are blown-out. No matter how you deal with this RAW file in the camera’s internal converter, you won’t get a balanced result showing the full tonal range of the scene. For example, redeveloping the JPEG in-camera with soft (-2) shadow and highlight tone settings won’t rescue the clouds:

Neither will “pulling” the image -1/3 or -2/3 EV using the built-in converter’s push/pull function:


-1/3 EV


-2/3 EV

It is important to note that both -1/3 EV and -2/3 EV versions shown here don’t induce any any clipped highlight warnings, neither in the camera’s “info display” view nor in Apple Aperture. This means that no matter how much further I might pull the RAW in-camera, the texture in the clouds won’t magically re-appear. The internal RAW converter simply cannot rescue this shot. However, a state-of-the-art external converter can.

I shot this sample using the basic “ETTR exposure technique for RAW shooters” that I am recommending in my book. This means setting the camera to DR100% and using the live histogram to set the “right” exposure, clipping the relevant highlights in the histogram just so much that they can still be recovered in Lightroom/ACR or, in this case, Apple Camera Raw and Aperture.

Here’s what the standard import of the RAW file looks like in Apple Aperture:

** CLICK HERE to Read the Rest of the Article **

First Look: XF55-200mmF3.5-4.8 R LM OIS

UPDATE (18APR2013): Added more llama shots and a new flower shot.

UPDATE: US readers can already preorder the brand new Fuji 55-200mm lens at BHphoto (Click here).

by Rico Pfirstinger

Talk to Rico (questions & feedback)Rico’s XF55-200mmF3.5-4.8 R LM OIS Prototype Samples

Fuji’s XF18-55mmF2.8-4 R LM OIS “kit zoom” was one of last year’s most pleasant surprises, offering very good image quality in a portale package at a quite affordable price. This May, it will be complemented by a telephoto zoom that was officially announced today. The new lens starts off exactly where the kit zoom ends: at 55mm, going all the way to 200mm. According to Fuji, that’s 84-305mm in 35mm (“full-frame”) equivalence terms.

The telephoto zoom’s full name is FUJINON XF55-200mmF3.5-4.8 R LM OIS, and it’s supposed to sell for USD 699.– (plus sales tax) in the U.S. or EUR 649.– (incl. VAT) here in Germany. I have been able to work with an early prototype of the lens for more than a week, so let’s have a closer look, shall we?

Same, same, but different…

If you already know Fuji’s 18-55mm kit zoom lens, the new telephoto zoom will immediately feel familiar. It’s obvious that Fujifilm wants you to buy this zoom as an extension to your already existing standard zoom. Both lenses offer the same key features: a manual focus ring, an aperture ring without engravings, a zoom ring, an optical image stabilizer (OIS) and fast/silent linear autofocus motors. Everything is located in the same place: There’s one switch to turn the OIS on and off, and there’s another one to toggle the lens between automatic and manual aperture settings. Design, build quality and used materials appear to be quite similar, as well.

Would you like to know more about what all those letters and numbers in XF55-200mmF3.5-4.8 R LM OIS actually mean? If that’s the case, you may want to read my article Decoding XF18-55mmF2.8-4 R LM OIS here on Fujirumors. Pretty much all information on the kit zoom lens is also applicable to the new telephoto lens.

** CLICK HERE to Read the Rest of the Article **