Using the XF14mmF2.8 R

by Rico Pfirstinger

Fujifilm kept their promise and started delivery of the new XF14mmF2.8 R wide-angle prime lens on January, 19. Many customers all over the web have already received their lens on Saturday, and I am one of them. So how’s the lens doing? Most of you will already have looked at my pre-production sample pics or may have read about how well the lens is optically corrected, so let’s focus on using the lens on your existing X-Mount camera.

14mmF2.8_R_FUJINON XF Lens

Updating the camera firmware

Let’s start with finding the new camera firmware that’s required to make all features of the lens work properly. It’s rather old school: The box contains an SD card (2 GB in my case) holding camera firmware upgrades for both the X-E1 and X-Pro1, named FWUP0001.DAT and FPUPDATE.DAT, respectively. Just insert the SD card into your camera (the card should be write-protected by default), then switch it on while pressing and holding the DISP/BACK button. Now follow the instructions on the display to update the camera body firmware. The new firmware versions supporting the 14mm lens are 1.03 for the X-E1 and 2.02 for the X-Pro1. Both versions will soon be replaced by a another upgrade from the global Fujifilm website, though.

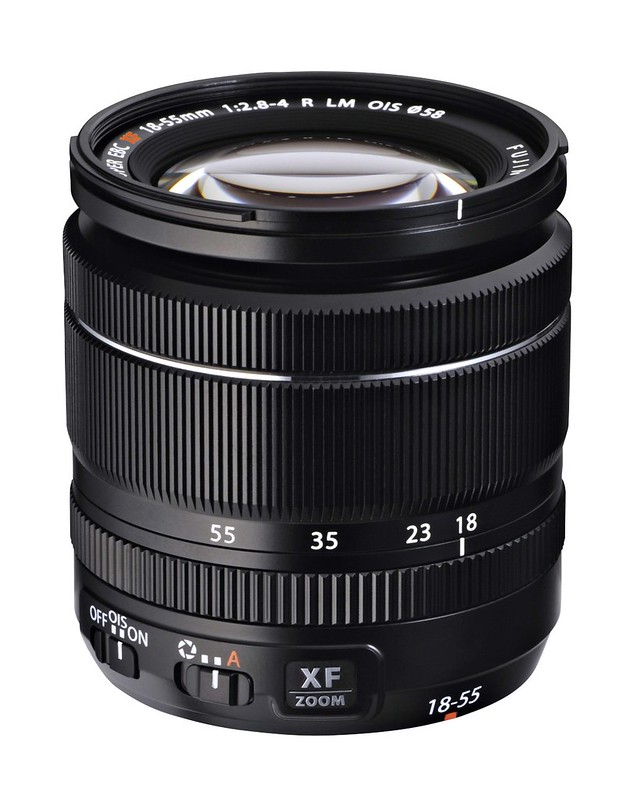
A recent Fuji guideline recommends not to have a lens attached to the camera while updating the camera body’s firmware. This is a reversal from previous policy and was specifically issued for the XF18-55mmF2.8-4 R LM OIS kit zoom lens, but I guess it won’t hurt to follow this new procedure with all current XF lenses.

Lens hood

You may have noticed that the hood that comes with the new 14mm lens is the same that’s coming with the kit zoom, so they are fully interchangeable. If you have space constraints in your equipment bag, you can just bring along one hood for both lenses, as you probably won’t be using both of them at the same time.

Focus ring

A unique feature of the 14mm lens is a new focus ring with engraved distance and DOF (depth-of-field) markings and hard stops at each end of the manual distance scale. In order to use the focus ring and see all markings, it has to be unlocked by sliding the ring backwards. Once you do so, the lens and the camera will automatically enter manual focus (MF) mode. Slide the ring forward to relock it. This returns the lens and the camera back to the mode that’s set on the camera’s own AF mode selector dial.

Please note that the AF-L button will not focus the lens with One-Press-AF when the focus ring of the lens is set to MF mode. However, you can still use One-Press-AF by setting only the camera to MF and leaving the focus ring of the lens in its AF position. Personally, I find this a bit complicated and would like to be able to use One-Press-AF when both the camera and the lens are set to MF.

Distance and DOF scales

With this new 14mm lens, you get two different distance/DOF scales indicating the depth-of-field and focus distance of a shot. Apart from the conventional “digital” distance/DOF scale in the camera’s viewfinder or LCD, there’s also an “analog” scale engraved in the lens. However, the digital scale in the viewfinder will disappear once you set either the lens or the camera to MF mode. This means we are getting no more distance or DOF readings while we are looking through the camera viewfinder or at the LCD.

This is the lens in MF mode, showing the analog distance and DOF readings. Yep, it really looks like in the old days…

DSCF6405

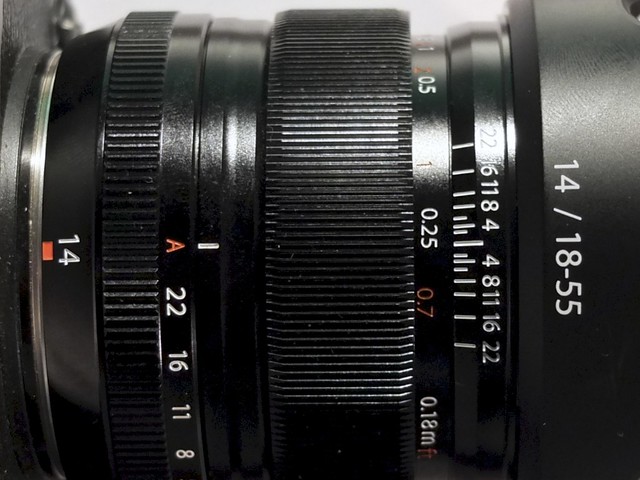
But wait, there’s more! The digital and analog DOF scales do not match. While the digital scale is still based on the camera’s established, very conservative circle of confusion (CoC) of about 0.005mm, the analog scale on the lens barrel uses a less strict CoC of about 0.01mm. The digital version of the scale is still available in both AF modes (AF-S, AF-C), but it disappears once the lens or the camera are set to MF mode.

Manual focus and “focus peaking”

When you enter MF mode (by sliding the focus ring back, or by selecting MF on the camera, or both), you can use the magnifier tool by pressing the camera’s command dial (aka thumb wheel). Turn the dial to the left or right to choose between a 3x or 10x magnification level. The 3x option offers a “poor man’s focus peaking” feature, as it crisply outlines edges of objects that are in focus. This feature isn’t really new (it was part of the X-Pro1’s version 2.00 firmware update), but it doesn’t work equally well with all focal lengths and magnification levels. However, it does work well with this 14mm lens and the 3x magnification option of the magnifier tool. So use it to your benefit, and don’t worry: It works just as fine with the EVF in the X-E1 as with the less sophisticated EVF in the X-Pro1.

Using the OVF

Speaking of the X-Pro1: The 14mm lens is compatible with the optical viewfinder in the X-Pro1! It just fits the full (aka 85%) frame of the OVF, and the lens is also supported by the camera’s AF field parallax correction when used in AF mode. Consider this when you are thinking about whether to buy this lens or the upcoming Carl Zeiss 12mm AF lens. With quite some certainty, the latter won’t fit into the optical viewfinder’s field of view.

Handling and usability

Using the XF14mmF2.8 R in manual focus mode may be a mixed bag for some users: While most will appreciate the “traditional” focus ring with its hard end stops and engraved distance and DOF markings, offering two different DOF displays based on two different circles of confusion may, well, confuse some less-experienced photographers. Of course, many users have asked Fuji for a less conservative DOF scale (especially for zone focusing purposes), so this was obviously a deliberate decision to accommodate such wishes.

Since there are no distance or DOF indicators displayed in the viewfinder or LCD once the lens or camera are set to MF, you have to use the readings that are engraved in the lens. That may be hard to accomplish while you are busy looking through the viewfinder trying to frame a shot, and the engraved numbers could be difficult to read in dark surroundings. So from a usability standpoint (and admittedly not being much of a zone focus guy), I’d be just as happy with the 14mm being a “conventional” XF lens like the previous models. But that’s just me.

Manual focus with the focus ring is still “fly-by-wire”, meaning there’s no helicoil. That said (I’m already hearing the moaning from the usual suspects), manual focusing feels smooth and direct. Quite obviously, Fujifilm meant this lens to be used for zone focusing in MF mode. This is how it works: Preset a suitable aperture, focus distance and DOF on the lens barrel, then forget about focusing while framing the shot in the viewfinder and hunting for the decisive moment.

Auto focus works pretty fast (no surprise at 14mm focal length), even though it’s only powered by a traditional AF motor with low noise emissions. Like the kit zoom, I’d consider this lens to be very well built and a joy to operate and handle. It’s light-weight, and it delivers stunning results. This, of course, is the most important aspect.

Happy shooting, and have a nice week!

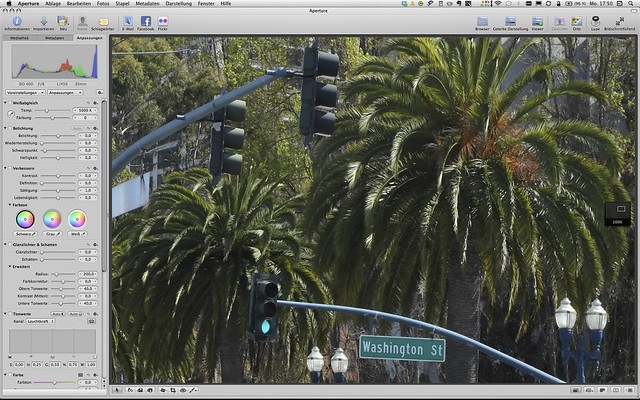
PS: I have just added a few more samples to my RAW converter comparison.

Rico Pfirstinger studied communications and has been working as journalist, publicist, and photographer since the mid-80s. He has written a number of books on topics as diverse as Adobe PageMaker and sled dogs, and produced a beautiful book of photographs titled Huskies in Action (German version). He has spent time working as the head of a department with the German Burda-Publishing Company and served as chief editor for a winter sports website. After eight years as a freelance film critic and entertainment writer in Los Angeles, Rico now lives in Germany and devotes his time to digital photography and compact camera systems. His book “Mastering the FUJIFILM X-Pro1” (Kindle Edition) (Apple iBook Store) (German version) is available on Amazon and offers a plethora of tips, secrets and background information on successfully using Fuji’s X-Pro1 and X-E1 system cameras, lenses and key accessories.

Decoding XF18-55mmF2.8-4 R LM OIS

by Rico Pfirstinger

Today’s scheduled Fujifilm X-Mount camera and lens firmware update would have been a great opportunity for an X-PERT CORNER article with some practical tips for updating your gear. Alas, the update has been postponed in order to address another glitch. Hopefully, we’ll see the update soon and can cover it in next week’s edition of this column.

Before we take-off with today’s little “ersatz topic”, let me point you to my recent article comparing several RAW converters that are suitable for X-Trans sensor cameras like the X-Pro1 and X-E1 (and soon X100S and X20). Since that article was first published on January 15, I have added a few more samples and another RAW converter to the equation: Russian-made RPP. So if you haven’t already done so, feel free to check-out the updated (pun intended) version by clicking here. You might also want to scroll down to the article’s comment section, as it contains several interesting user additions and a little Q&A.

In case you didn’t get the memo: Delivery of Fuji’s new XF14mmF2.8 R wide-angle prime lens appears to be imminent. Those who are interested in this lens can have a look at over 20 sample shots I have taken with a pre-production model of this lens. And click here for a brief article illustrating how well-corrected this lens appears to be by optical (aka non-digital) means. Fuji may have another winner here.

Speaking of imminent delivery, “Mastering the FUJIFILM X-Pro1” is finally shipping physically and electronically. Yay! It was about time. In case you were wondering, the book is just as valuable for users of the X-E1. Since I am writing and publishing all my articles on FUJIRUMORS (and other sites) for free, my only form of compensation is actually you guys buying (and hopefully liking) the book. Just sayin’.

Enough with the advertising! Apart from the new 14mm prime, one of the most pleasant surprises I experienced last fall was Fuji’s “kit zoom” lens, also known as the FUJINON XF18-55mmF2.8-4 R LM OIS. Wow, what a name! And what a lens! Certainly not your typical “kit zoom”, even though it’s often bundled with the X-E1. Let’s have a look at what each portion of the long name actually means.

XF

This is a no-brainer and simply means that the lens is suitable for X-Mount cameras from Fujifilm. X-Mount is a new bayonet with very little flange-back: only 17.7mm. Flange-back is the distance between the lens mount (where it sits on the camera body) and the camera sensor or film. This is why you can pretty much adapt almost every existing 35mm (aka “full-frame”) lens to your X-Mount camera: All those other lenses feature longer flange-back distances, hence leaving some space for an adapter ring.

X-Mount has no mechanical transmission/communication between the camera and the lens, so everything is performed electronically. Setting aperture and focus is performed through “fly-by-wire”, too, even though all current XF lenses have dedicated aperture and focus rings. Zooming with the zoom ring is fully mechanic, though.

18-55mm

This part of the name tells us the focal length range of the zoom. The lens offers anything between 18mm and 55mm, which corresponds to about 27-84mm in “full-frame” terms, or an angle of view between 79.1° at the 18 and 28.4° at the 55mm setting.

F2.8-4

This is the largest aperture opening (aka maximum aperture) the lens is offering. The range of 2.8-4 means that the maximum opening is not the same throughout all available focal lengths. It’s varying between f/2.8 at 18mm and f/4.0 at 55m. At 23mm, the maximum aperture of this lens is f/3.2, and f/3.6 at 35mm.

Since the maximum aperture opening of this zoom lens is variable, the aperture ring is not displaying any f-stop markers. By the way, variable aperture is not necessarily an attribute of “cheap design” or “non-professional”. For example, Leica’s standard zoom for their professional S system is a 30-90mm/F3.5-5.6 lens and sells for about 9,000 Euros. So much for “cheap design”.

R

R stands for ring, meaning the lens features a dedicated aperture ring. Since all current XF lenses have aperture rings, this feature has often been overlooked or confused with the rounded aperture blades of many current Fuji lenses. And yes, our “kit zoom” has those rounded blades, as well, in order to achieve fully circular bokeh rings in out-of-focus areas. The R also means that future (probably cheaper) XF lenses may come with no aperture ring. The aperture of such lenses can of course still be manually set by turning the camera’s thumb wheel (aka command dial). Thinking about that, cheaper entry-level XF lenses may also require cheaper, entry-level X-Mount cameras, so the R may just as well stand for rumor.

LM

LM describes the linear motor of the the AF drive. It suggests that the auto focus of this lens is operating particularly fast. You can read some marketing blah about all this on Fujifilm’s official XF lens website. Practically, the LM means the lens adjusts its AF pretty fast, while operating very silently.

OIS

OIS means optical image stabilizer. If you have clicked on the link mentioned above, you already know that the OIS is “checking camera shake 8000 times every second”. That’s nice to know, but what’s the real deal? Fuji claims that the OIS is good for compensating up to four f-stops of camera shake. This means that if you can hold a crisp and steady shot at 55mm without using the OIS at 1/80s, the same shot should (or at least could) be almost as crisp at 1/5s with the OIS turned on. Four stops maybe sounds a bit too optimistic, but on the other hand, one of my first sample shots using an early pre-production sample of the kit zoom was this one, taken in a fast moving commuter train at 1/10s:

DSCF4013

Pretty impressive, huh? Now, there are two different OIS modes, mode 1 and mode 2. You can select a mode in the shooting menu of your X-Pro1 or X-E1. Mode 1 is steadying the lens all the time (like when you are looking through the EVF), mode 2 is only doing this while you actually take the shot. So there’s reason to believe that mode 1 burns a little bit more energy than mode 2. However, that effect is probably marginal, as the OIS system is always operational, even when you turn it off using the OIS ON/OFF switch located on the lens barrel. This is not uncommon, by the way. Think of it like a hovercraft, whose engine has to be up and running to keep it afloat, even when it is not going anywhere.

There were reports about annoying high-pitched noise emissions coming from the lens in OIS mode 2 while focusing with the AF, especially at very low temperatures. This has been fixed with a recent firmware update, so if you are still experiencing this effect, you may want to check whether you are using the most recent lens firmware.

In theory, both OIS modes should be equally effective, though earlier tests with older Fuji cameras with a built-in OIS have shown that statistically speaking, mode 2 returned a higher percentage of “keepers”. Feel free to spend part of an afternoon checking this out by yourself. And don’t forget to turn the OIS off once you operate the camera on a tripod.

Till next week, then hopefully covering the postponed minor X-Mount camera and lens firmware update.

Rico Pfirstinger studied communications and has been working as journalist, publicist, and photographer since the mid-80s. He has written a number of books on topics as diverse as Adobe PageMaker and sled dogs, and produced a beautiful book of photographs titled Huskies in Action (German version). He has spent time working as the head of a department with the German Burda-Publishing Company and served as chief editor for a winter sports website. After eight years as a freelance film critic and entertainment writer in Los Angeles, Rico now lives in Germany and devotes his time to digital photography and compact camera systems. His book “Mastering the FUJIFILM X-Pro1” (Kindle Edition) (Apple iBook Store) (German version) is available on Amazon and offers a plethora of tips, secrets and background information on successfully using Fuji’s X-Pro1 and X-E1 system cameras, lenses and key accessories.

Comparing RAW converters: JPEG vs. Lightroom, Capture One, Silkypix & RPP

by Rico Pfirstinger

NOTE: This article has been edited to add Raw Photo Processor (RPP) and Lightroom 4.4RC to the comparison.

Yesterday, Richard Butler of DPREVIEW fame published an article comparing several X-Trans compatible RAW converters. You can download the RAW file of this demo shot yourself by following the link above. Just scroll down to the end of the DPREVIEW article.

This is an X-Pro1 in-camera JPEG of the original demo shot that was used in the article.

DPR Tram DR200% Astia (in-camera JPEG)

You can click on the image for larger views including full-size. Strangely enough, Richard used a DR200% shot (= a RAW that is underexposed by 1 EV) and film simulation mode Astia. Since Astia offers a different color gradation and more shadow contrast than the camera’s standard (default) Provia setting, this version of the demo image is actually not very suitable for comparing external RAW converters with their respective default settings, which will typically try to mimic the camera’s default settings and look. So let’s do a better job, shall we?

This is the same file as before, now developed in-camera with the X-Pro1’s Provia film simulation mode, using the camera’s default JPEG settings:

DPR Tram DR200% Provia (in-camera JPEG)

Again, click on the image to get to larger views on Flickr. As the demo shot was taken in DR200%, the camera’s internal RAW converter automatically adjusted shadow tones and darker midtones to compensate for the RAW’s -1 EV underexposure, while leaving the highlight tones intact (click here for a more elaborate discussion of how to extend dynamic range). As you can see, Provia offers less shadow contrast than Astia, so the shot looks a bit flatter and also “less sharp”, because increased contrast will give a (false) impression of increased sharpness. So let’s forget about the Astia JPEG shown in the DPREVIEW article. Let’s instead make this Provia JPEG our reference image and compare it with the results of three external RAW converters: Lightroom 4.3, Capture One 7.0.2 (release version) and Silkypix 5.

Here’s a screenshot showing a 100% crop of this Provia JPEG. Click on it to go to Flickr for a full-size viewing option:

DPR Tram DR200% Provia detail screenshot

Now that our benchmark image is established, let’s have a look at its Lightroom 4.3 version. Lightroom/ACR recognizes the camera’s DR settings (stored as metadata in the RAW file) and automatically compensates (at least partially) for it in its default import settings. Again, click on the pic for larger views:

** CLICK HERE to Read the Rest of the Article **

XF14mmF2.8 R appears to be almost distortion free

by Rico Pfirstinger

I may have found some interesting news about the 14mm prime. Comparing the uncorrected version of a shot with its software corrected SOOC JPEG version reveals that Fuji’s new XF14mmF2.8 R prime lens is apparently almost perfectly optically corrected. This means that the lens doesn’t really need any substantial software corrections which typically have a negative impact on image quality, particularly near the edges of an image.

Have a look at this example (click on the images for high-res versions):

DSCF6742 - RPP (no lens correction)

DSCF6746 - SOOC JPEG

The image above was developed in RPP 64, a Russian RAW converter based on DCRAW that does not interpret or apply any optical correction metadata that the camera is storing in a RAW files.

The image below is a JPEG straight out of the camera that includes all software corrections in the metadata, since the internal RAW converter of the cameras does of course interpret and apply optical correction metadata stored in the RAW files.

It appears that there are only minimal differences between both versions. This suggests that the 14mm is already fully corrected in the lens and does not need any significant additional software corrections. This is good news, as it suggests that the lens (the examples are from a not yet fully suppoerted pre-production sample) will perform well not only in the center, but also near the edges of an image.

EDIT: To wrap things up, here’s also a Silkypix 5 version of this sample:

DSCF6742 - SIlkypix 5

Since Silkypix is actually using lens correction metadata in the RAW file, this result pretty much overlaps with the SOOC JPEG.

If you want to see more 14mm samples, have a look at my Flickr set.

Rico Pfirstinger studied communications and has been working as journalist, publicist, and photographer since the mid-80s. He has written a number of books on topics as diverse as Adobe PageMaker and sled dogs, and produced a beautiful book of photographs titled Huskies in Action (German version). He has spent time working as the head of a department with the German Burda-Publishing Company and served as chief editor for a winter sports website. After eight years as a freelance film critic and entertainment writer in Los Angeles, Rico now lives in Germany and devotes his time to digital photography and compact camera systems. His book “Mastering the FUJIFILM X-Pro1” (Kindle Edition) (Apple iBook Store) (German version) is available on Amazon and offers a plethora of tips, secrets and background information on successfully using Fuji’s X-Pro1 and X-E1 system cameras, lenses and key accessories.

How to Expand Dynamic Range

X-T1 giveaway contest ends very soon (March 14th 2014 at 2PM NY-time). hurry up and join it here.

_ _ _

by Rico Pfirstinger

It appears like two thirds of our X-PERT CORNER readers wanted to know more about dynamic range (DR) expansion. So here we go! Does the following scenario sound familiar? You take a picture of a landscape that looks wonderfully beautiful to the naked eye, only to find out later that the blue sky no longer looks blue and the fascinating cloud formations are just white blobs. The reason for this and similar disappointments is that the scene captured in the image has a larger dynamic range than your camera.

Every camera sensor is capable of capturing only a certain range of luminance—that is, a limited range between the brightest and the darkest parts of an image. The X-Pro1/X-E1’s range covers about 9.5 f-stops or exposure values. In other words, there are 9.5 EV between the minimum amount of light required for the sensor to depict something more than black pixels and the maximum quantity of light beyond which the sensor registers white pixels. This is the dynamic range of the camera. Within this range, the X-Pro1 or X-E1 can depict levels of brightness between pure black and pure white.

“Hardware” solutions

Unfortunately the world doesn’t abide by these limits, and many subjects exhibit a larger dynamic range than the camera is capable of capturing. We see these limitations, for example, in backlit situations and when people are standing in the shadow of an entrance. Professional photographers (and film directors) reduce the dynamic range of their subjects by using additional light. That’s why you’ll see an entire arsenal of floodlights and reflectors on large film sets even on bright days.

Only the luckiest photographers have the luxury of elaborate lighting equipment. Most of us have to make do with natural lighting, which often produces contrast in our subjects that exceeds a range of 9.5 EV. When you try to photograph these subjects with your X-Pro1, your images will either have blown-out white areas or blocked-up shadows, regardless of the combination of aperture and shutter speed you use. They may even have both! Contrasts that the human eye (or more accurately, the human brain) seems to process without any trouble pose near-impossible challenges for even the best cameras.

Then again, even a setup with studio lighting can involve plenty of dynamic range, that’s why I shot the following SOOC (= straight out of camera w/o further post-processing) JPEG in February 2012 in Warsaw using the DR Auto function of my pre-production X-Pro1. The camera chose DR400% and preserved the highlights of the skin (which was illuminated by daylight coming through a train window on the right). Click on the image for a high-res version:

DSCF2502

But let’s get back to hardware: You can also use a graduated neutral density (ND) filter to decrease the dynamic range of a scene, typically a landscape. The top half of such a filter is dark and the bottom half is clear. The dark area is placed over a scene’s high-intensity region, such as the sky. Though this doesn’t increase the fixed dynamic range available in the sensor, it stretches usable dynamic range in practice.

Or you could use a camera with an EXR sensor, like the X10 or the X-S1. Then again, interest in getting to know more about EXR appears to be lackluster, as the number of votes for an “EXR Special” of this column is still ranking below 1000. Maybe this will change over the weekend? Here’s the poll, again:

Do you agree with the position of Fuji about IBIS?

View Results

Loading ... Loading ...

The following SOOC JPEGs from my X10 were taken in South Africa and show how EXR cameras can handle subjects with plenty of DR (click on the images for high-res versions):

** CLICK HERE to Read the Rest of the Article **