Fujifilm X-T2 Settings for Wedding Photography

Why write about Fuji X-T2 settings?
GUEST POST FEATURE
Write Your Articles Directly On FujiRumors!
Guest Post by Andrea Bagnasco – Website / Facebook / Instagram.
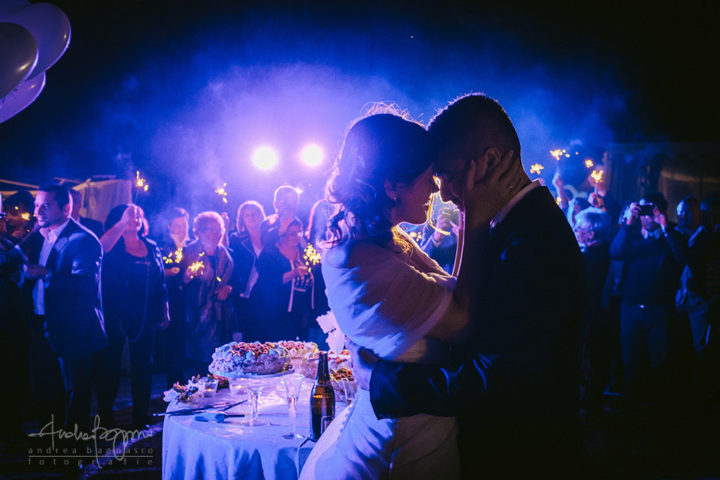
This brief article is to share my Fuji X-T2 settings for wedding photography and I hope you’ll find it useful.
I switched from Canon to Fuji for my wedding work because I was looking for a lighter, more portable alternative to my DSLR’s that wouldn’t wear me and my back out during the marathons that have become wedding shoots. Weight was becoming a serious issue for me with my Canons and thankfully this last generation Fuji APS-C X-Trans sensor seems to perform well enough in terms of resolution, noise (lack of), latitude and high ISO capabilities to output excellent results in a light and compact package: small sensor means small lenses and all that comes with it. Also, with this last iteration Fuji X cameras have gotten a lot better in terms of controls (exposure compensation dial and focus point selection joystick above all), features (double memory slot) and software and have become great tools suitable for professional use during weddings.
What happened then is, I switched for the size and weight and got hooked by the shooting experience. These Fujis are really fun to use and – once you get used to them – they are also practical and quite functional. These cameras are very versatile and offer a lot room for customization. Depending on your style of shooting and type of photography, there’s a lot to work on as far as setting up the cameras to get them to perform in a way that is suitable to you, your work flow and the results you’re after.
My wedding photography gear
I moved my first steps in photography back in the mid ’80s with a Nikon FM2 and coming from there I was drawn to the X-T1 form and layout as soon as it came out, so now I’m shooting with a pair of X-T2 bodies and a X100F as backup. As far as lenses are concerned, I’m using (wide to tele) a 12mm f/2 Samyang manual focus and the Fujinon 16mm f/1.4, 23mm f/1.4, 35 mm f/1.4 and 56mm f/1.2. I might be looking into the 90mm f/2 sooner or later, but for the time being I’m ok with those 5 lenses. I’m also bringing with me a Nissin i40 flash to use either on the hot shoe or with a Canon TTL cord and a Canon 580 EXII and a pair of Cactus V6s remotes in case I need a bit more power for anything off camera.
Basics of my wedding photography workflow
I shoot everything C-RAF, i.e. Fuji’s compressed RAW format and save two C-RAF files to the two SD cards in parallel. I always want a real backup as soon as I shoot a picture, so saving RAW + JPG doesn’t quite cut it for me. I download and cull the files via Photo Mechanic software and edit the RAWs into Lightroom or Capture One Pro (I’m using one or the other depending on the job). I export the images from the RAW converter as maximum quality jpg’s with no grain added. Then, I do some editing with Photoshop on selected images (cloning out the occasional trash bin or exit sign), add grain both to color and black and white with DxO Film Pack and, as a final step I run all images through JPEGmini PRO, that saves me storage space both on my hard drives and on the cloud.
Camera settings
As a general note, what comes next is the way I use my X-T2 cameras. It’s not meant to be right nor wrong, it’s just the way I do things and how it works for me. There’s more than one way to skin a cat, so your mileage may vary.
Image quality
As mentioned, the X-T2 is a very versatile camera that can be customized in several different ways. Since I shoot (compressed) RAW for my wedding work and do all image processing during post production, I get the camera to output a flat file that I can later work on. Therefore I’m not interested in setting anything in camera such as white balance (use Auto WB), highlights or shadows tone, color or sharpness.
Function Button Settings
What I love about this camera is the ability to assign a user defined function to each function button (TIP: keep the DISP/BACK button pressed for 3 sec to access the related menu).
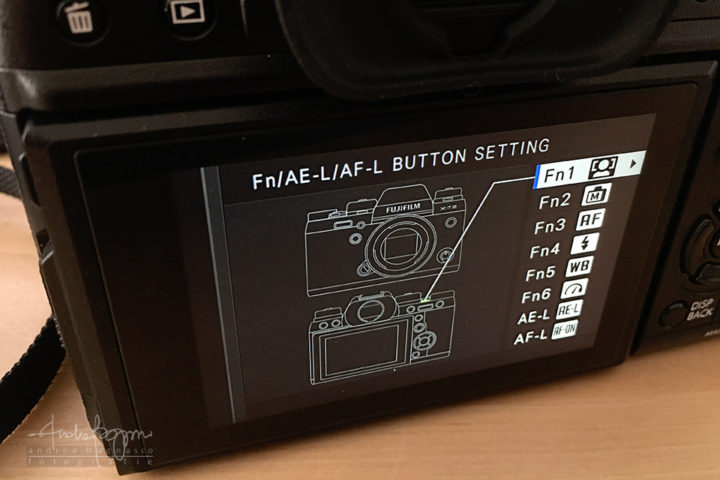
My buttons are set as follows:
Fn1: face/eye detection – having this handy is particularly useful especially when I’m shooting small groups or when I’m shooting portraits of the bride with shallow depth of field. The eye detection works very well in this respect.
Fn2: preview exp. comp/ WB in manual mode (this is particularly useful when I’m working with a off camera flash, such as in studio)
Fn3: AF Mode (single point / zone / wide)
Fn4: access to flash menu
Fn5: access to white balance menu, for those rare times when I shoot jpgs
Fn6: performance boost mode toggle
AE-L: exposure lock
AF-L: autofocus on
Autofocus and Drive
I’m most of the times relying on the 91 focus point matrix as I’m rarely taking pictures of objects or people in random movement, so I prefer to have fewer points to choose from and eventually being able to skip very quickly from one part of the frame to another using the selection joystick. For slowly moving or still subjects I may simply use the central focus point (TIP: this is readily accessible simply by pushing the joystick twice) and recompose. I’m living most of the time in single focus point, single focus mode and single shot drive mode, even though I might use the zone focus mode in some instances (i.e. during processionals, as the subject is moving towards me) and continuous focus mode. Even in such cases I’m most of the times still using the single shot drive mode and using the AF-L button to track my subjects.
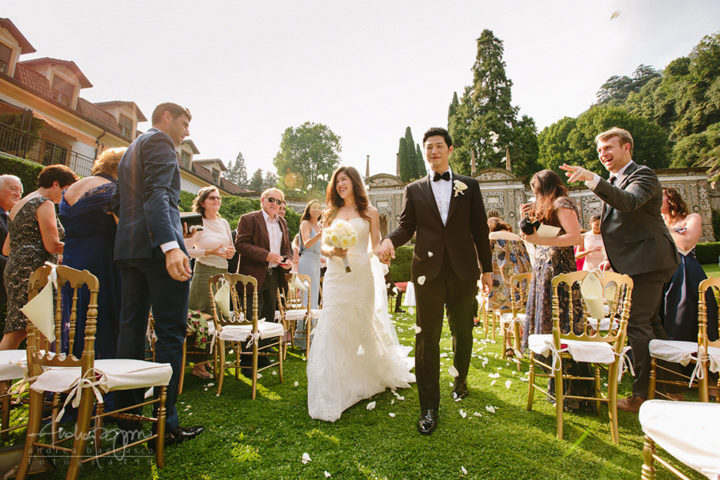
I may be using the continuous shooting mode when chances are high that my single shot is disturbed for any reason, e.g. when there’s other people shooting my same subject using flash, which seems to unfortunately be often the case during wedding processionals, for instance. In such cases the chances that my single shot is ruined by some uncle Bob’s flash are not negligible, so I may shoot short bursts to make sure I get something good before and after uncle Bob’s flash has fired. In general, the X-T2’s autofocus works well and is quite reliable and I recommend everybody to invest some time to read the manual and learn how to use it properly. Fuji has a specific website dedicated to autofocus and it’s worth visiting.
Shutter
I keep the shutter type set to M+E (manual + electronic) as it’s just too handy to have the camera automatically switching to Electronic shutter. One word of advice needs to be spent as in Electronic shutter mode there might be rolling shutter effect when taking pictures of fast moving objects, due to the sensor readout time. Other than that, the electronic shutter allows for wide apertures in full sunlight even without a ND filter.
ISO Settings
Unless I’m using flash, I live in Auto ISO all the time. I like the fact that the camera allows for three different auto ISO settings, that I can switch depending on the shooting conditions. My settings are as follows: ISO base 200 / ISO limit 12800 / shutter 1/125 or 1/100 or 1/80. Up to 12800 ISO the camera outputs very usable files, especially when the scene has sufficient contrast. I find that the luminance noise of the Fuji sensor has a very organic look, so I tend to keep luminance noise reduction down to a minimum in post production.

Chromatic noise needs a bit more care, especially in shadows, even though the overall level of chromatic noise is very acceptable and can be taken care of with minimal noise reduction. Overall I find the files to be cleaner than the ones of my Canon 5D3’s, and with bigger latitude and related freedom to push and pull when needed.
Exposure Compensation and Metering
For my way of working, one of the most welcome features of the X-T2 is the exposure compensation front wheel. I keep the exposure compensation dial on the ‘C’ position all the time and simply adjust compensation (+/- 5EV!) from the front wheel. I never use the front wheel to adjust aperture, as all my lenses come with very handy aperture rings. With the EVF, being able to preview actual exposure is for me a game changer. I’m working in Aperture priority most of the time and adjusting exposure via the exposure compensation front wheel is a breeze and extremely intuitive. To make sure that what I’m seeing in the EVF is actually what I’m getting I always keep the live histogram visible in the viewfinder and keep checking that to finally set exposure. Likewise I find metering mode selection not to be determining as it is on a DSLR. I just seem to live in multi metering mode all the time.
Final Remarks
Hopefully I’ve covered most of the useful stuff to know. There’s a ton of other options that can be set in this camera but as far as the basics I think I’ve given full disclosure of the way it works for me. I find the X-T2 to be wonderful camera and a game changer for wedding photography (maybe not only that). There are some things that still leave me wishing, e.g. a way to switch between viewfinder + eye sensor and LCD display without having to cycle through all the options with the oddly positioned button next to the shutter speed dial, but coming from the X-T1 and having seen the amazing improvements of the X-T2 over the previous camera, I can only imagine what will be given to us with the X-T3. I’ve said it before and I’ll repeat it: the DSLR monarchy is quickly coming to an end…
I really hope you enjoyed this article, please feel free to ask any questions, to get in touch directly and to follow me on social media, especially on Facebook and Instagram.
Andrea Bagnasco is a documentary wedding photographer based in Italy. He’s DxO Image master and affiliated with Fearless Photographers, ISPWP (International Society of Professional Wedding Photographers) and ANFM (national association of wedding photographers of Italy). He’s been listed in the top 100 international wedding photographers by SRL Lounge in 2016. Website: https://www.andreabagnasco.it
Guest Post by Andrea Bagnasco – Website / Facebook / Instagram.