First Look Review: Fujinon GF250mmF4 R LM OIS WR


Reaching Out: GF250mmF4 R LM OIS WR
The new GF250mmF4 R LM OIS WR and the optional GF1.4x TC WR teleconverter lens bring genuine telephoto capability to the evolving Fujifilm GFX medium format system. Featuring impressive detail resolution and three-dimensional subject rendering, the rather moderately priced GF250mm equals a 198 mm lens in 35 mm “full-frame” terms, and its reach can be stretched to 350 mm by attaching the new 1.4x teleconverter. Fujifilm’s GF product introductions are completed by two macro expansion tubes that work with almost all existing GF lenses and can turn the GF120mmF4 into a true 1:1 macro lens.
So is it all worth it? You should be able to decide for yourself after reading this first-look review based on pre-production samples of the GF250mmF4 R LM OIS WR, GF1.4x TC WR, MCEX-18G WR and MCEX-45G WR.
_ _ _
Fujinon GF 250mm F4: BHphoto, Adorama, AmazonUS
Fujinon GF 1.4x Teleconverter: BHphoto, Adorama, AmazonUS
18mm Macro Extension Tube: BHphoto, Adorama, AmazonUS
45mm Macro Extension Tube: BHphoto, Adorama, AmazonUS
_ _ _
by Rico Pfirstinger
The new GF250mmF4 R LM OIS WR is an impressive lens with an impressive size, so I was surprised to learn that it looks heavier than it actually feels. At approx. 1.4 kg, it certainly doesn’t fit into the “lightweight” category, but I could easily handle it without a tripod, and using its built-in 5 stop optical image stabilizer (OIS), I accomplished hand-held shots as slow as 1/20 s with perfectly pixel-sharp results. That’s pretty good for a lens with a 35 mm “full-frame” equivalent of 198 mm and an angle-of-view of merely 12.5 degrees.

The new GF250mmF4 R LM OIS WR, shot with an XF80mmF2.8 R LM OIS WR Macro on my X-H1
Tripod Or Not?
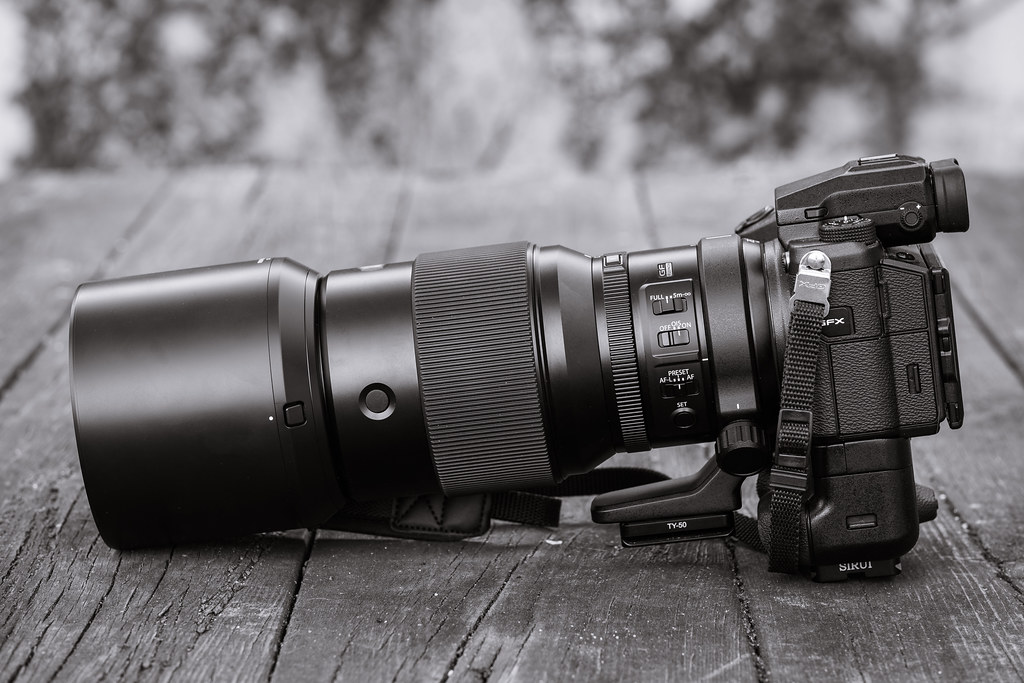
I didn’t use the lens on a tripod during my two-and-a-half weeks of playing with a pre-production copy, but I usually opted to put it on a carbon monopod. This allowed me to comfortably shoot from lower angles using the camera’s up-tilting rear LCD screen. To facilitate this, the GF250mm comes with a detachable tripod/monopod collar which can be single-handedly removed in a matter of seconds. As usual, you can loosen the holding screw and rotate the camera-lens combo in the collar to quickly change between landscape and portrait orientation.
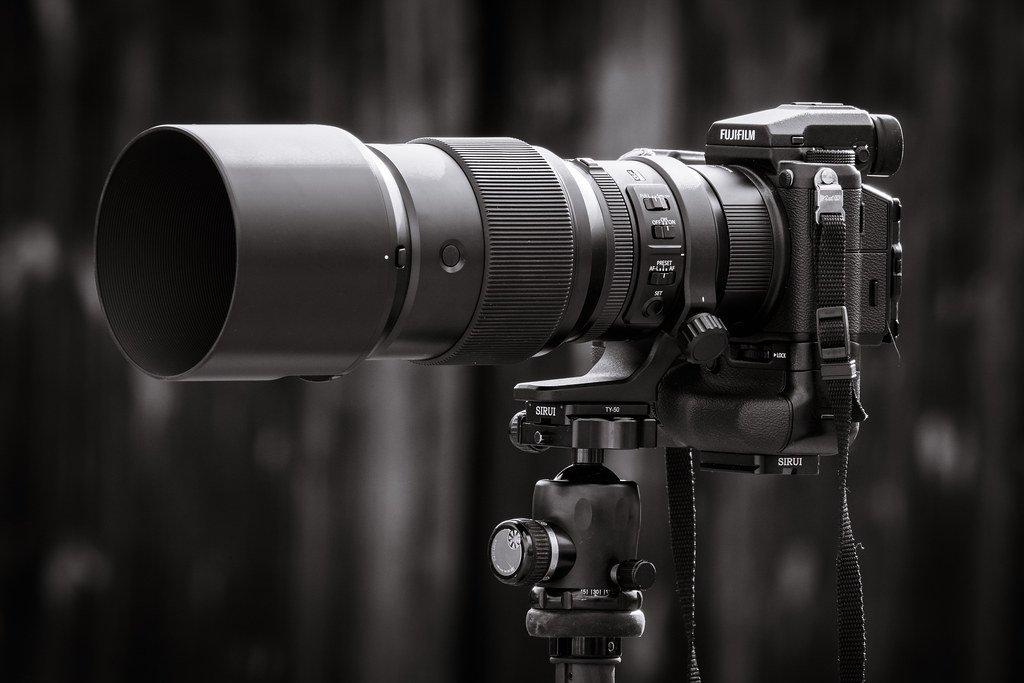
My GFX 50S with the GF250mmF4 R LM OIS WR and the GF1.4x TC WR teleconverter mounted on a tripod for staging purposes. While my standard Arca Swiss plates from Sirui fit well under the tripod collar, I assume that Fujifilm will offer their own Arca-type plate as an accessory, like they did for the XF100-400mmF4.5-5.6 R LM OIS WR (which incidentally is the lens I used to take this picture).
Optional 1.4x Teleconversion Lens
You can attach a new GF1.4x TC WR teleconverter lens to extend the focal reach of the GF250mm to 350mm (or 277mm in “full-frame” terms). This will of course cost you one aperture stop, turning the GF250mm into a powerful, yet compact GF350mmF5.6 contraption.
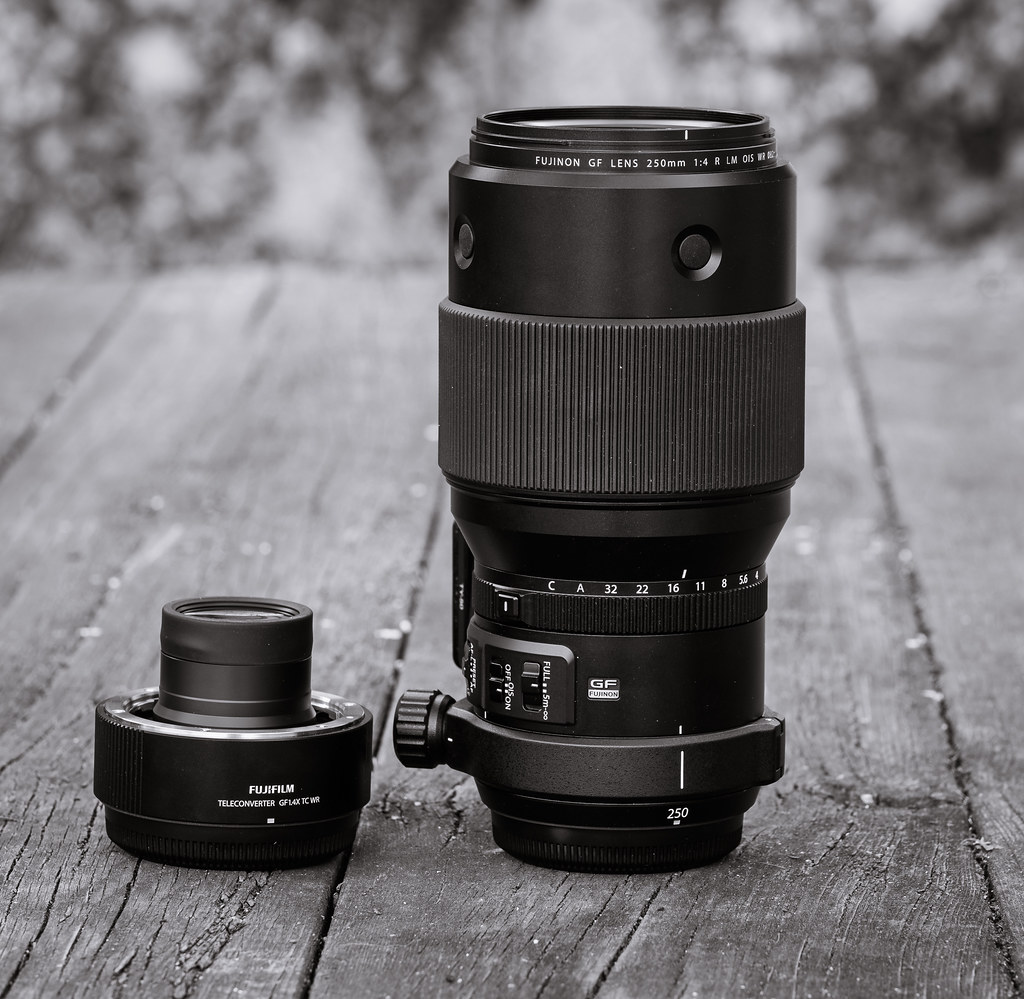
Like its smaller X-mount siblings, the GF1.4x TC WR protrudes deeply into the rear barrel of the host lens, disguising much of its own size when it’s sandwiched between a camera and lens. Sadly, this also means that the converter is currently only compatible with the GF250mm – and not with any of the six legacy GF lenses. However, Fujifilm hinted that future lenses might be working, too. Maybe a telephoto zoom?
The TC clocks in with an extra weight of 400 g, which is understandable considering that it is built of 7 elements in 3 groups. The GF250mmF4 is also a rather complicated prime design, featuring 16 elements in 10 groups (with 2 ED and 1 Super-ED element), including a refreshingly fast inner-focus mechanism driven by linear motors (hence the “LM” in the name).
Switch It, Baby!
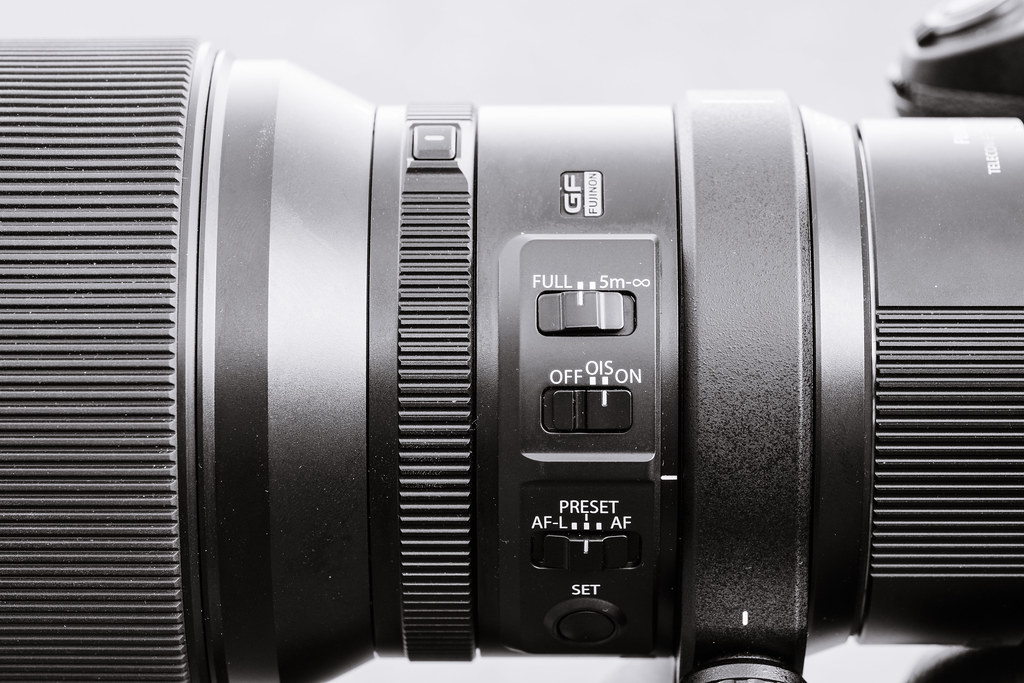
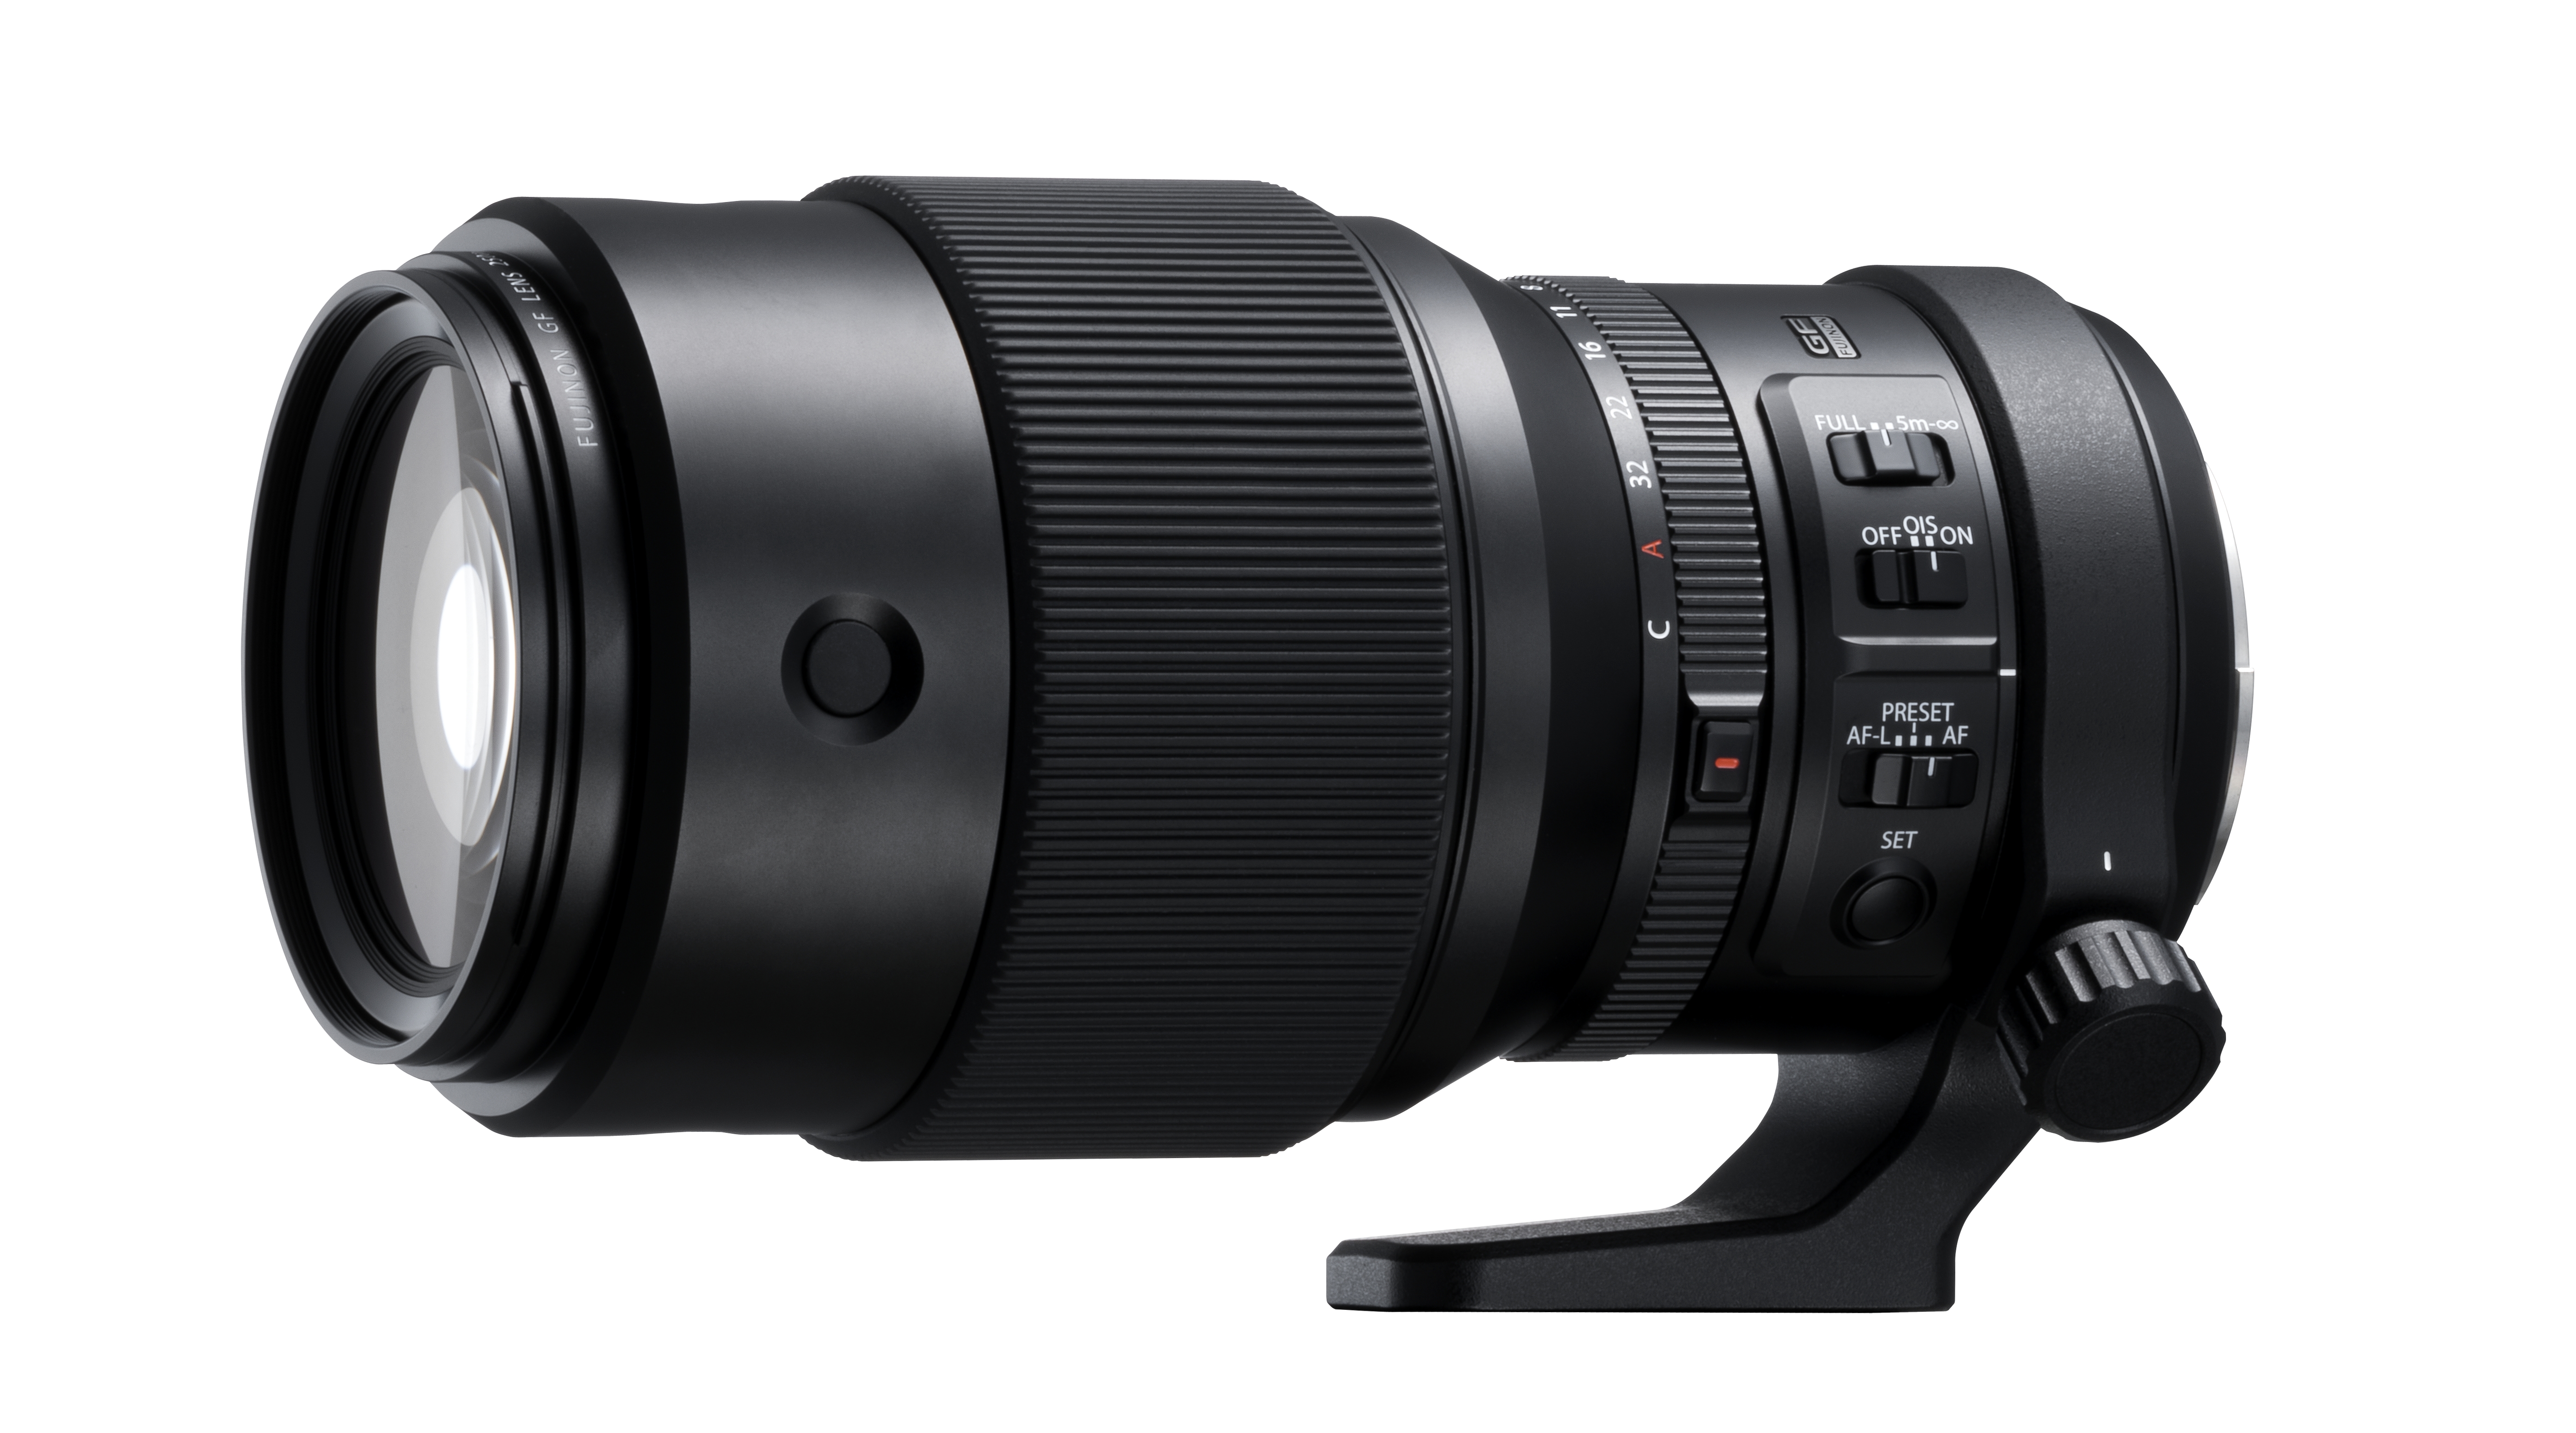
Switches on the side of the lens barrel include a focus limiter, OIS on/off control and a selector switch to configure the 4 identical Fn buttons on the far end of the barrel (behind the focus ring). There, you have a choice been AF-L, AF-ON and recalling a preset focus distance that you can save with the SET button.
The four unmarked Fn buttons are evenly distributed around the far end of the barrel, right behind the focus ring. This means no matter how you hold the camera and where your left hand happens to be located on or near the focus ring, there’s always at least one Fn button in reach. To use the Fn functions, the GFX 50S requires at least firmware 3.10, which will be available along with the new lens by the end of May 2018.
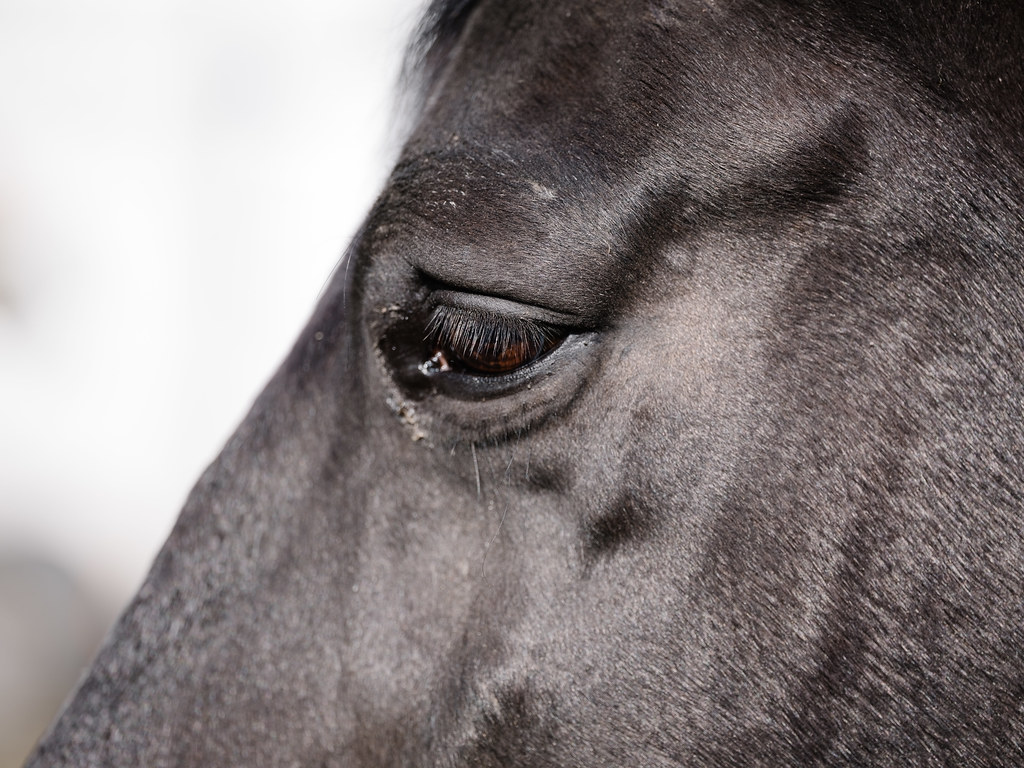
A maximum aperture opening of f/4 may sound unspectacular at first, but if you closely examine this sample at 100% on Flickr (click on the pic), you’ll see that depth-of-field is very limited, with only a part of the eyelash being in pixel-sharp focus. And that’s with just a 51 MP sensor. The next iteration of the GFX is expected to have twice as many pixels, and the GF250mmF4 is certainly ready for that.
Autofocus Performance
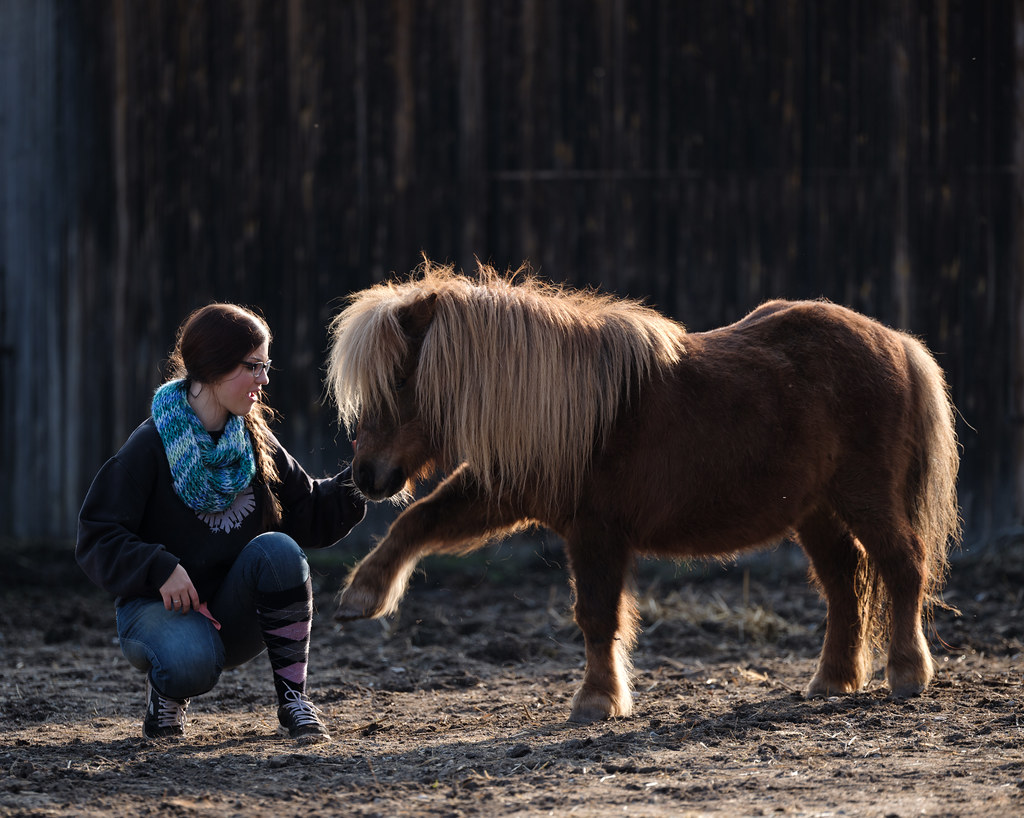
Autofocusing the GF250mm works pretty fast, even in the extended 350mm configuration. Under typical shooting conditions, I never felt like I was waiting for the camera to focus or missing a shot. Instead, I was able to shoot extended series of test samples with very high focusing accuracy, always capturing the moment. For a lens of this size, working with it was quite relaxed and confident.

Capturing the moment in AF-S mode was easier than expected thanks to the good AF response based on a fast inner-focus mechanism. Click on the images for full-size versions on Flickr.
Focusing performance can be further enhanced by employing the built-in focus limiter, where you can restrict the focus search distance from 5 m to infinity. In its regular full-range mode, the lens will focus down to the minimal focus distance of 1.4 m, which translates to a magnification of 0.22x (or approx. 1:5). If that’s still not enough, you can combine the GF250mm with one of the two new macro extension tubes.
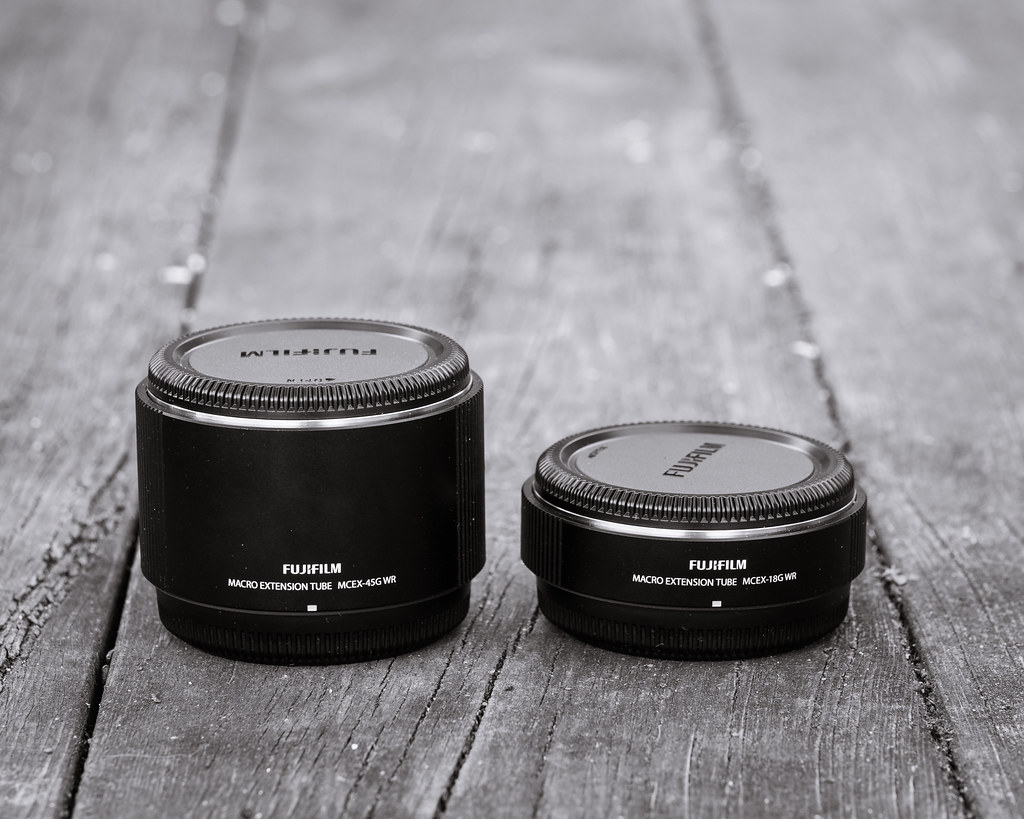
Unlike the GF1.4x TC WR, the new MCEX-18G WR and MCEX-45G WR macro extension tubes can also be combined with existing GF lenses. According to Fujifilm, the 18 mm version is the smallest possible size that meets the structural requirements, while the 45 mm tube was designed to add 1:1 magnification to the GF120mmF4 R LM OIS WR Macro lens.

Combining the GF250mmF4 with the smaller MCEX-18G WR macro extension tube allowed me to break the MFD barrier of 1.4 m and get closer to my subject. Even in this unusual configuration, the results look perfectly sharp up to the edges. Click on the images for full-size versions on Flickr.

***
 Everything You Always Wanted to Know About X, But Were Afraid to Ask
Fujifilm “X-Pert” Rico Pfirstinger, the author behind Mastering the Fujifilm X-E1 and X-Pro1, The Fujifilm X-E2: Beyond the Manual, The Fujifilm X-T1: 111 X-Pert Tips, The Fujifilm X-T10: 115 X-Pert Tips, The Fujifilm X-Pro2: 115 X-Pert Tips, The Fujifilm X-T2: 120 X-Pert Tips, The Fujifilm X-T20: 125 X-Pert Tips and The Fujifilm X100F: 101 X-Pert Tips knows the answers (use code XPERT40 for a 40% discount). Rico teaches about the little-known capabilities and features of Fujifilm’s X series, which he’s discovered through years of in-depth research and experimentation. Rico cuts to the chase and provides a plethora of tips and practical instructions not found in the user manual. With this knowledge, you will be able to take full advantage of the capabilities of your camera.
***

Image Quality
Even when shot wide-open, the GF250mmF4 delivers tack-sharp images with impressive detail resolution. Distortion is almost fully optically corrected – there’s only a tiny bit of pin-cushion distortion left, which is automatically taken care of digitally during RAW conversion based on metadata (as long as you employ a competent RAW converter that fully supports the GFX). The same is true for chromatic aberration and vignetting. The latter can be quite pronounced wide-open, but is of course digitally corrected by the camera or any good external RAW converter.
Results from this lens look sharp from edge to edge, an impression that is supported by the MTF curves that Fujifilm has published on its website.

My early pre-production sample with the very preliminary sounding serial number 00R00013 delivered detailed results that were sharp from edge to edge, even when shot wide-open.
Adding the 1.4x teleconverter doesn’t seem to change things noticeably. With my firmware 3.00, the converter was already fully supported with updated EXIF data, modified lens correction metadata and the actual aperture being correctly displayed in the live view.

Shooting with the GF1.4x TC WR teleconverter turns the GF250mmF4 into a GF350mmF5.6 combo, but without visibly affecting image quality. As usual, click on the images for full-res versions on Flickr.

A common trademark of the six older GF lenses is their three-dimensional subject rendering. This is one of the main reasons why I like to shoot with the GFX system, including the very capable 32-64mm zoom. As far as I’m concerned, the GF250mmF4 is no exception to this rule.
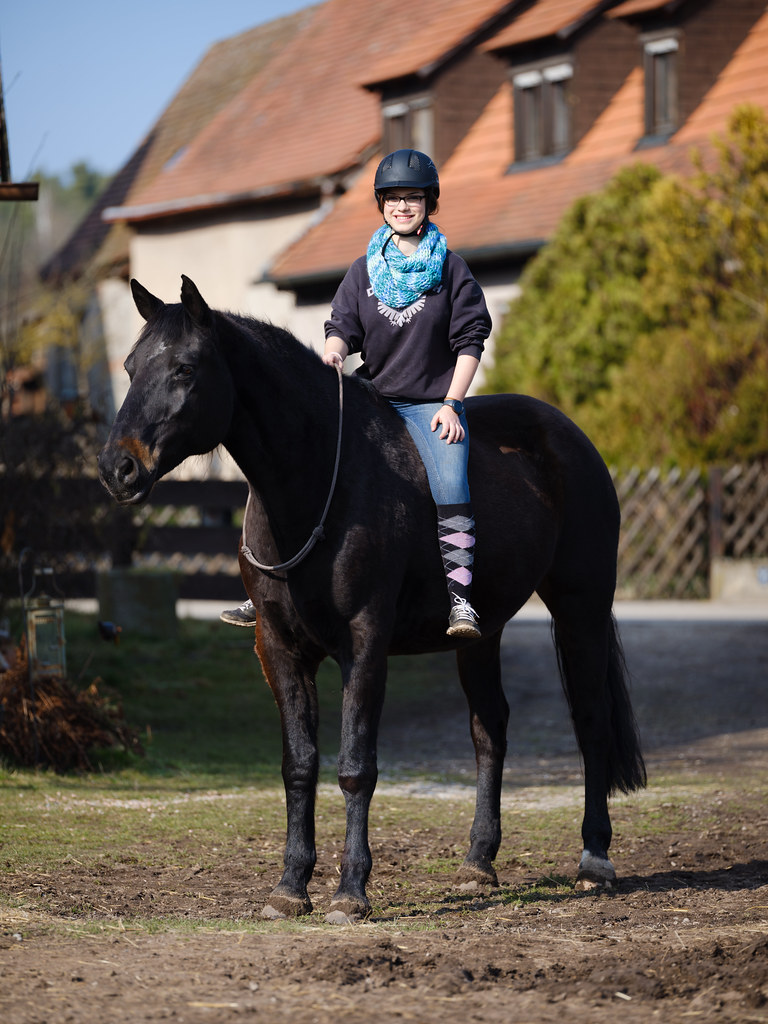
The 250mmF4 delivers the kind of “3D Pop” that I’m looking for in GF lenses, even when the background is less favorable. Click on the image for a full-res version on Flickr.
As for the quality of out-of-focus areas (also known as bokeh), views are typically divided. I very well remember my bokeh comparison between the XF90mmF2 and the XF80mmF2.8, both shot at f/2.8 of course. Some viewers preferred the smooth and flat bokeh of the XF90mm, while others loved the more swirly look of the XF80mm and bought the macro lens specifically to do portrait work with it.

The rendering of OOF areas behind and in front of the main subject is a matter of personal opinion. I like the results of the GF250mmF4, that’s why I have already pre-ordered the lens. Click on the images for full-res versions on Flickr.

To get an impression of how a lens renders OOF areas behind and in front of a subject, I like to take test pictures of difficult subjects like this picket fence:

Part of my personal test is also to see how sharp, detailed and contrasty the small in-focus parts are rendered:

Please click here for a Flickr album with 30 full-res sample images.
Hardware Considerations & Build Quality
Like its GF siblings, the GF250mmF4 is weather resistant with a sturdy but lightweight build. According to Fujifilm, sealing has been applied in 18 different locations for dust and moisture resistance and the ability to operate at temperatures of down to –10°C. A fluorine coating has also been applied to the front lens element to repel water and dirt under tough outdoor conditions.
 Because of the immense resolving power, shutter vibration can affect image sharpness in the range of 1/8 to 1/60 second. This can easily be avoided by setting the GFX to electronic front curtain shutter (EFCS).
When the camera/lens is powering off, a new lock mechanism is holding the linear motor driven inner focusing element in place, meaning no more “clacking noises” while you carry the lens around in your bag. If you remove the lens while the power is still on, this lock mechanism won’t work.
The aperture ring extends from F4 to F32 in 1/3 stops along with the usual A and C positions that are secured by a custom button on the ring. The aperture ring rotates and clicks smoothly into position, and the Fn and SET buttons feel very nice, as well. However, I was less impressed with the rather cheap impression made by the three selector switches that control the quite effective OIS, the focus limiter and the Fn mode selector.
Macro Extension Tubes
The new macro extension tubes MCEX-18G WR and MCEX-45G WR reduce the minimum focusing distance of all GF lenses, making it possible to achieve higher magnifications. Specifically, you can get better than 1x magnification by attaching the MCEX-45G WR to either the GF120mmF4 R LM OIS WR Macro or the GF45mmF2.8 R WR. You could even get 1.5x magnification by attaching it to the GF32-64mmF4 zoom lens and focusing at 32 mm focal length. However, that’s a pretty theoretical endeavor, because the practical working distance of this configuration would be 0 (as in zero) millimeters, meaning you would literally have to stick your subject onto the front lens element.
Click here for a PDF showing the magnification and distance specs for all combinations of GF lenses and macro extension tubes.

With the MCEX-45G WR, the GF120mmF4 R LM OIS WR Macro gains “true” 1:1 magnification (image above). However, it still doesn’t gain tilt-shift capability, so I had to stack 241(!) full-res RAW files in HeliconFocus to get this coin in perfect focus front to back (image below). The new focus stacking function of GFX firmware 3.00 really came in handy here.

Click here for 30 full-size sample images on Flickr!
Fujinon GF 250mm F4: BHphoto, Adorama, AmazonUS
***
Everything You Always Wanted to Know About X, But Were Afraid to Ask
Fujifilm “X-Pert” Rico Pfirstinger, the author behind Mastering the Fujifilm X-E1 and X-Pro1, The Fujifilm X-E2: Beyond the Manual, The Fujifilm X-T1: 111 X-Pert Tips, The Fujifilm X-T10: 115 X-Pert Tips, The Fujifilm X-Pro2: 115 X-Pert Tips, The Fujifilm X-T2: 120 X-Pert Tips, The Fujifilm X-T20: 125 X-Pert Tips and The Fujifilm X100F: 101 X-Pert Tips knows the answers (use code XPERT40 for a 40% discount).
Rico Pfirstinger studied communications and has been working as journalist, publicist, and photographer since the mid-80s. He has written a number of books on topics as diverse as Adobe PageMaker and sled dogs, and produced a beautiful book of photographs titled Huskies in Action (German version). He has spent time working as the head of a department with the German Publishing Company Burda and served as chief editor for a winter sports website. After eight years as a freelance film critic and entertainment writer in Los Angeles, Rico now lives in Germany and devotes his time to digital photography and compact camera systems. His camera books are available at Rocky Nook and dpunkt Verlag.
***