Comparing RAW converters: JPEG vs. Lightroom, Capture One, Silkypix & RPP

by Rico Pfirstinger
NOTE: This article has been edited to add Raw Photo Processor (RPP) and Lightroom 4.4RC to the comparison.
Yesterday, Richard Butler of DPREVIEW fame published an article comparing several X-Trans compatible RAW converters. You can download the RAW file of this demo shot yourself by following the link above. Just scroll down to the end of the DPREVIEW article.
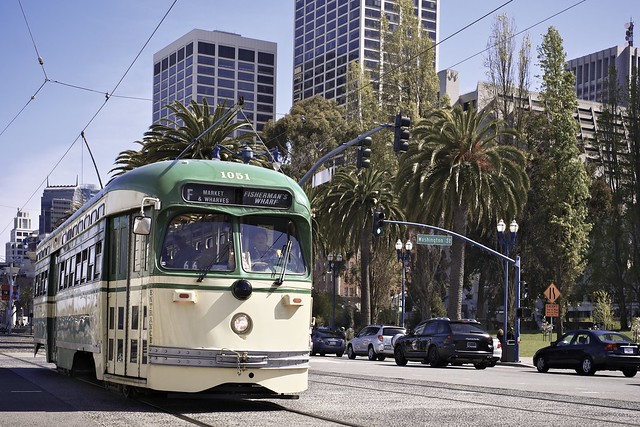
This is an X-Pro1 in-camera JPEG of the original demo shot that was used in the article.
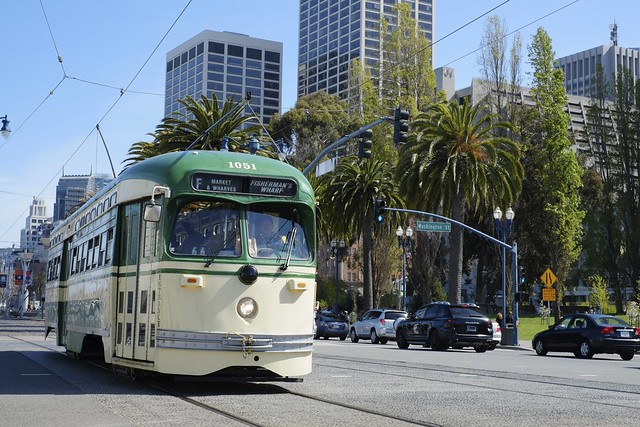
You can click on the image for larger views including full-size. Strangely enough, Richard used a DR200% shot (= a RAW that is underexposed by 1 EV) and film simulation mode Astia. Since Astia offers a different color gradation and more shadow contrast than the camera’s standard (default) Provia setting, this version of the demo image is actually not very suitable for comparing external RAW converters with their respective default settings, which will typically try to mimic the camera’s default settings and look. So let’s do a better job, shall we?
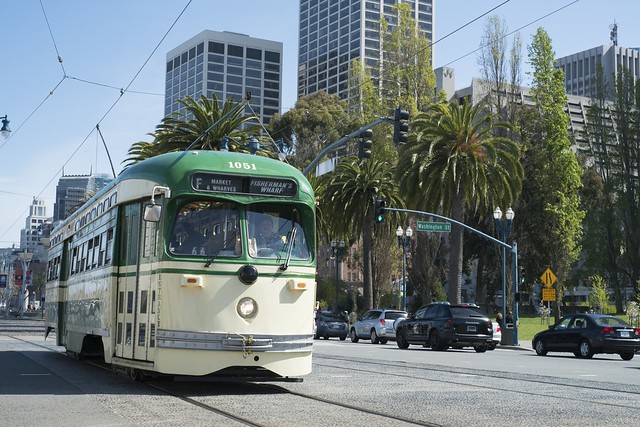
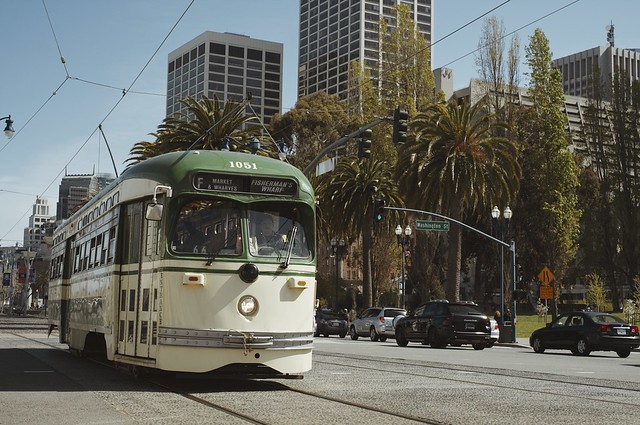
This is the same file as before, now developed in-camera with the X-Pro1’s Provia film simulation mode, using the camera’s default JPEG settings:

Again, click on the image to get to larger views on Flickr. As the demo shot was taken in DR200%, the camera’s internal RAW converter automatically adjusted shadow tones and darker midtones to compensate for the RAW’s -1 EV underexposure, while leaving the highlight tones intact (click here for a more elaborate discussion of how to extend dynamic range). As you can see, Provia offers less shadow contrast than Astia, so the shot looks a bit flatter and also “less sharp”, because increased contrast will give a (false) impression of increased sharpness. So let’s forget about the Astia JPEG shown in the DPREVIEW article. Let’s instead make this Provia JPEG our reference image and compare it with the results of three external RAW converters: Lightroom 4.3, Capture One 7.0.2 (release version) and Silkypix 5.
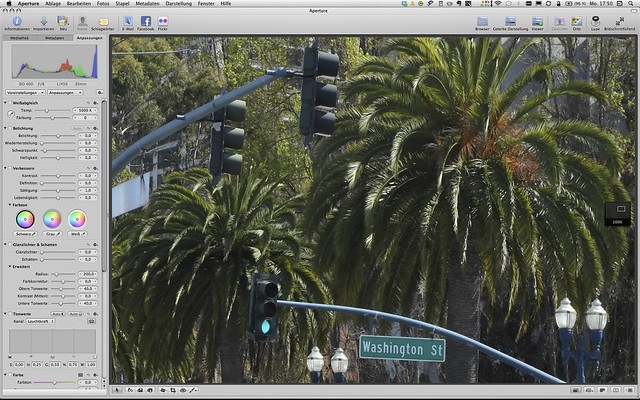
Here’s a screenshot showing a 100% crop of this Provia JPEG. Click on it to go to Flickr for a full-size viewing option:
Now that our benchmark image is established, let’s have a look at its Lightroom 4.3 version. Lightroom/ACR recognizes the camera’s DR settings (stored as metadata in the RAW file) and automatically compensates (at least partially) for it in its default import settings. Again, click on the pic for larger views:
As you can see, Lightroom’s demoasicing quality is indeed questionable, exhibiting blurry details (the so-called “watercolor effect”) and strong color bleeding in the green/white street name sign. Have a look at this 100% crop:
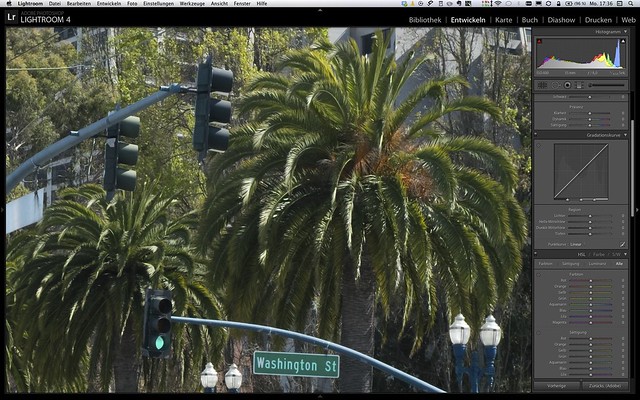
Quite understandably, some paying Adobe customers are not content with such results. Luckily, Adobe has since updated its demosaicing in Lightroom 4.4:

Many X-Trans sensor users also put their hopes in Capture One (C1), a competing RAW converter with plenty of pro appeal that offers full X-Trans support in its current version 7.0.2. So let’s get right to it, you may again click on the pic for larger viewing options:

The Capture One 7.0.2 version of the demo file seemingly reveals more detail and appears sharper when using the program’s default settings. Color bleeding in the street sign has almost disappeared. Here’s a screenshot with a crop:
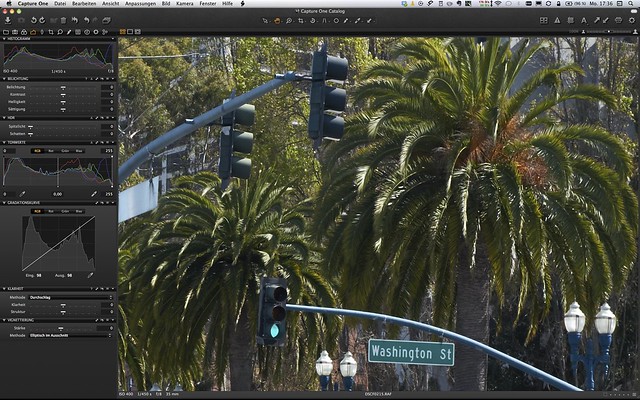
By default, C1 apparently does NOT adapt a RAW image’s tonality to match the camera’s DR settings. Instead, it’s simply pushing up exposure by 1 EV (DR200%) or 2 EV (DR400%), sacrificing highlights in the process. This means that the user needs to manually adjust exposure settings, shadows & highlights and tonality when importing DR200% or DR400% X-Trans RAW files.
This Silkypix 5 version of the demo file uses standard default settings, except for the film simulation choice, which was set to Portrait Color 2 (PC2) and “V4 compatible”. These settings typically resemble the out-of-camera Provia settings of the Fuji X series. Click on the pic for larger viewing options:

There’s no visible color bleeding and overall sharpness & detail look quite good, at least in my humble opinion (click image for larger views):
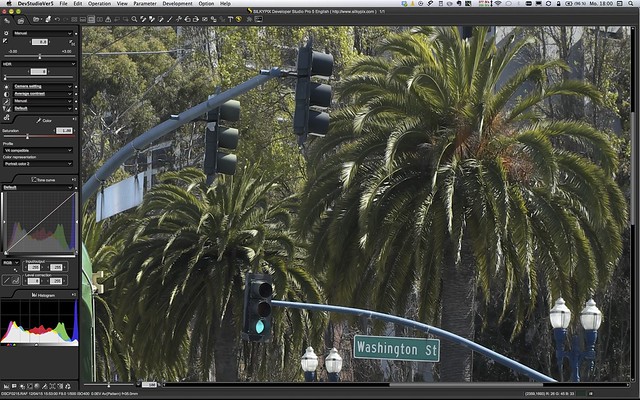
Silkypix 5 also recognizes the camera’s DR settings in the RAW metadata and adjusts for DR200% by pushing the exposure up +1 EV and increasing DR in the program’s highlight recovery control panel by the same amount.
While it’s often rather difficult to increase sharpness and detail in Lightroom/ACR or Capture One without also emphasizing adverse effects like “watercoloring”, Silkypix users can sharpen X-Trans RAWs by a fair amount without experiencing such problems. Silkypix also offers an optional sharpening method called “Pure Detail”, which was used for the example below. So this is mostly the same Silkypix 5 rendering as before, however with modified sharpness settings (click image for larger views):

Here’s a screenshot showing a 100% crop of this variation:

Of course, all these exercises are quite futile when they don’t result in nicely looking images. External RAW conversion is not about using standard import settings, it should be more about using the right tools to turn imagination into images. Never lose track of this, and don’t spend too much of your time with pixel peeping. To wrap things up, here’s my quick personal take on DPREVIEW’s demo file:
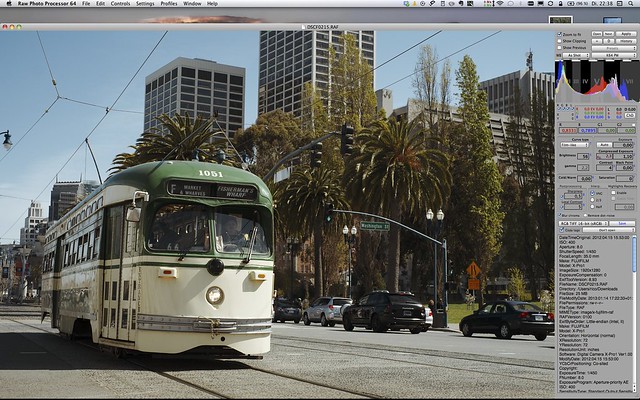
EDIT: Here’s the demo file processed with Raw Photo Processor, a Russian shareware RAW converter based on DCRAW. I used the software’s K64 PW film gradation to immediately get this retro look. The result looks sharp and detailed, no color bleeding, but there’s the infamous “zipper effect”.
RPP does not process any digital lens correction metadata (distortion, vignetting etc.) and uses the full sensor, delivering a larger image of 16.3 megapixels (instead of 16.0 MP). The screenshot below shows the development paramaters I used to process the demo file. Not the numbers in the “Compressed Exposure” fields. This is my compensation for the DR200% RAW which was underexposed by -1 EV.
Finally, let’s look at one of my own sample images to compare how Silkypix 5 and Capture One 7.0.2 can handle increased sharpness and maximum detail without displaying undesirable side effects. I have chosen an old RAW file I shot 10 months ago in Singapore’s botanical garden with my first X-Pro1, then still a pre-production model. I used the 60mm macro lens (also pre-production), put the gear on a tripod and shot this lovely flower in ISO 200. There’s plenty of color, structure and detail in this shot, and this complexity lends itself for an external RAW workflow.
Here’s what I could come up with when fine-tuning the shot in Capture One 7.0.2:
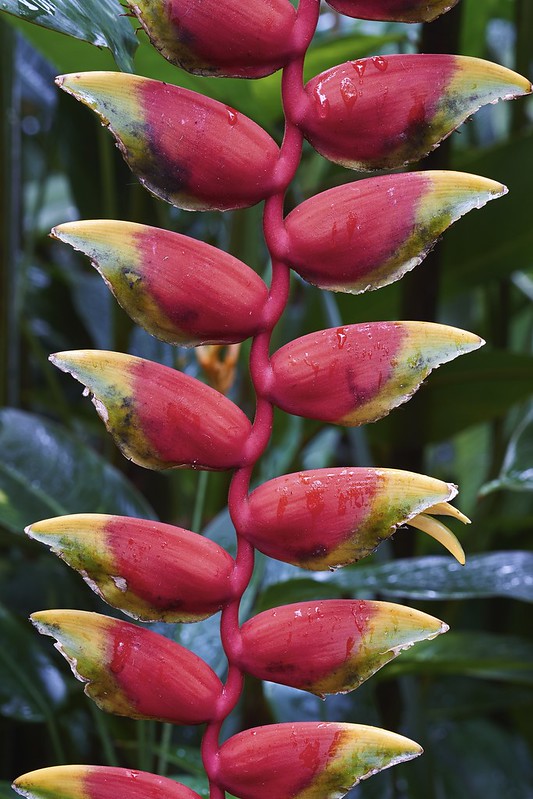
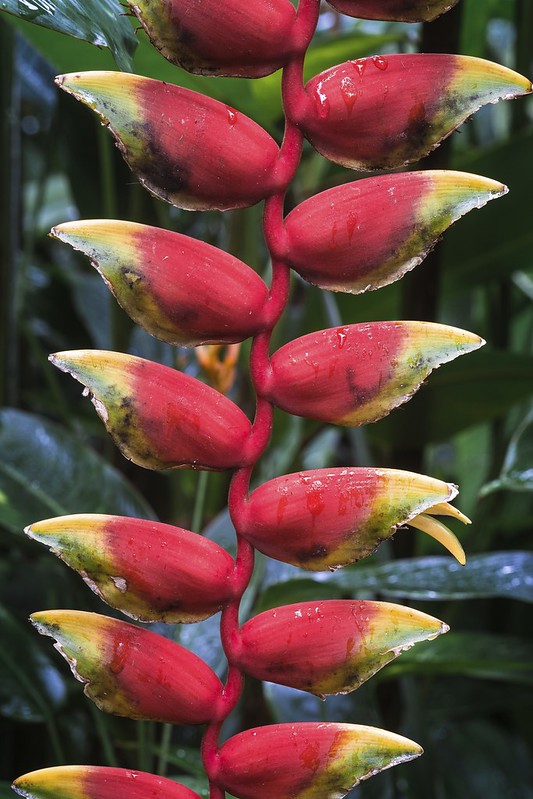
As usual, click in the pic to get on Flickr and display a full-size view once you are there. The result looks pretty detailed,doesn’t it? But will it be good enough to beat Silkypix 5? Let’s see, here’s my Silkypix version of the shot:

Here’s a rendering that was done with Lightroom 4.4RC:
You be the judge. And please don’t trust my mediocre post-processing skills, as I am sure that many of you guys can do a better job. So here you go: Click this link to download the original RAW file from my Dropbox and give it a work-over with the RAW converter(s) of your choice! If you have an X-Pro1 available, also try the internal RAW converter. If you come up with anything interesting, feel free to post and link to it in the comments, and tell us which converter and what settings you have used.
Here’s another direct C1/SP5 comparison illustrating the look and effectiveness of the different sharpening methods when it comes to preserve maximum detail:

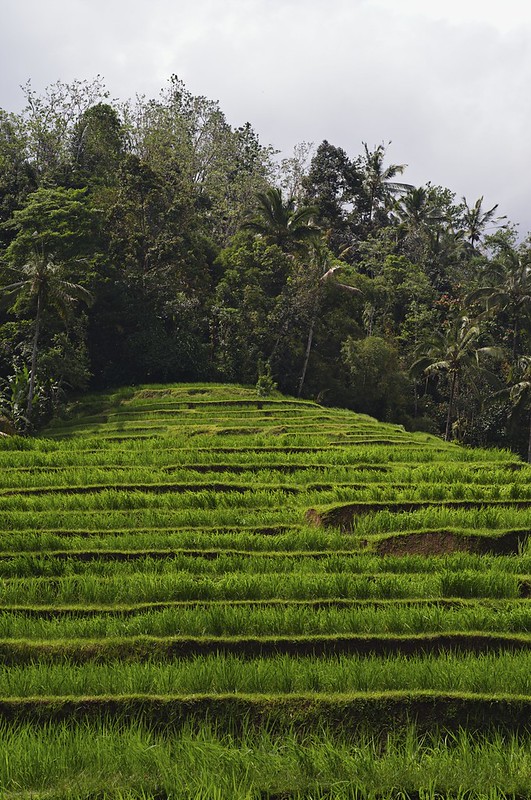
EDIT 2 (19JAN): If you want to have a look at Silkypix 5 handling green grass and foliage with lots of detail, have a look at this sample (click on pic for full-res) options:
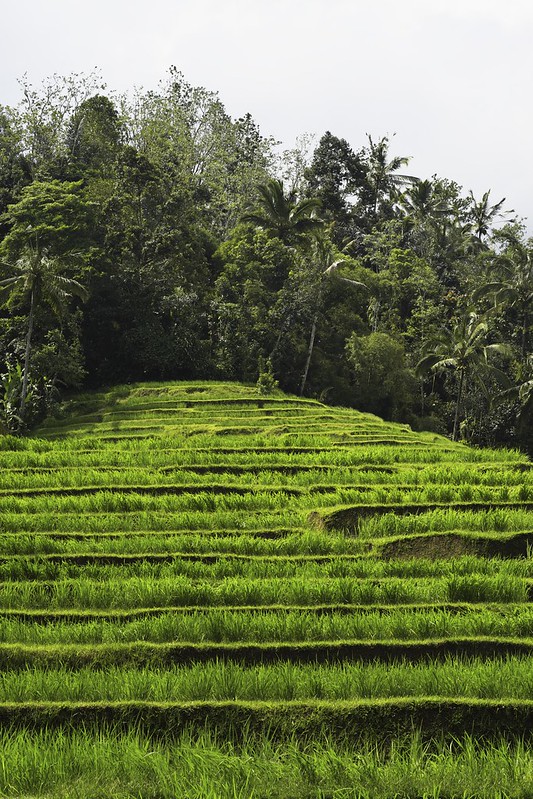
Capture One 7.0.2:
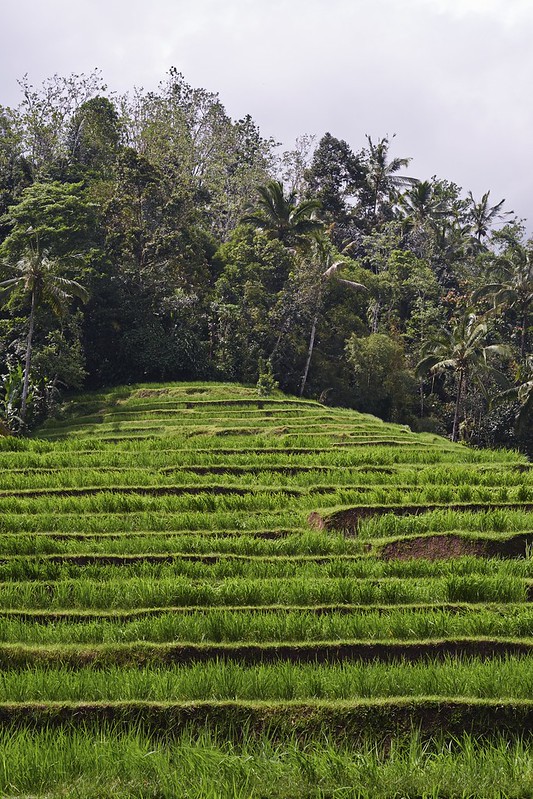
Lightroom 4.3:
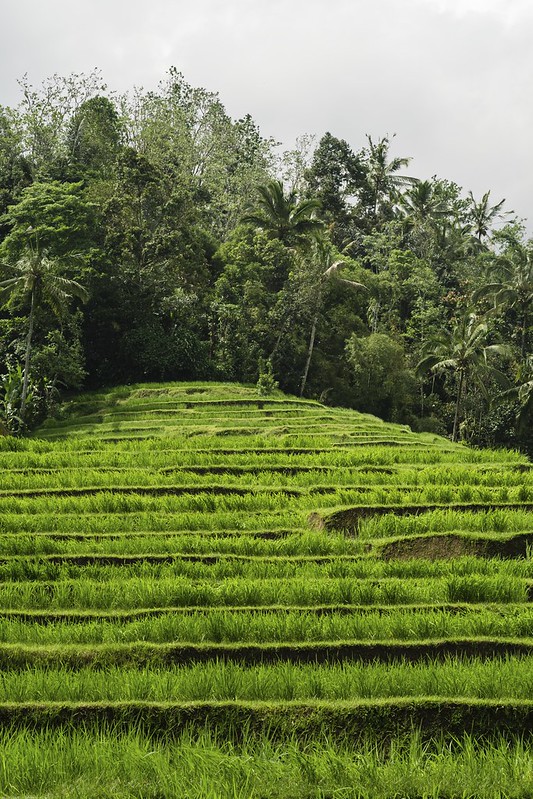
Lightroom 4.4RC:
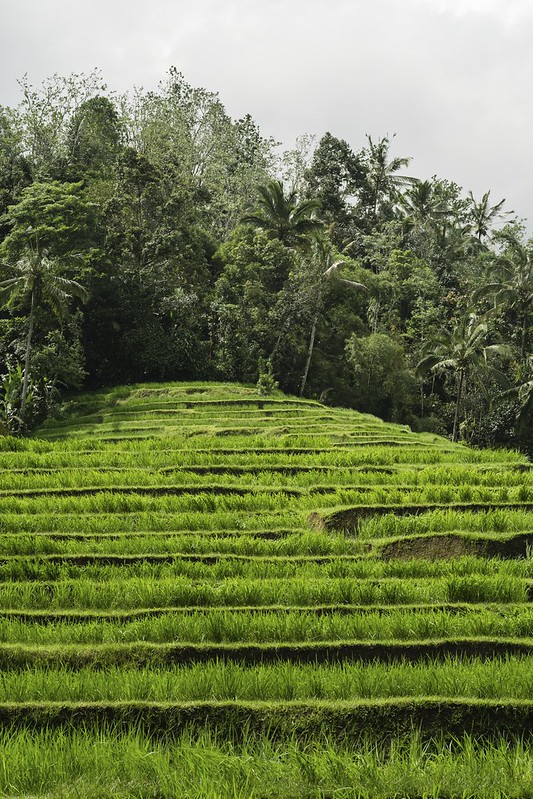
And RPP:
By the way: Here is the full Flickr set with all sample pics from this article.
Rico Pfirstinger studied communications and has been working as journalist, publicist, and photographer since the mid-80s. He has written a number of books on topics as diverse as Adobe PageMaker and sled dogs, and produced a beautiful book of photographs titled Huskies in Action (German version). He has spent time working as the head of a department with the German Burda-Publishing Company and served as chief editor for a winter sports website. After eight years as a freelance film critic and entertainment writer in Los Angeles, Rico now lives in Germany and devotes his time to digital photography and compact camera systems. His book “Mastering the FUJIFILM X-Pro1” (Kindle Edition) (Apple iBook Store) (German version) is available on Amazon and offers a plethora of tips, secrets and background information on successfully using Fuji’s X-Pro1 and X-E1 system cameras, lenses and key accessories.