Skip to content

Full Fuji X-M1 specs!… and focus peaking?

 photo fujifilm_logo_zps283a0fd6.jpg

On June 25 Fujirumors will follow the announcement live. Follow us on facebook, twitter and subscribe the RSS feed, and you won’t miss anything!

_ _ _

[UPDATE] According to PR, the  X-M1 will have focus peaking, but no digital split image focusing.

Digicaminfo got the full specs of the X-M1. It confirms what sources already told us: same sensor of the X-E1/X-PRO1 and no viewfinder, but a tiltable and improved LCD screen (920,000 dot 3.0-inch).

From readers, we have to provide information about the price and specifications of the Fujifilm X-M1.

  • Specifications of Fujifilm X-M1 are as follows.- The sensor 16.3 million pixels X-Trans APS-C CMOS active
    – (100,12800,25600 an extension) ISO200-6400
    – -1/4000 Seconds 30 seconds, shutter speed (160 seconds in the S / M mode) sync 1/180 sec
    – 920,000 dot 3.0-inch, 3:2 aspect ratio can tilt up and down, the LCD monitor
    – The shooting speed (for 10 consecutive frame 50 continuous frames, in RAW with JPEG) 5.6 frames / second
    – Video 1920×1080 30p, 1280×720 30p
    – Sound Linear PCM Stereo
    – Mode dial with
    – Advanced Auto function
    – Placed together in the right dial or button operation. Can be operated with one hand
    – Wi-Fi, smart phone transmission function
    – Built-in flash, super i flash function
    – Media SD / SDHC / SDXC
    – The size is 116.9 x 66.5 x 39.0mm
    – 330g (including battery, media), 280g weight (only body)
    – Expected Release Date (body color of some September) July 27
    – Estimated retail price of ¥ 75,000 before and after body


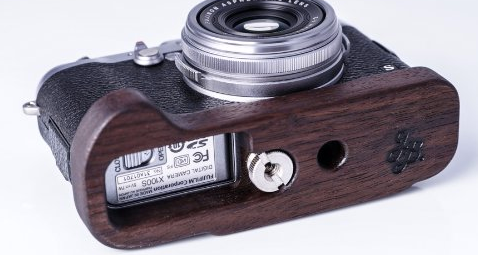
miXed zone: “DSLR is dead”, reviews, Wood Grip Bases for your X100S

[Preorder the new 55-200: USA at BHphoto (Click here) and Adorama (click here)]

Settings

Daniel sent me this mail: “I wrote up a small blog post on my personal jpeg settings including some sample shots. Maybe something for one of the miXed Zone. Thanks for your great work on the Fujirumors site. Kind regards or as we Germans say mfg und Dankeschön“. Bitte sehr, Daniel! Check his settings out at stockografie here.

Wood Grip Bases for your X100S

Wood Grips Bases, 100% handcrafted and made in the USA can be purchased here at AmazonUS. ( J.B. Camera Designs click here.)

 photo bsad_zpsb2858cee.png

X100S

[shopcountry 10075]

– Zack Arias video about the X100S (in Istanbul) can be seen here. “DSLR is dead […] it’s the greatest camera ever made. I’ll fight you in the streets, if you think differently!” So, anyone out there who’d like to challange Zack?


– Is it worth the price? That’s the question of digitalcamerareview. It earned an 8.2 overall and the Editor’s Choice award. They found it improves immensely on many of the trouble areas that plagued the X100, with superb manual focus support. They did notice some extremely aggressive clipping of JPEGs, even at ISO 200, which they go into in the review “The main problem is that with JPEGs, even at ISO 200, the camera clips all the shadows to zero very quickly. The result is shadow areas that have no visible noise, but also lack any recoverable detail“. There’s a great deal of information in the RAW files to tap into that the JPEG just eliminates. Just read more here.

– rileyjoseph X100S review (part II) here: “I am not a street photographer by any means but I can see why the X00s is so popular. It is very quiet and discreet. You are walking, see something, raise it up, click (which you can barely hear), review the shot in the EVF and keep walking.” Part I of the review can be read here.

– “The the Fuji X100s looks sexy, and it feels sexy .. and better yet, makes *you* look sexy. And that’s worth the price of the camera already.” This is the last sentence of the review over at neilvn.com (click here). Read if the X100S is the camera for you.

– digitalcameraworld X100S video review can be seen here. “While the X100S might intimidate novice photographers, enthusiasts will find there plenty to get excited about and the exposure controls are a joy to use. Perhaps even more importantly, its also capable of capturing superb, well-exposed images with lots of sharp detail and pleasant colours.”

– A wall, the bricks, and different cameras. See the comparison shots of the Fuji X100s vs Fuji X-E1 vs Canon 5DMK2 vs [shoplink 9959]Nikon D800[/shoplink] over here.

– “Spring in the Langhe: Landscape Gallery with the Fuji X100s” at bestmirrorlesscamerasreviews here.

X20

[shopcountry 10267]

– minghthein X20 review can be read here. Just an extract:

“Ultimately, I was left with very mixed feelings on this camera. I really wanted to like it; it simply felt right in the hand in a way that few other modern designs have managed to; color rendition and native tonal response render both very natural color images and subtly toned black and white ones after conversion. Above all, it was very, very enjoyable to use. The trouble is, I can’t help but feel the size to image quality tradeoff isn’t a good one; if I’m going to carry something that large and not particularly pocketable, to be honest, I’d rather have the OM-D – which moves me up a couple of sensor classes entirely. Furthermore, despite being physically large for its sensor size, the battery is rather small – I averaged about 250-300 frames before running dry. You’ll definitely need a spare to get through a day…”

– Check out danbailey’s review here: “Overall, the X20 is an incredibly capable and versatile little camera that has a wide array of very usable features. It’s built well, it shoots great looking photos, and of course, it’s got a great classic design that MAKES you want to hold it in your hands and shoot photos with it. In my mind, that goes a long way, because when it all comes down, a camera is just a tool for capturing moments in life. If you don’t have it in your hands, you’ll miss the shot.

– Joshua: “Hi there Patrick, I have been following your blog on Fujifilm X stuff and I really love it. I wrote a little personal review of the X20 here: My Fujifilm X20 Review. Thought you might like to share it with some folks out there interested in this wonderful camera!  Cheers!” Click here to read his review. It’s quite a long list of PROS, and 2 CONS (battery life and video… so it’s just one CON for me, as I don’t care about video ;) )

– bestmat.ch X20 review can be read over here. A part from a weak battery life and zero controls in video mode, the X20 is a little great camera. Superb design, great image quality and well built.

– X20 photoreview can be read here. The camera gains 8.8 out of 10 points.

X-E1

[shopcountry 10259]

– Comprehensive admiringlight review of the X-E1 here. “[…] the Fuji X-E1 produces tremendous images.  The outstanding dynamic range, great noise control and beautiful tonal depth create images that look like they came from a full frame sensor.  And, despite the letdown in the AF department, the camera is an absolute joy to shoot with. Controls are simple and quick to change and everything you need as a photographer is just right there.  I love shooting with the X-E1, and the output seriously impresses.  It’s not a fully mature camera, but Fuji’s on the right track.  If you are shooting events or moving children or are in situations where you need a quick, responsive camera….don’t use the X-E1 (I grab my OM-D for those situations).  However, for deliberate shooting and an old-school feel to photography, it’s really hard to beat.”

X-PRO1

[shopcountry 10261]

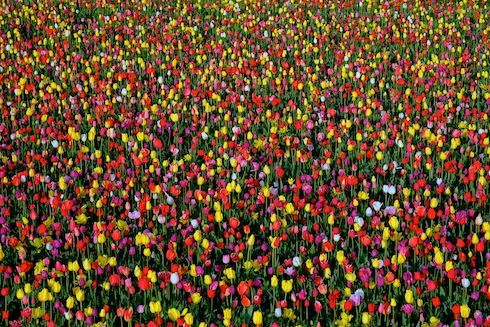
– “tulip festival+ Fuji = colour!“. See some beautiful (macro) shots here!

image courtesy: vanearlphotography

 photo blogshow-resamplephp_zpsa98294bd.jpg

X100S vs. X100

by Rico Pfirstinger

Talk to Rico (questions & feedback)Sample images setComparison images set

The X100S is an evolutionary camera, improving the classic X100 without taking away what most users valued in the first place. Sales of the original X100 (about 130,000 units globally) did beat expectations. The camera also inspired competing manufacturers to enter the mirrorless fixed-lens compact market, and it served as a blueprint for Fuji’s own line of mirrorless system cameras. Without the X100 and its (then revolutionary) hybrid viewfinder technology, there wouldn’t be an X-Pro1. Make no mistake: The X100 is the foundation of Fuji’s X series.

DSCF0136 - Lightroom 4.4RC / Aperture

Alas, it’s foundation with some flaws—many of which have been addressed with numerous firmware updates. However, firmware can’t fix everything, especially not hardware oversights, and even though the X100S very much looks like an “old” X100 at first and second glance, it is a different and better camera thanks to extensive user feedback.

DSCF0139 - f16, Silkypix 5 & Aperture

Let’s have a look at some of the changes and improvements that have been made regarding operation, features and design of the new X100S vs. the classic X100.

Speed

The X100S is not only faster, it’s also more responsive. Startup time and writing speed to SD cards have been accelerated. Of course, you need to use the fastest SD cards available (such as SanDisk Extreme Pro UHS-1 95 MB/s) cards to fully take advantage of this feature. The X100S shoots a maximum of 6 frames per second (vs. the X100’s 5 fps) in FINE+RAW, with no actual limit in the number of frames that can be continuously recorded. The X100S never locks up in burst mode, it just slows down. Unlike the X100S, the classic X100 needs an actual break after 8 frames and locks up until all 8 images have been transferred to the card.

With the X100S, the shooting interval in single frame (still image) mode has been reduced from 0.9 to 0.5 seconds, and you can immediately playback an image directly from the buffer, even while the camera is still saving shots to the SD card in the background. Image display (preview) options have been changed from 1.5 and 3 seconds to a more suitable 0.5 and 1.5 seconds. Of course, “off” and “continuous” preview modes are still available. Oh, and the eye sensor now also works when image preview is engaged.

Autofocus is has become more responsive, too, both in the classic contrast detection (CDAF) and even more so the new phase detection (PDAF) mode. On-sensor PDAF is now available in an focusing area roughly as large as the center 9 AF fields, and it will automatically engage at suitable light levels of about 5 EV or higher.  PDAF is also available in Movie mode (which now offers Full HD at up to 60 fps), as are all three focusing modes (AF-S, AF-C and MF). In manual focus (MF) mode, the MF ring is more responsive and actually quite usable. The AF distance range for the EVF and LCD has been improved  from 40cm-∞ (X100) to 21cm-∞ (X100S), and the shooting range in the OVF has been expanded from 80cm-∞ to 50cm-∞, so you will have to switch to macro mode less often.

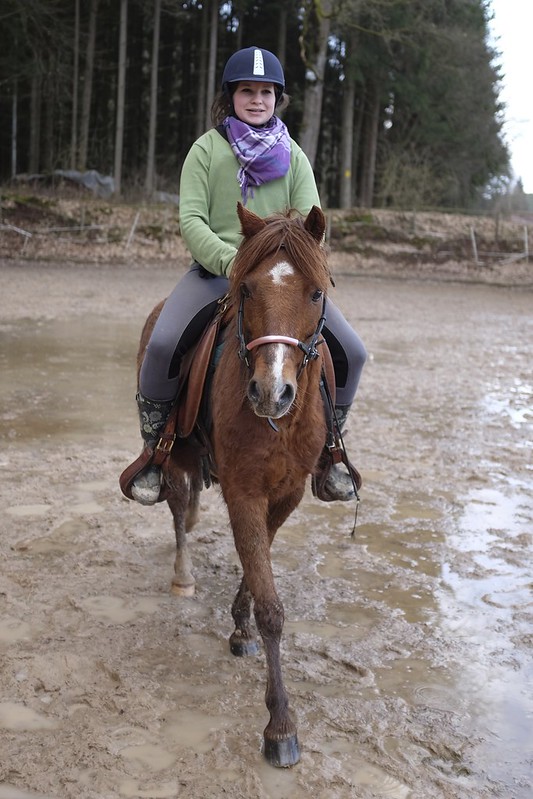
Like the X20 and X100 (and X-Pro1 and X-E1 with current firmware), the X100S operates with AF priority: When you fully depress the shutter button in one swift motion (vs. first half-pressing it to lock focus and exposure), the camera will take the picture immediately after it has acquired focus. This “trick” can be used to catch moving subjects, like this pony trotting towards the camera:

DSCF0037 - X100S "AF trick"

Focus was directed at the horse’s head, with open aperture (f/2) to minimize the depth-of-field (DOF). As you can see in the cropped image above, the pony’s head is perfectly in focus. Click on the image for larger viewing options.

Split Image

Another notable improvement are the camera’s new manual focus aids: Digital Split Image and Focus Peaking. The former uses PDAF pixels on the sensor to simulate split image focusing as you may know it from older MF SLRs. Click here for a demo: http://youtu.be/_fJDX1hzUIg. The latter, called “Focus Peak Highlight”, delivers classic focus peaking over the entire image frame by outlining/highlighting those areas of the image that are currently in focus. This is a software feature, so I’m confident we will also see it in future firmware releases for the X-Pro1 and X-E1. Click here for a demo: http://youtu.be/PMdQpgOzd4o. By pressing the command dial for about a second, you can easily rotate between the different manual focusing aids.

DSCF0140 - f16, Silkypix 5 & Aperture

** CLICK HERE to Read the Rest of the Article **

RAW for JPEG Shooters…

…and JPEG for RAW Shooters!

by Rico Pfirstinger

One of the most persistent flame wars on the “photographic Internet” is the endless fight between RAW and JPEG shooters. If it wasn’t so sad, it would be funny. Readers of my book know that I prefer a comprehensive approach to this hot topic by advising to shoot FINE+RAW (SHOOTING MENU > IMAGE QUALITY) at any time, no matter whether you consider yourself a part of the RAW or JPEG camp. There are plenty of good reasons for being inclusive instead of divisive.

Why “RAW only” shooters should use FINE+RAW

Even if you consider yourself a hardened “RAW only” shooter, FINE+RAW makes sense for you. Don’t forget that you can preview exposures on your camera only in JPEG format. This means that even in “RAW only” mode, your camera will produce a JPEG out of every RAW file it saves to provide you with a preview file. Otherwise there wouldn’t be anything to examine in playback mode.

However, these preview JPEGs in “RAW only” mode are low resolution—often so low that it is impossible to tell whether image details are in focus when you zoom-in to 100%. Shooting in FINE+RAW mode with an IMAGE SIZE of L obviates this problem. With this setting, the camera saves a high-resolution JPEG “print” in addition to the RAW “negative”: You can use this high-res JPEG for precise focus control immediately after you snap it by pressing the command dial, thereby enabling the 100% zoom function. Moreover, the high-res JPEG file is a good point of reference for developing the RAW file later in your personal computer.

Admittedly, you could also opt to shoot in NORMAL+RAW mode instead of FINE+RAW, which doesn’t actually affect the resolution of the JPEG. However, this setting produces files with greater compression, compromising image quality. Dedicated RAW shooters should pay attention to this fact, because in some modes, the camera saves only JPEGs without any RAW files! Think of motion panorama or of ISO, film simulation and dynamic range bracketing as examples for such modes. In all these cases, your X-Pro1 or X-E1 (or X100 and X100S) silently switch the image quality setting from NORMAL+RAW to NORMAL, which means the only image they write to the memory card is a quality-reduced JPEG! And what X-camera user likes to skimp on quality?

Wait, there’s more! The camera’s IMAGE SIZE settings (3:2, 16:9 or 1:1 format with resolutions L, M and S) aren’t available in “RAW only” mode. They are greyed-out. This feature can be valuable for RAW shooters, though, because the camera’s light metering is influenced by the current format settings. If you intend to shoot (and later crop) images to a ratio of 16:9 or 1:1, the light metering works more effectively when the camera’s image format is set accordingly. That’s because parts of the image that are superfluous will be automatically cropped out and won’t affect the camera’s exposure metering (which is based on the current live-view image). Furthermore, it’s easier to target your desired image area when the image format in the camera’s viewfinder matches up with your intended end result. Finally, the camera adjusts the size and shape of the autofocus fields and redistributes them according to your selected image format. This means that you can continue to use all 49 of the camera’s AF fields even when you are shooting in the exotic 1:1 format.

No worries: Independent from any IMAGE SIZE or IMAGE QUALITY settings you choose in the shooting menu, your X-Pro1 or X-E1 will always record a full-size L, 3:2 format RAW file. You will not lose a single pixel.

Why “JPEG only” shooters should use FINE+RAW

Now that the “RAW only” camp has been served, what about the “JPEG only” crowd? After all, this is what this article is supposed to mostly be about, right?

The reason to opt for FINE+RAW comes down to this: All X-series cameras feature an internal RAW converter (PLAYBACK MENU > RAW CONVERSION) that allows you to change an image’s JPEG settings anytime after you take a shot. However, before we examine the implications of this feature, let’s find out about those mysterious “JPEG settings” and let’s see what they actually are.

JPEG settings (or JPEG parameters) are camera settings that do not affect the RAW file. Instead, they only affect the look of any JPEG files your camera spits out. Thinking of RAWs as “digital negatives” and JPEGs as “digital lab prints”, the camera’s JPEG settings determine how the JPEGs actually look like.

JPEG settings are:

  • White Balance
  • WB Shift
  • Film Simulation
  • Color
  • Sharpness
  • Highlight Tone
  • Shadow Tone
  • Noise Reduction (NR)
  • Color Space

As you have probably noticed, there settings are scattered over the shooting and setup menus of the camera. With the exception of color space, they are also directly accessible via the Quick Menu and can be saved in sets known as custom shooting profiles. The same JPEG settings are available when you activate the camera’s internal RAW converter.

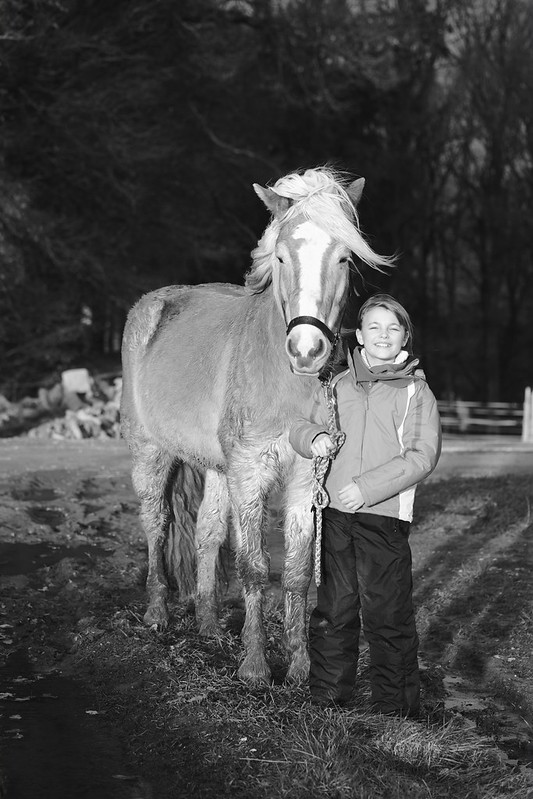
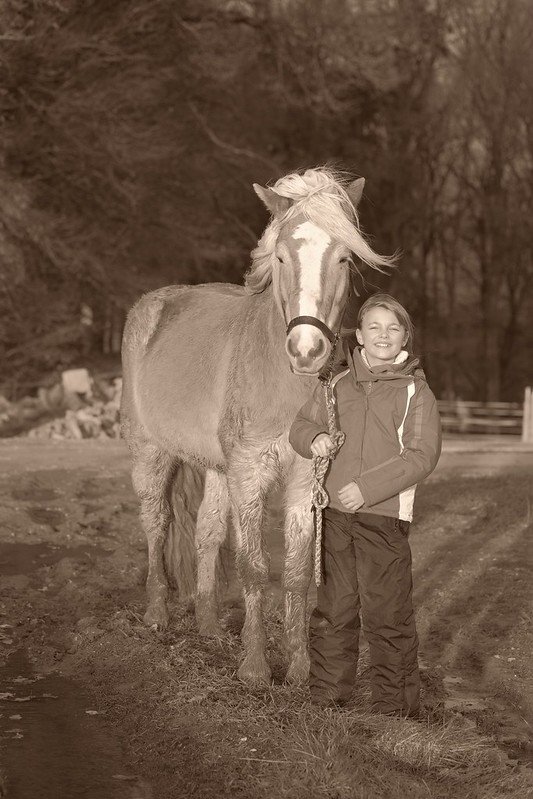
JPEG settings strongly affect the look of an image. The very same shot can look quite differently depending on what JPEG settings you have chosen. Here’s an example of a snapshot I took recently—the following pics all show the same RAW image (“digital negative”) processed with different camera JPEG settings to produce different “digital prints”.

Let’s start with three different color versions:

And here three different black&white versions, again all courtesy of the X camera’s flexible JPEG parameter settings:

As you can see, there can be both strong and subtle differences between different “digital prints”. There are virtually billions of possibilities of how you can combine these JPEG settings to generate an actual image. Quite overwhelming! With normal cameras and as a “JPEG only” shooter, you would have to know/guess and then set the “perfect” JPEG parameter combination for each image in advance. Can you actually do this? Honestly, I can’t.

** CLICK HERE to Read the Rest of the Article **

Capture One tests

C1

More and more photographers tested the new Capture One 7.0.2 ($300, trial available). Since neither Apple’s Aperture nor DxO Labs’ Optics Pro do yet support the X-Trans format, this is an important choice to consider.

I tested the Capture One Pro beta about 2 weeks ago, and I am pleased to report that its raw conversion algorithm improves the color artifacts from the X-Trans sensor in Fuji X camera, but the offensive artifacting remains there plain to see.” Read more at diglloyd.com.

Here is Thomas Fitzgeralds first look at C1. “It’s not completely perfect. There are still some weird de-mosiacing artefacts, but it’s substantially better than what Lightroom was producing… Anyway, I’m delighted that someone has finally unlocked the true potential of the X-Trans sensor.” Read all and see his converted images here.

frontallobbings: “There’s still issues with Capture One and the details. Moire seems to be an issue that causes an unusual maze like pattern to appear in specific textures and still some smearing of details happens. However the great news is that it smears at a much higher detail rate over Adobe’s implementation of these files… I’m hopeful these minor issues will be resolved in the next version of Capture One, but for now, it’s very nice to have a professional RAW processor that at leasts matches the output quality of the JPG files out of camera, with far more flexibility found in RAW processing.Click here to read more and see his comparison images (Lightroom vs C1).

Capture One 7.0.2 and the X-E1 short words at skullfilmsproductions: “Well It is a good software, I will give them that, the RAW is alot better supported!.. However for me coming from Lightroom and everything set up to work.. this experience has been.. not horrible but CaptureOne is slooooow to work in.. as.. well I dont know what is this slow.”

Here are the French lemondedelaphoto pics converted with C1 (translated version)

And here another Lightroom / CaptureOne comparison at seriouscompacts. “The biggest differences I noted between C1 and Lightroom are that C1 has higher local and increased color saturation. I also think C1 handles high ISO noise reduction better, while Lightroom is slightly more able to recover highlights.

miXed zone (X100s, X20 and more) + the 14mm mystery at Amazon

Do you agree with the position of Fuji about IBIS?

View Results

Loading ... Loading ...

Amazon 14mm cancellation

First of all, what happened with the 14mm at Amazon? Here is a mail from a FR-reader: “I just got off of a very lengthly conversation with amazon.The final feedback I received was that Amazon discovered a mis-match with the manufacturer product number  and cancelled all orders so that customers did not receive the wrong product. They are researching the problem. Appears to be an Amazon error. Question, did they order using the wrong product number????? Problem and strong customer complaint has been escalated.”

X100s

Whatdigitalcamera Fuji X100S First Look Preveiw at CES 2013

Which camera do you think is the best at the CES according to digitalcamerareview.com. It’s the X100s! Click here to see the top five!

dcwatch at the CES. X20 and X100s click here for the translated version.

Dpreveiw hands on (click here). For some more hands on impressions click here. How split image focusing works at dpreview.com.

eoshd.com posted his thoughts about the new X100s. They say it’s a significant upgrade to the X100, which was a great cam, but “the terrible AF and fly by wire manual focusing technology spoilt it, and the video mode was very much an afterthought… On the new model the AF system for stills is now one of the fastest around and manual focus is much more responsive… To be honest I find it strange that all this good stuff has been reserved for the $1200 [note: $1300] X100S, and Fuji have based their much more important interchangeable lens system around quite outdated technology, since the X100S seems like generation 2 from Fuji and comes only a few months after their new X-E1 which has none of the essential new AF or MF upgrades that the X100S brings to the table.” Read more at eoshd.com

Also photographybay is at the CES and posted his hands-on review here.

digitalcamera X100s first impressions video

X20

digitalcamerainfo X20 first impressions.

You’ll read a lot of beautiful words also in this hands on review at dslrphoto.com. Let’s hope we can see soon some images shot with this cameras… can’t wait for it!

X-E1

Mike Kobal compared the NEX6 and the X-E1 (sava $123 at Adorama vor the bundle). Just one sentence from the conclusions: “As a purist with no interest in video, the choice is easy. Fuji X-E1.”

Mike Kobal’s portrait of the day shot with the X-E1 and the 35mm lens. Its bokeh, he says “can be incredible and easily mistaken for something we thought only possible with a full frame sensor.See his shots and read more here.

It’s the old dilemma, X-PRO1 or X-E1. Here is another one that tries to give an answer to this question. Take a look at it here.

The only thing I have left to say is go out, and buy the Fuji X-E1.  This is one of those cameras where you really, REALLY get your money’s worth.  The X-E1 is a fantastic little camera, and priced very reasonably allowing many, many photographers out there to easily obtain stellar image quality for not put yourself “in the dog house” price.” Read why findingrange comes to this conclusion here.

X-PRO1

Fuji X-PRO1… more to learn. IS1 and IS2… read the difference between these two options to activate the Optical Image Stabilization on the 18-55mm lens.

Fuji X-PRO1 winter street photography in London (click here).

X-PRO1 street shooting in Iran at stevehuffphoto.com

Prague in December. Click here to see the pics.

See the pics here of the X-Pro 1 at the 2012 Pushkar Camel Fair – Rajasthan, India

New year fireworks shot handheld with the X-PRO1. See the results here.

Fuji X100

camera.co.uk posted his X100 review. Read the Good and the Bad here.

The X100 really has impressive metrics for a compact camera. Its sensor manages to outperform that of the Sony NEX-5, and thus takes first place in the mirrorless rankings. The interesting part though is that it also manages to outperform or rival mid-range DSLRs such as the Nikon D90 and the Canon EOS 60D, thanks to its well-handled noise and good color management, but above all thanks to a truly decent low-light performance.” That’s an extract of the conclusions of the DxOMark review here. There is also a short comparison with the Nex-5, the Nikon D90 and the EOS 60D.

Best Cameras 2012 (MirrorlesCentral)

Which where the best cameras in 2012 according to Mirrorless Central? In the category Still Photo Cameras the winner are the Fuji X-PRO1 and X-E1. See the video here.

Fuji X10

A German Fuji X10 (18% price drop) video review can be seen here.

Accesories and more

Protect your Fujifilm X100, X100s and X-Pro1 lenses with the S-Cap. Read this article here.

Who’s the winner of Fujifilms studend award of December? See it here at ephotozine.

PREORDER

X100S: AmazonUS / Adorama / B&H

X20: AmazonUS: silver and black version / B&H: silver versionblack version / Adorama: silver versionblack version

Europe: UK: Wexphotographic X100s for £1099 / X20 silver and black for £599

Or sign in www.slidoo.com , decide your parameters, save your search and get notified when it’s available. It’s easy!


DigiDirectTV X-E1 video review

The X100s and the X20 are the hot cameras of the moment. And with all the new features inside these cameras, the X-E1 seems already to be old (I hope that a firmware update will bring focus peaking also to the X-E1 / X-PRO1). But just click on the review section at Fujirumors, and read the X-E1 reviews: “the closest thing to perfection”, “for everyone who celebrates photography” and of course the great riflessifotografici review (translated version)… we are talking of an amazing camera.

So, just take a look at this 10 minute enthusiastic review at DigiDirectTV. How the speak without taking breath and put as much information as possible in 10 minutes! :-)

Now, if he convinced you to purchase the X-E1, check the in stock status here.

AmazonUS: X-E1 kit BLACK / X-E1 kit SILVER / X-E1 body only BLACK / X-E1 body only SILVER

Adorama: X-E1 kit BLACK / X-E1 kit SILVER / X-E1 body only BLACK / X-E1 body only SILVER

B&H: X-E1 kit BLACK / X-E1 kit SILVER / X-E1 body only BLACK / X-E1 body only SILVER

EbayUS: X-E1 kits (via slidoo)

Wexphotographic: X-E1 body only BLACK / X-E1 body only SILVER

Jessops: X-E1 kit SILVER

Amazon GER: X-E1 body only BLACK / X-E1 body only SILVER

Fujinon XF18-55mm in stock status check

 Amazon US / Adorama / B&H / ebayUS via slidoo)

PREORDER

X100S: AmazonUS / Adorama / B&H

X20: AmazonUS: silver and black version / B&H: silver versionblack version / Adorama: silver versionblack version

Europe: UK: Wexphotographic X100s for £1099 / X20 silver and black for £599

Do you agree with the position of Fuji about IBIS?

View Results

Loading ... Loading ...

FujiRumors should....

View Results

Loading ... Loading ...


miXed Zone

Fuji X photography

gizmodo top 10 cameras 2012

Gizmodo released his top 10 cameras 2012 rating (click here). The X-PRO1 reached the 8th position. First position for the Canon EOS 5D MARK III, second position for the Nikon D800 and the RX100 is third.

X-PRO1

Landscape photography and X-PRO1? See the results at fstopguy.com. His landscape photography equipment is: XF 18mm, XF 35mm, XF 60mm. Accessories: L-Bracket and grip for X-PRO1cable release, extra batteries, SanDisk Extreme PRO, Circular Polarizer, ND Filters, Tripod with ball head.

The X-PRO1 in the metro of Paris. See all the people with their mobile phones and read the impressions of parisphototours.

Street photography with the X-PRO1 and 18mm lens? See the pics of the trip in Melbourne here.

Some X-PRO1 pics at high Iso. (click here)

Is the X-PRO1 the perfect travel camera? Read the opinions of mcgaughey here.

X-PRO1 highlight recovery at hfortysixit.com

From 11th. of August 2012 Juha Periniva started to shoot with Fuji X-Pro1 and four lenses. Click here to see his beautiful shots in Finnland.

X-E1

Street photography by derekclark (click here). Don’t avoid to shoot in the rain or in the midday sun! Read why.

All I want for X-mas is a X-E1… read the creativelondonphotographer review here.

Did Simon Peckham the right decision by selling his Nikon DSLR and purchasing the X-E1? Here are his first thoughts. And once he received the camera, he posted his first impressions and pics (click here). (also he enjoyed “the best review of the X-E1 to date” of riflessifotografici as he worte here. If you want to read the riflessifotografici review, click here!)

A German video review on youtube can be seen here. If you want to read the review and look at sample pics click here (translated version).

Many, many snapshots can been seen here: brandonremler

Read the sansmirror review here. It focuses also on the difference between X-PRO1 and X-E1.

Fuji’s has always made cameras and camera sensors that intrigue me and have enabled me to turn out beautiful files. And their lenses are also well regarded“. Read the whole opinion about the X-E1 at visualsciencelab (click here)

X-F1

A video review of PhotoNewsReview here.

Fuji F800 EXR

For a first look at digitalcamerareview click here.

VOTE THE X-PERT CORNER POLL

The Best Locations for Streetphotography are... (max. 2 selections)

View Results

Loading ... Loading ...

Using Shooting Profiles and the Quick Menu

by Rico Pfirstinger

An “expert” column about the X-Pro1, the X-E1 and other Fujifilm X-series cameras? Isn’t it okay if we just read the owner’s manual? After all, it briefly documents all of the camera’s functions – including features that I (and probably most of you) won’t ever use. There’s something missing, though: background information and practical tips based on experience. What’s the best way to activate a function? Which setting should you use in different circumstances? Why is the camera exhibiting a certain behavior? And what functions don’t work the way you would expect them to and how you should handle them?

So yes, you should definitely read the owner’s manual. But you may also find this column somewhat useful, because (like my book “Mastering the Fujifilm X-Pro1” which it is  based on to a large extent) it picks up where the manual leaves off. I’ll try to include personal experiences, tips, and background information – not only from me, but from other photographers as well. After all, the Internet is full of knowledgeable people and valuable advice. It would be unwise to ignore this wealth of information.

Using the Quick Menu

Let’s get started with something so basic that’s it is mostly ignored: using shooting profiles and the Quick menu. As you will probably know, the Quick menu (aka the Q button) are part of Fujifilm’s efforts to enhance the (not so perfect) electronic user interface of their X-series cameras. You can currently find different iterations of the Quick menu in the X-Pro1, the X-E1 and the X10.

Let’s be clear: The Quick menu isn’t yet another menu to expand the contents of the Shooting, Playback and Setup menus. Instead, it’s here to make frequently used functions (that are buried in those other menus) more accessible. It’s just a shortcut, nothing else.

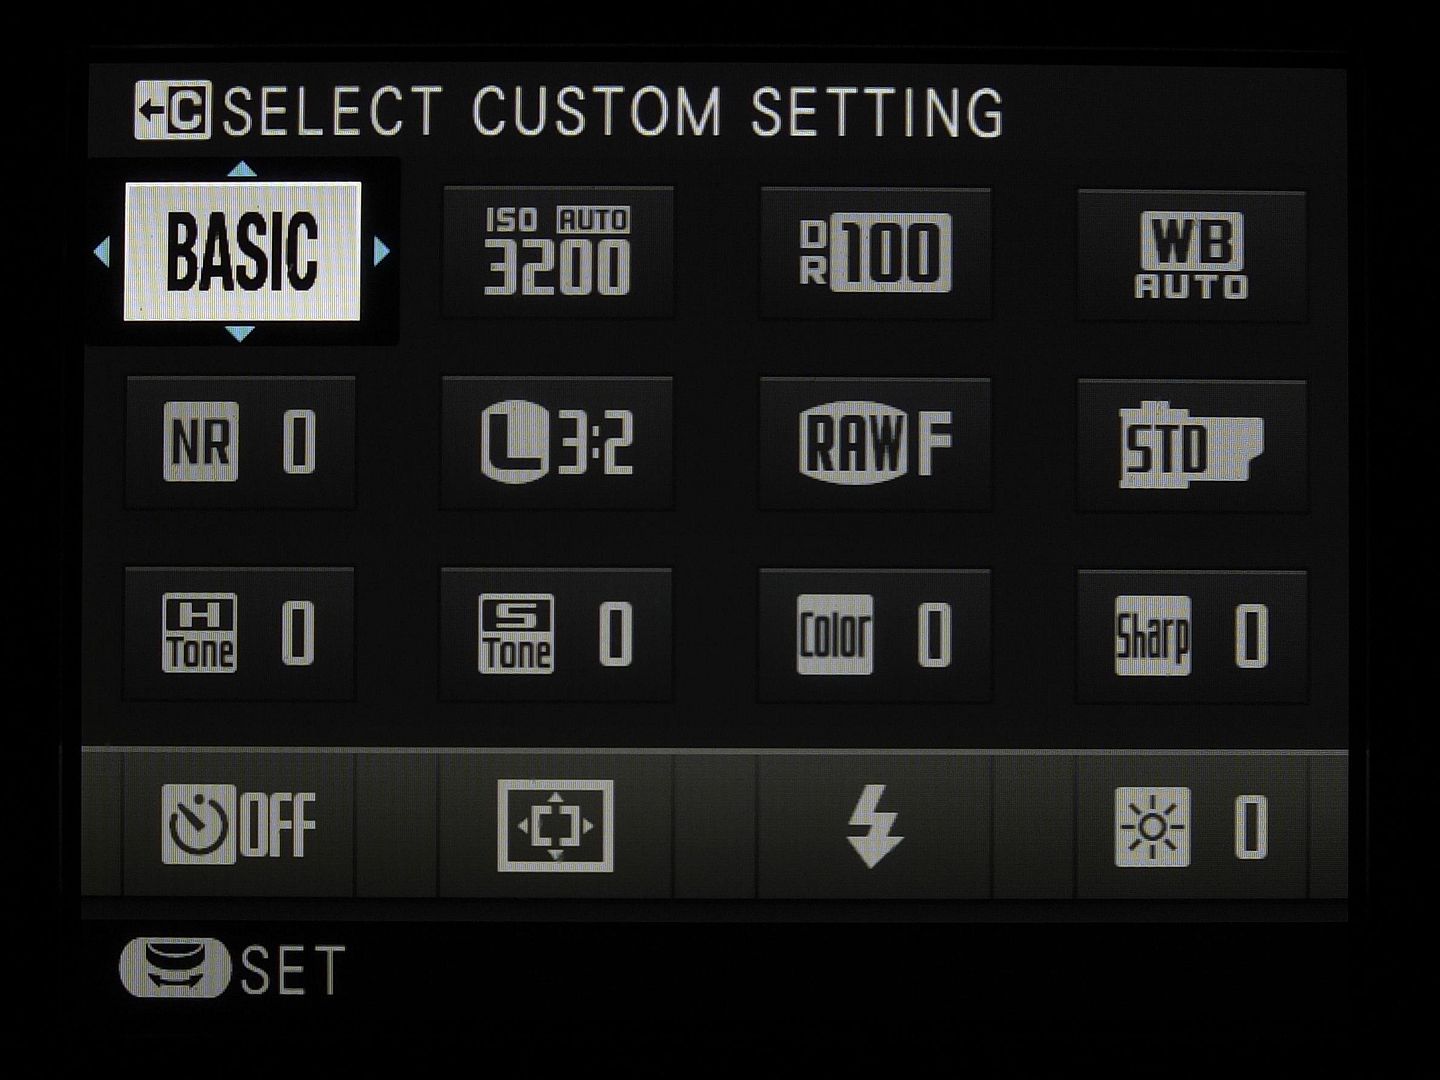
While your camera is in shooting mode, you can open the Quick menu by pressing the Q button. This allows you direct access to 16 of the most commonly used camera features: select custom settings (aka shooting profiles), change ISO settings, dynamic range settings, select a white balance setting, set noise reduction, image size, image quality, film simulation, highlight tone, shadow tone, color, sharpness, the self-timer, AF mode, flash mode, and change the viewfinder/LCD brightness.
Qmenu1

Use the four selector (arrow) keys to navigate to any of the 16 functions and then use the command dial to change the settings for the function of your choice. You can apply any changes you make in the Quick menu using one of three buttons: you can press the Q button once again, you can press the MENU/OK button, or you can depress the shutter button halfway.

The X-Pro1 and X-E1 allow you to create up to seven custom settings or shooting profiles, which you can bring up and select in no time with the help of the Quick menu. To create a new shooting profile or change the settings of an existing one, hold down the Q button for a few seconds. This will bring you directly to the menu option EDIT/SAVE CUSTOM SETTING in the shooting menu, where you can either save your current camera settings as one of the seven profiles (SAVE CURRENT SETTINGS) or manually set and save values for ISO, dynamic range, film simulation, white balance, color, sharpness, highlights, shadows, and noise reduction for each profile.

While in the Quick menu, you can use the command dial to shuffle rapidly through the seven shooting profiles. As you do this, you will be able to see a live image on the camera’s display depicting the settings of each profile. In other words, you not only see which one of your up to seven profiles is currently selected, you also see all of the actual camera settings that are associated with that profile. You can of course use these predefined profiles as a starting point and then use the Quick menu to make further adjustments to the settings. Any changes you make to each profile’s baseline settings will be indicated with a red dot.
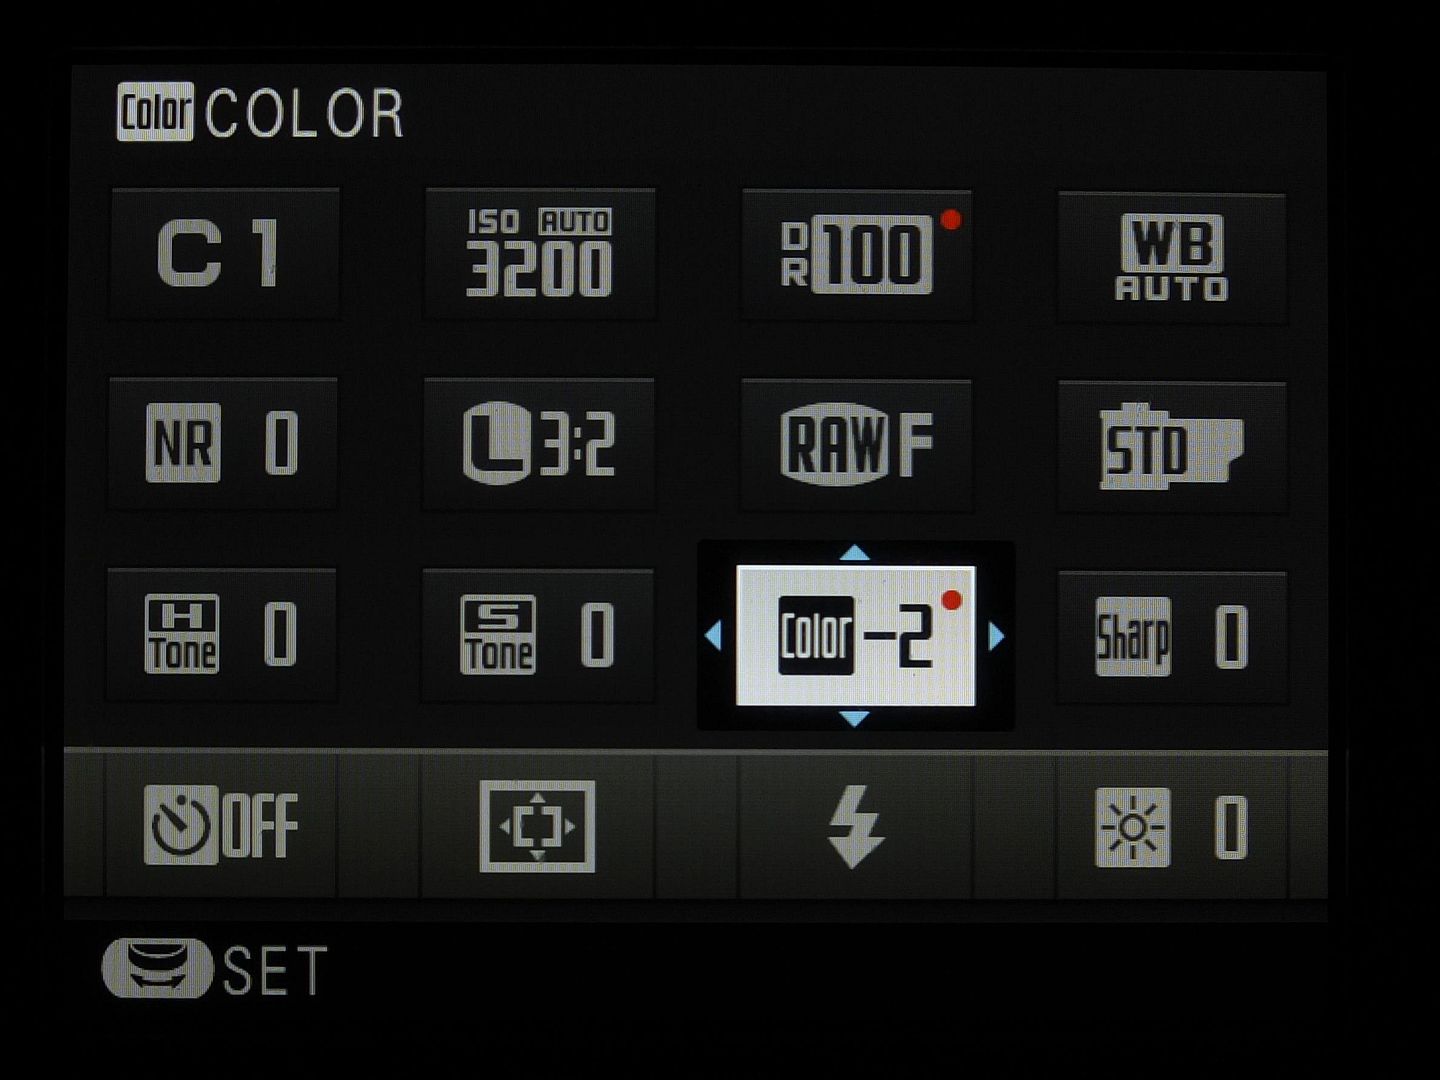
 

Qmenu2

In this illustration the first shooting profile is selected (C1), but the values for the dynamic range (DR100) and color (–2) have been manually adjusted. The camera indicates these changes with a red dot. These changes won’t be saved with the shooting profile; they are only active until you overwrite (change) them again or select another shooting profile. To make permanent changes to a shooting profile, hold down the Q button for a few seconds or select EDIT/SAVE CUSTOM SETTING from the shooting menu.

What about the BASIC setting in the upper left of the Quick menu? I have seen some confusion about in a few photography forums, so here’s the deal: While it’s clear that C1 to C7 are labels for the camera’s custom shooting profiles 1 to 7, BASIC simply means your current, active settings. So once you select one of the seven shooting profiles and then confirm your selection (with or without making any changes), those settings immediately become the camera’s new (= current) BASIC setup and there won’t be any more red dots indicating any changes you made to a previously selected shooting profile. In other words, BASIC simply shows the settings that you and your camera are currently working with. Whatever you do in the Quick Menu – once you close it (by pressing the Q button once again, by pressing the MENU/OK button, or by halfway depressing the shutter button), the settings you left it with become the BASIC settings.

Using Custom Shooting Profiles

The X-Pro1 and X-E1 have a plethora of settings options: ISO, DR function, white balance selection, film simulation, color, contrast (highlights and shadows), sharpness, noise reduction. Excluding ISO and DR, the remaining settings are also referred to as “JPEG settings”, as they do not affect what’s in the RAW file.

You may be wondering, “How am I supposed to define all of these settings quickly when I’m ready to snap an image? I want to take pictures; I don’t want to stand around fumbling with my camera!”

Here is where the seven custom shooting profiles come into play. They allow you to program each variable independently and then save them together in a bundle. Then you can switch back and forth quickly among your predefined profiles.

Examples of Custom Profiles

Which profiles should you save? Only you can answer this question for yourself – photographers not only have individual requirements and aims, but they also have their own stylistic preferences. This is exactly why the X-Pro1 and X-E1 feature so many different programming possibilities. If there were one “optimal” universal setting, Fuji could have done away with many options. Nevertheless, here are a few recommendations for potentially useful custom shooting profiles:

  • General profile: In this profile, I save the settings that generally apply to everyday situations and quick snapshots. My typical settings for my all-around profile are automatic white balance, auto ISO, auto DR, ASTIA or PROVIA, and occasionally a decreased noise reduction set at medium low.
  • DR100% profile: This is a variation of the general profile with the dynamic range setting fixed at DR100%. This profile allows me to use the live histogram for correcting the exposure and target the brighter areas of my image more accurately when defining the exposure settings.
  • Black-and-white profile: Any time I imagine an image would look good in black-and-white, I use this profile, which includes the black-and-white film simulation and increased contrast settings. The electronic viewfinder gives me a practical (black-and-white) preview of my subject.
  • Special profile: I generally reserve one profile for special situations, such as shooting in a studio or taking infrared images, when it is practical to shoot with a color temperature setting predefined in Kelvin.
  • RAW shooter” profile: I use this profile when I know in advance that I will probably want to expose the image very carefully so that I can develop and edit it with an external RAW converter.

A JPEG Profile for RAW Shooters

Yep, no kidding: a JPEG shooting profile for RAW shooters. While JPEG settings have no effect on RAW files, they do affect the image you can see in the electronic viewfinder (EVF) and on the LCD display. Moreover, the data for the live histogram is derived from the image that appears in the live view – in other words, it too is affected by your current JPEG settings.

What does this practically mean? If you select VELVIA as your film simulation, for example, not only will you have a brightly colored JPEG; you’ll also have a brightly colored live view preview with pronounced contrast. This image preview is reflected in the live histogram as well, and the Velvia simulation will cause the peaks of exposure to shift to either the left or the right limits quicker than if Provia were used instead.

The same goes for the contrast settings (HIGHLIGHT TONE and SHADOW TONE): if both parameters are set to HARD then the highlights and shadows will shift beyond the right and left limits of the histogram faster than they would if both were set to SOFT.

As I’ve already said, the RAW file itself isn’t affected by any of this – it collects all of the image information that the sensor is capable of capturing. Conversely, JPEGs rely on only a portion of the RAW data. The objective here is setting the JPEG parameters in a way that allows you to see the largest possible portion of the RAW data – because this is the information that interests us as RAW shooters. We want to squeeze everything possible out of our camera and its sensor – to get the absolute maximum and to leave nothing behind. We want to explore the limits of the dynamic range and expose as close as possible to its borders. And we want the live histogram to inform us of where these limits are as precisely as possible.

The JPEG settings influence how we expose and adjust our images because we make our decisions about exposure using the information we can gather from the histogram and the live image. As a RAW-only photographer, you will be typically shooting with ETTR (Expose To The Right). We are therefore looking for JPEG settings that produce the softest contrast in order to obtain a histogram that reveals the most useful information about dynamic range for RAW files. Here are my recommendations for this profile:

  • DYNAMIC RANGEDR100%. The live histogram supplies meaningful information only with this DR setting.
  • FILM SIMULATIONPROVIA. This is the most neutral film simulation and also has the softest contrast. This setting will prevent highlights and shadows from unnecessarily being cropped at either end of the histogram.
  • HIGHLIGHT TONE(–2) SOFT. The RAW format of the sensor has an exposure reserve of approximately 0.4 EV in comparison to the processed JPEG format. You can access this reserve with an external RAW converter. The live histogram should be set to SOFT at its edges to prevent RAW shooters from exposing their images too conservatively.
  • SHADOW TONE (–2) SOFT. When you use DR100% with high-contrast subjects (in order to use the live histogram to base your exposure on the bright areas of your image), the dark areas often end up appearing as blocked-up black areas. This SHADOW TONE setting of (–2) SOFT counteracts this problem, since it brightens the dark tonal values in the viewfinder (and in the live histogram).

What’s next? Obviously, there’s much more to say about using the live histogram, the camera’s exposure modes or about how to use ETTR. In fact, one could easily fill a book with all this stuff, so that’s exactly what I did. It took me about a year to finish it, and you can have a look at 65 pages of reading samples by clicking this link for the German and this link for the English version of “Mastering the Fujifilm X-Pro1”. Or you can actually buy the book at Amazon by clicking here for the German or here for the English version.

As X-PERT CORNER is supposed to become a weekly column here on FUJIRUMORS, I have already identified over 20 topics I could write about. Here’s a pretty random pick of three of them:

The Best Locations for Streetphotography are... (max. 2 selections)

View Results

Loading ... Loading ...

So what’s it going to be next week? You decide by answering the poll! Till then, I wish you a happy New Year – and have fun with your Fuji X-series camera.

Rico Pfirstinger studied communications and has been working as journalist, publicist, and photographer since the mid-80s. He has written a number of books on topics as diverse as Adobe PageMaker and sled dogs, and produced a beautiful book of photographs titled Huskies in Action (german version). He has spent time working as the head of a department with the German Burda-Publishing Company and served as chief editor for a winter sports website. After eight years as a freelance film critic and entertainment writer in Los Angeles, Rico now lives in Germany and devotes his time to digital photography and compact camera systems.