Using Firmware 4

Using Firmware 4
Talk to Rico (open forum for questions & feedback)
Rico’s Books at Rocky Nook – Fuji X Secrets Workshops – Rico’s Flickr Sets
The Fujifilm X-E2: Beyond the Manual (use coupon XPERT40 for a 40% discount)
NEW: The Fujifilm X-T1: 111 X-Pert Tipps (use coupon XPERT40 for a 40% discount)
—
Today, Fujifilm announced another major firmware revision for the X-T1: Version 4 introduces a new autofocus system with zones and object tracking based on pattern recognition. It’s also faster and more accurate, and it’s easier to use. Over the past weeks, I was able to gather practical experience with several work-in-progress versions of what’s coming in late June. I am happy to share these experiences in this article.
U.S. workshop is happening!
Before we begin, I’d like to respond to more than two dozen inquiries I have received regarding the proposed Fuji X Secrets workshops in Santa Barbara, CA. Here’s the deal: It’s happening! There will be a 2-day workshop on the weekend of July 18 and 19 at the offices of Rocky Nook (my publisher), and those of you who have already contacted me via email will get a heads-up to register before everyone else. For the best possible learning effect, only 8 places will be available, so if you haven’t already contacted me to express your interest, now is your last chance to do so. You can find out more about my workshops and my contact information here.
Minor and major improvements
Firmware 4 offers several improvements with regards to usability, such as exposure compensation in manual mode with Auto-ISO, expanding the T setting on the shutter dial to cover the full range of available shutter speeds (30s – 1/32000s), getting rid of the macro button (you may want to reassign the button to select the new AF modes), displaying finer gridlines that obscure less of the actual scene, or replacing the term Silent Mode with something we can actually understand.
However, the most significant innovation in firmware 4 is the new autofocus system: It includes improved single-point focussing, introduces new zone focussing and finally offers “real” subject tracking over the entire sensor area. Click here for an overview of what’s new in firmware 4.
If you have watched Fuji’s video presentation on the new autofocus modes and features, you’ll already have a good idea of what firmware 4 can do for you. If you haven’t, here’s the video on YouTube:
SINGLE-POINT AF
Let’s begin with what we already know: SINGLE-POINT AF. This is the mode we currently enjoy in our X-series cameras: It allows us to select one of 49 square-shaped AF frames and adjust its size in five steps. The nine central frames are PDAF-enabled and can use the camera’s faster phase detection autofocus. The 40 remaining outer frames are CDAF-only, meaning they can only work with the slower contrast detection autofocus method. You can read all about AF methods and the hybrid autofocus in my current books on the X-E2 and X-T1, so I’m not going to bore you with things you already know.
What you may not know it that single-point AF is now more accurate because thanks to the new firmware, the camera is dividing each selected AF frame into additional (invisible) subframes to ensure even better autofocus accuracy. In other words: The camera isn’t just focussing on anything with sufficient contrast covered by the selected AF frame, it’s trying to make a smarter decision about which part of what’s covered by the AF frame shall be in focus.
Here’s a quick video that illustrates single-point AF. Obviously, everything looks quite familiar:
Single-point AF works in concert with both AF-S and AF-C.
In AF-S mode, it simply locks onto a subject as you half-press the shutter button and keeps that distance until you refocus or adjust the focus with AF+MF. You can also use the “autofocus trick” to capture moving subjects in this mode by fully depressing the shutter button in a swift motion (also known as the “shutter mash” technique), skipping the half-press part of the action.
In AF-C mode, single-point AF employs predictive distance tracking to keep your subject in focus as it moves towards the camera (or away from it). As the camera is tracking the distance, it’s important that the selected AF frame always covers the portion of the subject that is supposed to be in focus.
To ensure maximum performance, it’s recommended to select one of the nine central PDAF-enabled AF points. Since PDAF sensitivity increases from 2.5 EV to 0.5 EV in firmware 4, the camera will now use the fast PDAF method almost exclusively even when the light is poor. No more focus hunting.

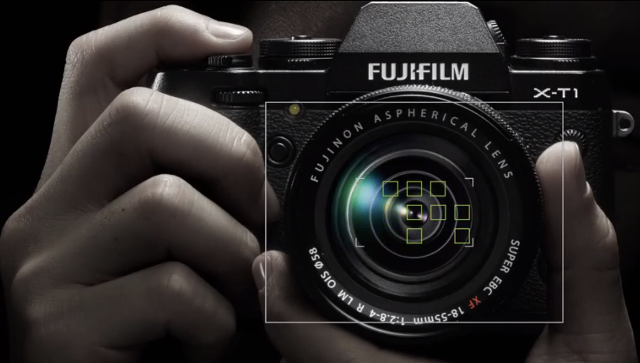
Single-point AF
ZONE AF
The new ZONE AF mode divides the image frame into 77 (11 x 7) instead of the previously known 49 (7 x 7) AF points, so the AF point coverage gets tighter, with less space between horizontal AF points. Within this 77 point area, you can define focus zones that cover areas of 3 x 3, 5 x 3 or 5 x 5 AF points.
This is how zone focussing looks like:
You can freely move your zone around the entire image area, just like you would move a single AF point. In the short video above, the zone’s size and position were set to match the PDAF-enabled sensor area, which is a reasonable choice. As soon as you select a zone area that covers an AF point that is not PDAF-enabled, it’s “game over” for the PDAF and the camera will switch to the slower CDAF focussing that involves more hunting.
Once again, ZONE AF is available in concert with AF-S and AF-C. Basically, you can think of a zone as a super-sized AF frame: The camera will always try to focus on what’s covered by the selected zone, analyzing its contents from the center to its edges. Zones allow you to more easily follow subjects with erratic and unpredictable movements, a task that used to be quite challenging with a single AF point. Zone focussing is also kind of smart, as it won’t immediately lose a subject when it temporarily exits the center of your selected zone.
Here’s a seagull that flew by in Istanbul (at a pretty fast speed, I must say), captured in AF-S with Zone AF (5 x 3, PDAF zone) and the “slow” 27mmF2.8 pancake lens using the “shutter mash” technique:

ZONE AF (5 x 3)
WIDE/TRACKING AF
The third AF mode in firmware 4 is called WIDE/TRACKING and covers the entire image sensor area. This means that this mode is basically CDAF-only. However, it still offers 3D subject tracking plus predictive autofocus along the time axis.
Here’s how it works:
In AF-S, WIDE pretty much works like MULTI autofocus in the X30, X100T, XQ2 and X-A2: It scans the full image area and automatically selects and confirms up to 9 green AF points that indicate which parts of the image are in focus.
In AF-C, WIDE/TRACKING uses pattern recognition to track a specific subject as it moves across the image area. It begins with the photographer selecting one of 77 available AF points and pointing it at the part of the scene he wants to track. Then, while half-pressing the shutter button, the camera will track this pattern as it moves across the screen (left/right, up/down) and also moves towards or away from the camera. All this is done with CDAF, so there’s some continuous pumping going on. By doing so, the camera can apply predictive AF tracking even in CDAF mode, as it keeps analyzing previous successful focus locks to calculate the speed and distance of the moving subject.
Here’s a little video that shows WIDE/TRACKING in action:
Video AF Improvements
The new firmware also improves AF performance in video mode. This is illustrated by another little Fuji video:
Face Recognition with Eye Detection
Firmware 4 also brings improved face recognition with eye detection to the X-T1. This isn’t really new, as this feature has already been introduced with the X-A2 in January. However, it’s pretty impressive, as it can better look through glasses and isn’t as easily distracted as the previous implementation.

Face Detection AF
A Few Hints
- As usual, when using Single-point AF, make the AF frame as large as possible and as small as necessary.
- In Zone AF, try to use zones that do not extend into the CDAF-only area of the sensor. Instead, keep the zone entirely within the central PDAF-enabled area to ensure maximum AF performance.
- In Wide/Tracking AF with AF-C, avoid abrupt/erratic camera movements that may cause the system lose the subject.
- Remember that Face Detection AF isn’t just an autofocus mode, it’s also an exposure metering mode and even affects auto white balance. In order to make sure that your exposure doesn’t unexpectedly change when faces are recognized or not recognized, use manual exposure mode (M). Also note that Face Detection only uses CDAF.
Firmware 4 will be available in June. As of now, it’s still a work in progress, but trust me: once you have tasted it, you don’t want to go back.
See you next week!
For your convenience, here’s a TOC with links to my previous X-PERT CORNER articles:
- First Look: XF16mmF1.4 R WR
- Film Simulations in RAW File Converter EX Version 2
- X-T1: Tethering with Adobe Lightroom and Fujifilm HS-V5
- First Look: Fujinon XF16-55mmF2.8 R LM WR
- XF 56mm APD vs. XF 56mm
- New Firmware Features (3): X-T1 Firmware Version 3.00
- New Firmware Features (2): Using Camera Remote
- New Firmware Features (1): Using AF+MF
- First Look: Fujinon XF 50-140mm F2.8 R LM OIS WR
- Using the Fujifilm X100T
- First Look: Fujifilm X30
- First Look: XF18-135mmF3.5-5.6 R LM OIS WR
- X-E2: Behind Firmware 2.00
- First Look: Fujifilm TCL-X100 Teleconverter for X100(S) Cameras
- First Look: Fujinon XF10-24mmF4 R OIS
- First Look: Fujifilm X-T1
- First Look: Fujinon XF56mmF1.2 R
- Exposing Right
- Using Auto-ISO
- Using Face Detection
- First Look: Fujifilm XQ1
- PDAF & LMO Lens Firmware Updates Coming in November
- First Look: Fujifilm X-E2
- How Fuji could save the X-M1
- X-A1 vs. X-M1: Photo Ninja Edition
- X-A1 vs. X-M1: the Shootout
- Using the Fujifilm X-A1 [& X-M1]
- First Look: Fujinon XF23mmF1.4 R
- RAW Converter Shootout Results
- Ultimate RAW Converter Shootout
- First Look: X-M1 with New Kit Zoom and Pancake Lens
- Zeiss Touit vs. Fujinon XF
- Remote Shutter Control for X Series Cameras
- Apple Camera RAW, X-Trans and EXR
- First Look: XF55-200mmF3.5-4.8 R LM OIS
- Studio X
- Using the X100S
- Using the X20
- X100S vs. X100
- X20 vs. X10
- RAW, JPEG, Silkypix and “Fuji Colors”
- Adapting Third-Party Lenses (updated with Speed Booster)
- RAW for JPEG Shooters…
- Tips for Updating your Firmware
- How to Clean the X-Trans Sensor
- Using the XF14mmF2.8 R
- Decoding XF18-55mmF2.8-4 R LM OIS
- Comparing RAW converters: JPEG vs. Lightroom, Capture One, Silkypix & RPP
- XF14mmF2.8 R appears to be almost distortion free
- How to Expand Dynamic Range
- How to Use Extended ISO
- EXR, anyone?
- Capture One – When the Going Gets Tough…
- Using Shooting Profiles and the Quick Menu
Rico Pfirstinger studied communications and has been working as journalist, publicist, and photographer since the mid-80s. He has written a number of books on topics as diverse as Adobe PageMaker and sled dogs, and produced a beautiful book of photographs titled Huskies in Action (German version). He has spent time working as the head of a department with the German Burda-Publishing Company and served as chief editor for a winter sports website. After eight years as a freelance film critic and entertainment writer in Los Angeles, Rico now lives in Germany and devotes his time to digital photography and compact camera systems. His new ebook The Fujifilm X-T1: 111 X-Pert Tips is available at Rocky Nook.