How to Use Extended ISO

by Rico Pfirstinger

The X-Pro1 and X-E1 offer a so-called Expanded or Extended ISO range with values of ISO 12800 and ISO 25600, but there’s a catch: These ISO settings are only available in JPEG mode, so you won’t be able to save these images as RAW files. So these options are only available when the RAW shooting is disabled and your camera is set to JPEG Only mode. As you may expect, the results of these very high ISO settings are typically accompanied by visible image noise and some loss of detail.

What’s hiding behind the Extended ISO range? At these two ISO settings, the X-Pro1 and X-E1 record RAW images at ISO 6400, hence underexposing them by one or two exposure values (EV) and then boost up the exposure again when the image data is converted to a JPEG. This means that you can achieve the same results by setting your camera to ISO 6400 (with RAW mode enabled) while turning the compensation dial to –1 EV or –2 EV, and then using the internal or an external RAW converter to push the image one or two exposure values in order to compensate for this underexposure.

Employing these Extended ISO values results in an unavoidable loss of quality, so you should only use them in emergencies. You actually retain more flexibility if you underexpose your image while shooting with ISO 6400 in FINE+RAW (or RAW Only) and then plan on adjusting the exposure manually during the RAW conversion.

Here’s how it looks (click on the images for high-res versions):

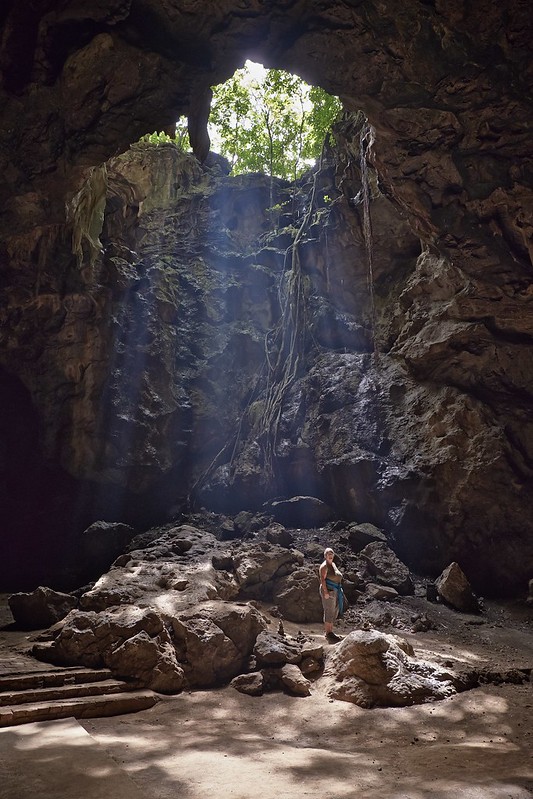
ISO 12800

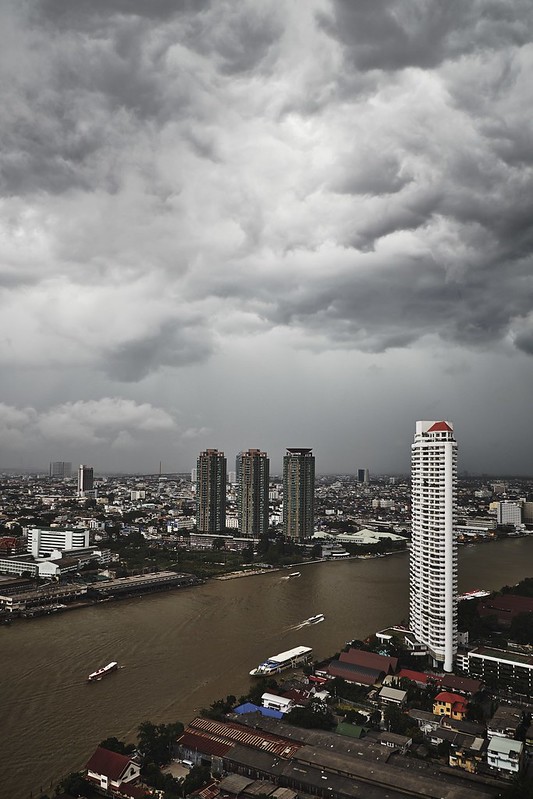
ISO 25600

These two examples illustrate shooting in Extended ISO 12800 (above) and 25600 (below). When you click on these images to open them in Flickr for a full-size view, you will find visible noise and loss of detail, which is owed to a large amount of analog and digital image data amplification.

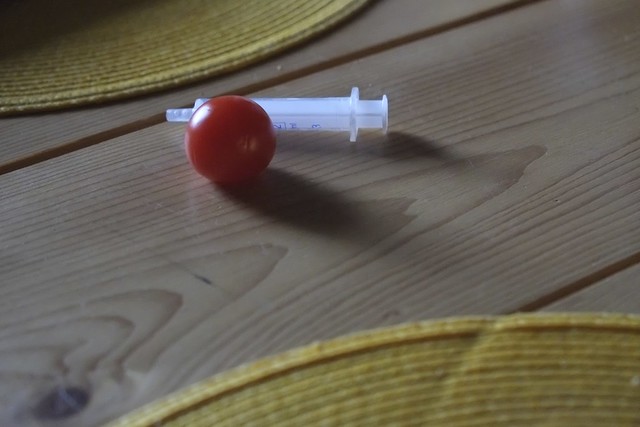
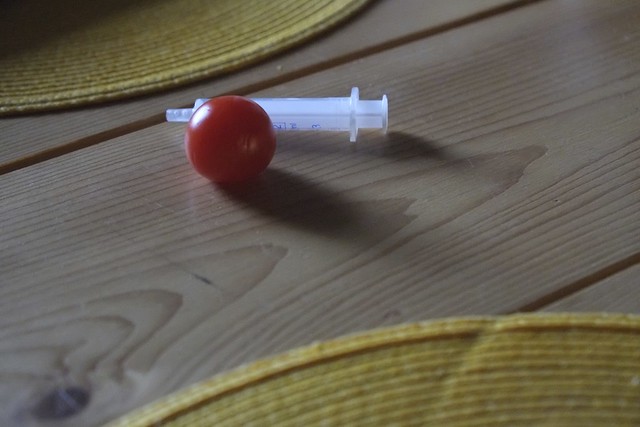
Let’s add another example: One of the following images was shot with Extended ISO 12800, the other with ISO 6400 RAW and then pushed 1 EV in the internal RAW converter of my X-E1. Both images were shot at f5.6 and 1/30s in manual mode.

It’s hard to tell which one is which, isn’t it? With higher magnification levels or in a 100% view, you would see differences related to noise reduction. The camera is of course optimizing its noise reduction for its Extended ISO settings 12800 and 25600. On the other hand, pushing an ISO 6400 image in the internal converter will leave you with NR processing optimized for ISO 6400.

By the way, here’s the ISO 6400 RAW developed and pushed by 1 EV with Silkypix 5:

Why ISO 100 is not good for you

The Extended ISO range also includes the option of shooting at ISO 100, which is again only available if you are shooting exclusively in JPEGs. Here the process is inverted: the camera captures an image at its native ISO 200 and overexposes the RAW data by one exposure value (1 EV) in the process. Then, during the RAW conversion, it brings the exposure down again by 1 EV. This process—the counterpart of “pushing” an exposure—is called pull development.

This method produces images with good contrast, very little noise and a high degree of detail, particularly in the shadow areas, which comes at the expense of the high end of the dynamic range. The highlights, or bright tones, suffer dramatically, making ISO 100 also an “emergency setting” for images that don’t feature high contrast or important highlight details.

Again, you can manually simulate Extended ISO 100 by enabling RAW, shooting in native ISO 200 and overexposing your image by 1 EV while doing so. When you process this image in the camera’s internal or with an external RAW converter, you have to correct for this by using the Pull option or the exposure slider.

Does this process sound familiar? It’s indeed pretty much the same as using classical ETTR aka classical Expose To The Right. In Extended ISO 100, the camera works the entire process (shooting the image overexposed and developing it underexposed) automatically. However, Extended ISO 100 will only get you JPEGs, no RAW files. And it only makes sense with subjects that exhibit low dynamic range, as this method tends to blow the highlights of your subject.

Have a look at this example (click on the images for high-res versions):

ISO 200

The image above shows our test subject in standard ISO 200. The full dynamic range is preserved.

ISO 100

This example shows the same image in Extended ISO 100. As you can see, it shows more contrast and highlights are blown.

To illustrate the difference more clearly, here are both images in Apple Aperture. The red areas show exposure warnings indicating blown (missing) highlights:

ISO 200 - Highlights Clipping Warning

ISO 100 - Highlights Clipping Warning

As you can see, there’s a very visible difference between ISO 200 (above) and Extended ISO 100 (below).

Let’s summarize: We should only stray beyond the standard range of ISO 200-6400 when there’s no other option. Extended ISO 100 results in a reduced dynamic range for highlights, whereas ISO 12800 and ISO 25600 lead to very visible interference and a loss of detail. Moreover, these three “extended ISO range” settings are available only when your camera is set to save JPEGs only—writing RAW files with these settings is not an option.

Here’s the poll for next week’s column. With Extended ISO gone and little interest in tips for updating the camera and lens firmware, let’s add two new options:

FujiRumors should....

View Results

Loading ... Loading ...

Till next week!

Rico Pfirstinger studied communications and has been working as journalist, publicist, and photographer since the mid-80s. He has written a number of books on topics as diverse as Adobe PageMaker and sled dogs, and produced a beautiful book of photographs titled Huskies in Action (German version). He has spent time working as the head of a department with the German Burda-Publishing Company and served as chief editor for a winter sports website. After eight years as a freelance film critic and entertainment writer in Los Angeles, Rico now lives in Germany and devotes his time to digital photography and compact camera systems. His book “Mastering the FUJIFILM X-Pro1” (Kindle Edition) (Apple iBook Store) (German version) is available on Amazon.

EXR, anyone?

by Rico Pfirstinger

Hello and Happy New Year!

While the topic of Friday’s column appears to be set in stone by now (I have already uploaded several samples on “extended ISO settings” to my Flickr Photostream), I’d like to know about your interest in a different subject matter: EXR sensors. Plenty of Fujifilm cameras are using them, including three X-series models: X10, X-S1 and XF1.

To be clear: This is not about “EXR Auto” mode, which is basically kind of a “dummy mode” where the camera automatically decides which scene program to choose and what settings to establish, so the only thing the user has to do is press the shutter button. Nope, it’s about EXR DR and EXR SN: how it works, what it means (practically!), how to use it, when to use it, and when not to use it. Plus, how does your EXR camera actually use EXR? Do you really know? Do you even care to know?

Having spent several years with at least five different EXR camera models, I may have gathered some knowledge and experience that could be instrumental in answering some of these questions. I had to do it all by means of “reverse engineering”, as Fujifilm doesn’t disclose any kind of useful technical information about the inner workings of the EXR camera logic. So the question is: Do you want to know (more) about EXR?

Kindly answer the poll below:

Do you agree with the position of Fuji about IBIS?

View Results

Loading ... Loading ...

Rico Pfirstinger studied communications and has been working as journalist, publicist, and photographer since the mid-80s. He has written a number of books on topics as diverse as Adobe PageMaker and sled dogs, and produced a beautiful book of photographs titled Huskies in Action (german version). He has spent time working as the head of a department with the German Burda-Publishing Company and served as chief editor for a winter sports website. After eight years as a freelance film critic and entertainment writer in Los Angeles, Rico now lives in Germany and devotes his time to digital photography and compact camera systems. His book “Mastering the FUJIFILM X-Pro1” is available on Amazon.

Capture One – When the Going Gets Tough…

…the Tough Get Going. Demosaicing the X-Trans sensor is a tough task, and in about a week, Phase One is expected to release a new final version of their successful Capture One (aka C1) RAW file processing software. Although it’s just a minor update (7.0.2) on paper, this is major news for Fujifilm X-Trans camera users. There’s also a crazy amount of hype  going on about it in the virtual sphere. Several beta testers have been stating that C1 is putting Lightroom/ACR to shame. This usually refers to X-Trans image detail reproduction, which is pretty lame in Lightroom. So this is a no-brainer: Of course, detail rendering is better than in Lightroom! DCRAW and Silkypix put Lightroom/ACR to shame in this category, as well.

That said, I think detail rendering is pretty decent in this C1 beta, but it’s also nothing to brag about too loudly (at least if you know how to use Silkypix 5 or the DCRAW based “RPP” converter). In any case, it’s always great to get new workflow options, because competition is good for us customers. I’m also confident that Phase One’s X-Trans market entry and increasing sales of current and future X-Trans camera models will put more pressure on Adobe to get their act together. Not that I really needed Lightroom, as I appear to be one of those very few human beings on this planet who have no problem at all processing X-Trans RAWs in (gasp!) Silkypix 5.

I have played with C1’s beta version for almost two weeks, and I’m quite pleased with its ability to recover highlights, which seems to be on par with Lightroom/ACR and definitely better than Silkypix 5. There are still several issues, though, which I will not get into specifically at this time, as I expect them to be ironed out in the final version of the software. It’s called “beta” for a reason, at least hopefully so.

Here are a few successful examples of me developing some of my high dynamic range test samples  in Capture One (click on them for high-res versions):

DSCF6339 (Capture One version)

DSCF5915 (Capture One version)

DSCF5528 - A Storm is Coming (Capture One version)

Please let me take this opportunity to thank you all for your warm welcome here on Fujirumors – and for so many of you also expressing their support by pre-ordering “Mastering the Fujifilm X-Pro1“, which will start shipping in just a few days, as my publisher has told me.

With respect to the topic of my next regular column, it appears like we already have a winner. However, please still cast your vote if you haven’t done so already. Your votes are not just helpful in determining what topics to discuss in future editions of this column, their accumulated number is also a good indicator of your general interest in this column altogether. That said, I’m already mentally preparing to write something insightful about “extended ISO” settings. See you next Friday here on Fujirumors, and have a great start in 2013!

The Best Locations for Streetphotography are... (max. 2 selections)

View Results

Loading ... Loading ...

Rico Pfirstinger studied communications and has been working as journalist, publicist, and photographer since the mid-80s. He has written a number of books on topics as diverse as Adobe PageMaker and sled dogs, and produced a beautiful book of photographs titled Huskies in Action (german version). He has spent time working as the head of a department with the German Burda-Publishing Company and served as chief editor for a winter sports website. After eight years as a freelance film critic and entertainment writer in Los Angeles, Rico now lives in Germany and devotes his time to digital photography and compact camera systems.

Using Shooting Profiles and the Quick Menu

by Rico Pfirstinger

An “expert” column about the X-Pro1, the X-E1 and other Fujifilm X-series cameras? Isn’t it okay if we just read the owner’s manual? After all, it briefly documents all of the camera’s functions – including features that I (and probably most of you) won’t ever use. There’s something missing, though: background information and practical tips based on experience. What’s the best way to activate a function? Which setting should you use in different circumstances? Why is the camera exhibiting a certain behavior? And what functions don’t work the way you would expect them to and how you should handle them?

So yes, you should definitely read the owner’s manual. But you may also find this column somewhat useful, because (like my book “Mastering the Fujifilm X-Pro1” which it is  based on to a large extent) it picks up where the manual leaves off. I’ll try to include personal experiences, tips, and background information – not only from me, but from other photographers as well. After all, the Internet is full of knowledgeable people and valuable advice. It would be unwise to ignore this wealth of information.

Using the Quick Menu

Let’s get started with something so basic that’s it is mostly ignored: using shooting profiles and the Quick menu. As you will probably know, the Quick menu (aka the Q button) are part of Fujifilm’s efforts to enhance the (not so perfect) electronic user interface of their X-series cameras. You can currently find different iterations of the Quick menu in the X-Pro1, the X-E1 and the X10.

Let’s be clear: The Quick menu isn’t yet another menu to expand the contents of the Shooting, Playback and Setup menus. Instead, it’s here to make frequently used functions (that are buried in those other menus) more accessible. It’s just a shortcut, nothing else.

While your camera is in shooting mode, you can open the Quick menu by pressing the Q button. This allows you direct access to 16 of the most commonly used camera features: select custom settings (aka shooting profiles), change ISO settings, dynamic range settings, select a white balance setting, set noise reduction, image size, image quality, film simulation, highlight tone, shadow tone, color, sharpness, the self-timer, AF mode, flash mode, and change the viewfinder/LCD brightness.
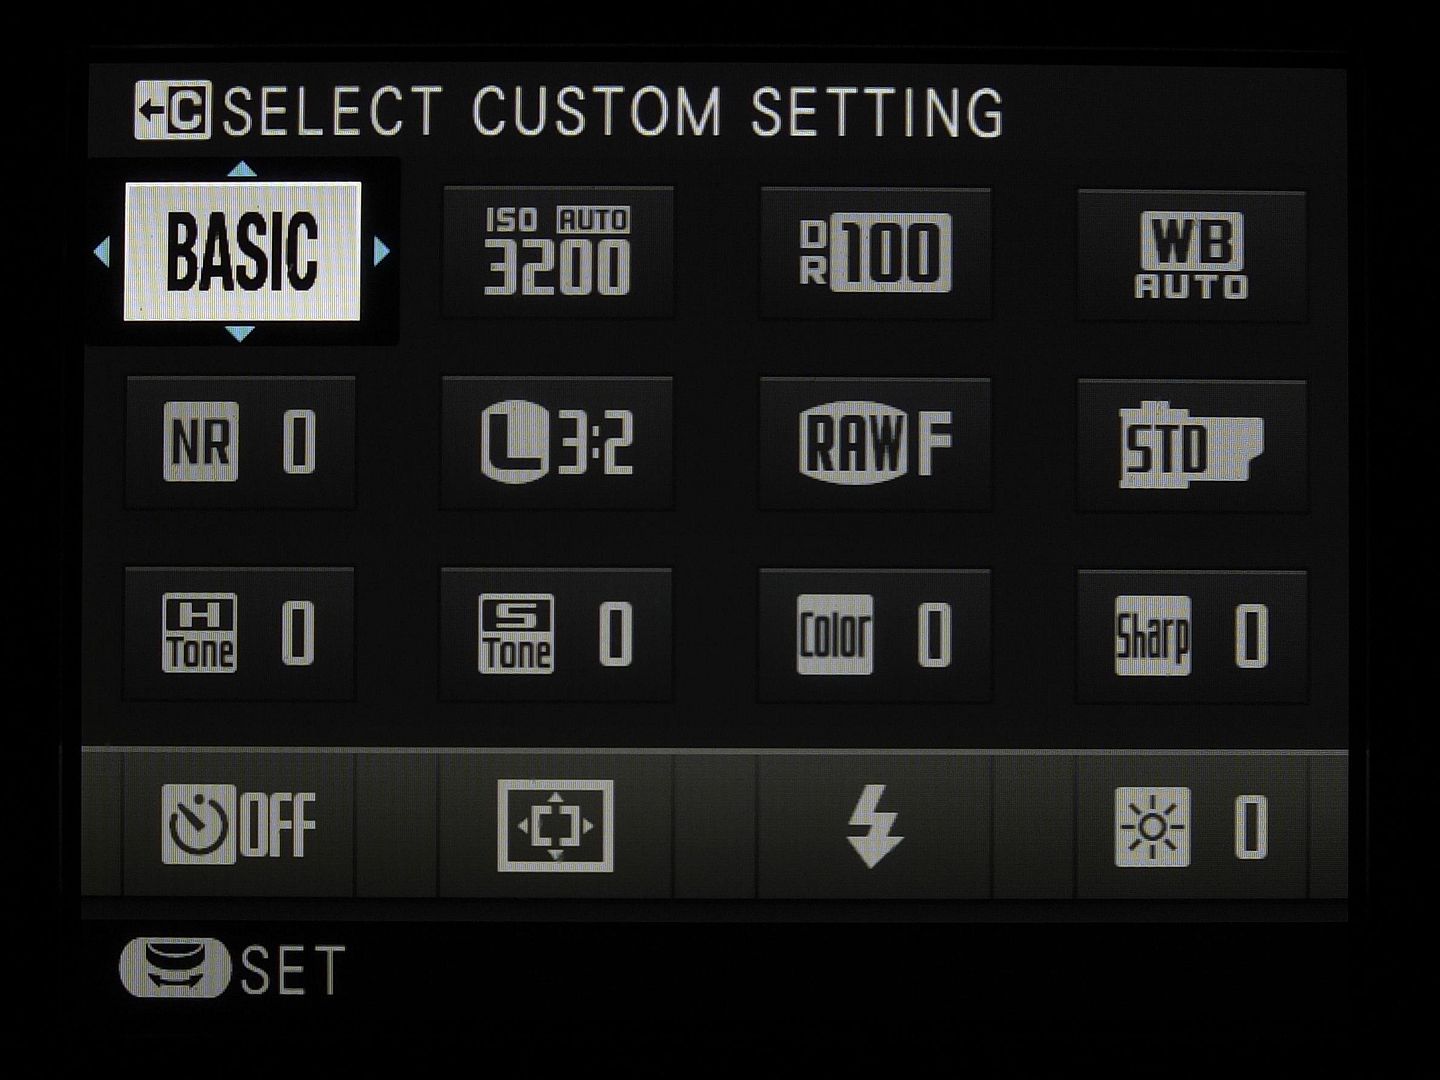
Qmenu1

Use the four selector (arrow) keys to navigate to any of the 16 functions and then use the command dial to change the settings for the function of your choice. You can apply any changes you make in the Quick menu using one of three buttons: you can press the Q button once again, you can press the MENU/OK button, or you can depress the shutter button halfway.

The X-Pro1 and X-E1 allow you to create up to seven custom settings or shooting profiles, which you can bring up and select in no time with the help of the Quick menu. To create a new shooting profile or change the settings of an existing one, hold down the Q button for a few seconds. This will bring you directly to the menu option EDIT/SAVE CUSTOM SETTING in the shooting menu, where you can either save your current camera settings as one of the seven profiles (SAVE CURRENT SETTINGS) or manually set and save values for ISO, dynamic range, film simulation, white balance, color, sharpness, highlights, shadows, and noise reduction for each profile.

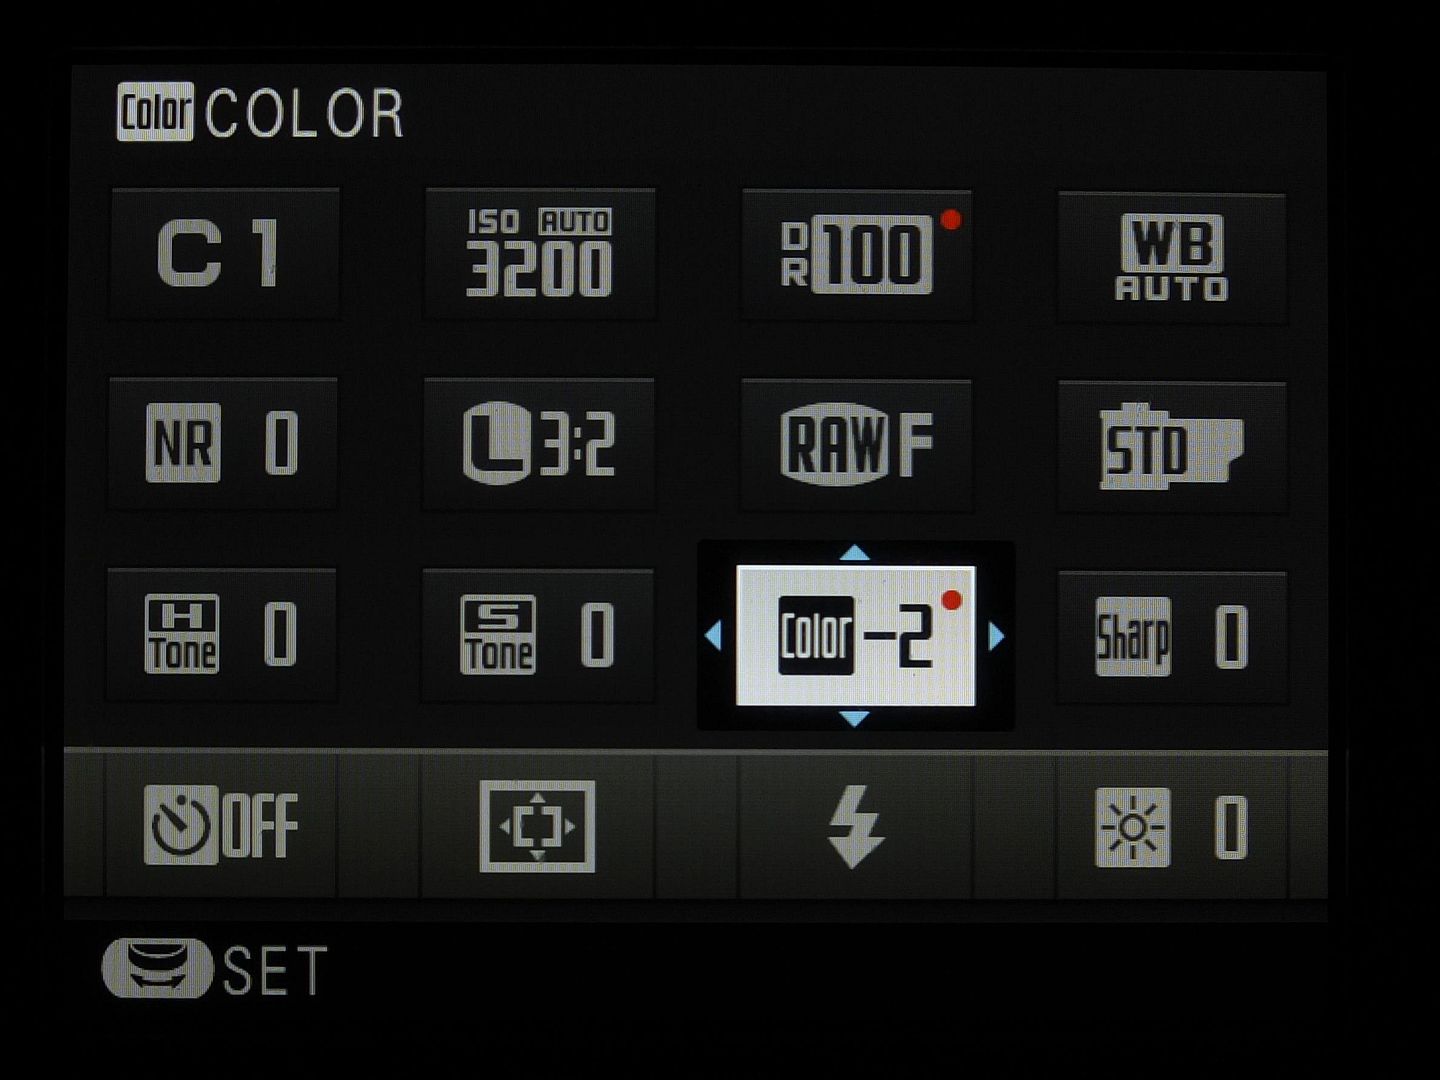
While in the Quick menu, you can use the command dial to shuffle rapidly through the seven shooting profiles. As you do this, you will be able to see a live image on the camera’s display depicting the settings of each profile. In other words, you not only see which one of your up to seven profiles is currently selected, you also see all of the actual camera settings that are associated with that profile. You can of course use these predefined profiles as a starting point and then use the Quick menu to make further adjustments to the settings. Any changes you make to each profile’s baseline settings will be indicated with a red dot.
 

Qmenu2

In this illustration the first shooting profile is selected (C1), but the values for the dynamic range (DR100) and color (–2) have been manually adjusted. The camera indicates these changes with a red dot. These changes won’t be saved with the shooting profile; they are only active until you overwrite (change) them again or select another shooting profile. To make permanent changes to a shooting profile, hold down the Q button for a few seconds or select EDIT/SAVE CUSTOM SETTING from the shooting menu.

What about the BASIC setting in the upper left of the Quick menu? I have seen some confusion about in a few photography forums, so here’s the deal: While it’s clear that C1 to C7 are labels for the camera’s custom shooting profiles 1 to 7, BASIC simply means your current, active settings. So once you select one of the seven shooting profiles and then confirm your selection (with or without making any changes), those settings immediately become the camera’s new (= current) BASIC setup and there won’t be any more red dots indicating any changes you made to a previously selected shooting profile. In other words, BASIC simply shows the settings that you and your camera are currently working with. Whatever you do in the Quick Menu – once you close it (by pressing the Q button once again, by pressing the MENU/OK button, or by halfway depressing the shutter button), the settings you left it with become the BASIC settings.

Using Custom Shooting Profiles

The X-Pro1 and X-E1 have a plethora of settings options: ISO, DR function, white balance selection, film simulation, color, contrast (highlights and shadows), sharpness, noise reduction. Excluding ISO and DR, the remaining settings are also referred to as “JPEG settings”, as they do not affect what’s in the RAW file.

You may be wondering, “How am I supposed to define all of these settings quickly when I’m ready to snap an image? I want to take pictures; I don’t want to stand around fumbling with my camera!”

Here is where the seven custom shooting profiles come into play. They allow you to program each variable independently and then save them together in a bundle. Then you can switch back and forth quickly among your predefined profiles.

Examples of Custom Profiles

Which profiles should you save? Only you can answer this question for yourself – photographers not only have individual requirements and aims, but they also have their own stylistic preferences. This is exactly why the X-Pro1 and X-E1 feature so many different programming possibilities. If there were one “optimal” universal setting, Fuji could have done away with many options. Nevertheless, here are a few recommendations for potentially useful custom shooting profiles:

  • General profile: In this profile, I save the settings that generally apply to everyday situations and quick snapshots. My typical settings for my all-around profile are automatic white balance, auto ISO, auto DR, ASTIA or PROVIA, and occasionally a decreased noise reduction set at medium low.
  • DR100% profile: This is a variation of the general profile with the dynamic range setting fixed at DR100%. This profile allows me to use the live histogram for correcting the exposure and target the brighter areas of my image more accurately when defining the exposure settings.
  • Black-and-white profile: Any time I imagine an image would look good in black-and-white, I use this profile, which includes the black-and-white film simulation and increased contrast settings. The electronic viewfinder gives me a practical (black-and-white) preview of my subject.
  • Special profile: I generally reserve one profile for special situations, such as shooting in a studio or taking infrared images, when it is practical to shoot with a color temperature setting predefined in Kelvin.
  • RAW shooter” profile: I use this profile when I know in advance that I will probably want to expose the image very carefully so that I can develop and edit it with an external RAW converter.

A JPEG Profile for RAW Shooters

Yep, no kidding: a JPEG shooting profile for RAW shooters. While JPEG settings have no effect on RAW files, they do affect the image you can see in the electronic viewfinder (EVF) and on the LCD display. Moreover, the data for the live histogram is derived from the image that appears in the live view – in other words, it too is affected by your current JPEG settings.

What does this practically mean? If you select VELVIA as your film simulation, for example, not only will you have a brightly colored JPEG; you’ll also have a brightly colored live view preview with pronounced contrast. This image preview is reflected in the live histogram as well, and the Velvia simulation will cause the peaks of exposure to shift to either the left or the right limits quicker than if Provia were used instead.

The same goes for the contrast settings (HIGHLIGHT TONE and SHADOW TONE): if both parameters are set to HARD then the highlights and shadows will shift beyond the right and left limits of the histogram faster than they would if both were set to SOFT.

As I’ve already said, the RAW file itself isn’t affected by any of this – it collects all of the image information that the sensor is capable of capturing. Conversely, JPEGs rely on only a portion of the RAW data. The objective here is setting the JPEG parameters in a way that allows you to see the largest possible portion of the RAW data – because this is the information that interests us as RAW shooters. We want to squeeze everything possible out of our camera and its sensor – to get the absolute maximum and to leave nothing behind. We want to explore the limits of the dynamic range and expose as close as possible to its borders. And we want the live histogram to inform us of where these limits are as precisely as possible.

The JPEG settings influence how we expose and adjust our images because we make our decisions about exposure using the information we can gather from the histogram and the live image. As a RAW-only photographer, you will be typically shooting with ETTR (Expose To The Right). We are therefore looking for JPEG settings that produce the softest contrast in order to obtain a histogram that reveals the most useful information about dynamic range for RAW files. Here are my recommendations for this profile:

  • DYNAMIC RANGEDR100%. The live histogram supplies meaningful information only with this DR setting.
  • FILM SIMULATIONPROVIA. This is the most neutral film simulation and also has the softest contrast. This setting will prevent highlights and shadows from unnecessarily being cropped at either end of the histogram.
  • HIGHLIGHT TONE(–2) SOFT. The RAW format of the sensor has an exposure reserve of approximately 0.4 EV in comparison to the processed JPEG format. You can access this reserve with an external RAW converter. The live histogram should be set to SOFT at its edges to prevent RAW shooters from exposing their images too conservatively.
  • SHADOW TONE (–2) SOFT. When you use DR100% with high-contrast subjects (in order to use the live histogram to base your exposure on the bright areas of your image), the dark areas often end up appearing as blocked-up black areas. This SHADOW TONE setting of (–2) SOFT counteracts this problem, since it brightens the dark tonal values in the viewfinder (and in the live histogram).

What’s next? Obviously, there’s much more to say about using the live histogram, the camera’s exposure modes or about how to use ETTR. In fact, one could easily fill a book with all this stuff, so that’s exactly what I did. It took me about a year to finish it, and you can have a look at 65 pages of reading samples by clicking this link for the German and this link for the English version of “Mastering the Fujifilm X-Pro1”. Or you can actually buy the book at Amazon by clicking here for the German or here for the English version.

As X-PERT CORNER is supposed to become a weekly column here on FUJIRUMORS, I have already identified over 20 topics I could write about. Here’s a pretty random pick of three of them:

The Best Locations for Streetphotography are... (max. 2 selections)

View Results

Loading ... Loading ...

So what’s it going to be next week? You decide by answering the poll! Till then, I wish you a happy New Year – and have fun with your Fuji X-series camera.

Rico Pfirstinger studied communications and has been working as journalist, publicist, and photographer since the mid-80s. He has written a number of books on topics as diverse as Adobe PageMaker and sled dogs, and produced a beautiful book of photographs titled Huskies in Action (german version). He has spent time working as the head of a department with the German Burda-Publishing Company and served as chief editor for a winter sports website. After eight years as a freelance film critic and entertainment writer in Los Angeles, Rico now lives in Germany and devotes his time to digital photography and compact camera systems.
X-PERT CORNER: the new Fujirumors column by Rico Pfirstinger

XPC
Dear Fujirumors readers,

I’m very happy to introduce you to a new weekly column at Fujirumors that will start tomorrow.

As you may know, a few days ago I posted a comprehensive reading sample of the book “Mastering the Fujifilm X-PRO1” (das Fujifilm X-PRO1 Handbuch). The author, Rico Pfirstinger, sent me the links to the German and English version. I enjoyed the look inside the book and appreciated the tips in his reading sample.

I decided to contact him and discovered a very passionate, creative and competent photographer. After a few emails I asked him if he’d like to share his knowledge and some useful tips about the Fuji X-cameras with my readers. I’m glad to tell you that he accepted my proposal and contributed with many ideas to the development of this new column: the “X-PERT CORNER“.

So, from now on, you’ll find a column written by Rico Pfirstinger here on Fujirumors. But it’s you, the readers, who can decide what he should write about. At the end of every post you’ll find a new poll with 3 options. You have a few days to vote for the option you’d like to have covered in the following episode of Rico’s “X-pert Corner”. The most voted topic will be the subject of his next article.

I’m really grateful to Rico Pfirstinger for his kindness and availability. Now, it’s time for me to shut up and leave the word to Rico and to you. Hope you’ll have a nice and profitable time at the “X-pert corner”.

Rico Pfirstinger studied communications and has been working as journalist, publicist, and photographer since the mid-80s. He has written a number of books on topics as diverse as Adobe PageMaker and sled dogs, and produced a beautiful book of photographs titled Huskies in Action (german version). He has spent time working as the head of a department with the German Burda-Publishing Company and served as chief editor for a winter sports website. After eight years as a freelance film critic and entertainment writer in Los Angeles, Rico now lives in Germany and devotes his time to digital photography and compact camera systems.