by Rico Pfirstinger
Since pretty much everybody wrote about Lightroom 4.4RC in the past few days, I won’t. After all, what’s the big story? It took Adobe a full year to get their paying customers what the free RAW File Converter EX software and Fuji’s internal JPEG engine delivered from day one: decent X-Trans demosaicing quality. Big deal! But for those who are still interested in LR4.4RC, I have updated my RAW converter comparison set on Flickr with several new renderings.
Let’s take a look at colors, so-called “Fuji Colors” in particular. It’s often noted that Fujifilm’s built-in JPEG engine is one of the best in the entire industry. Obviously, people either love it, hate it or are just plain ignorant about it, but if you belong to the “I love it” crowd, there’s a good chance that “Fuji Colors” have played a role when you made your decision to buy an X-series camera.
The heart of these colors are the different film simulations Fuji’s cameras are offering in either the shooting menu or in the camera’s internal RAW converter. X-Trans sensor cameras feature five different color film modes, named after famous analog slide and negative FUJIFILM brands: Provia, Astia, Velvia, Pro Neg. Std and Pro Neg. Hi. Make no mistake: These aren’t accurate recreations of analog films. Instead, you get modern, state-of-the art color gradations that feature key qualities of their vintage role models: Provia is a more-or-less neutral all-purpose film mode, Astia delivers more distinct “Fuji Colors” with added pop in the shadows and smooth highlights, while Velvia offers high-contrast JPEGs with strong, saturated colors. Pro Neg. Std and Hi deliver accurate and pleasant skin tones, with “Std” acting as the neutral option and “Hi” as the one giving additional pop and contrast.
Here’s a practical example illustrating the five different film simulation modes:
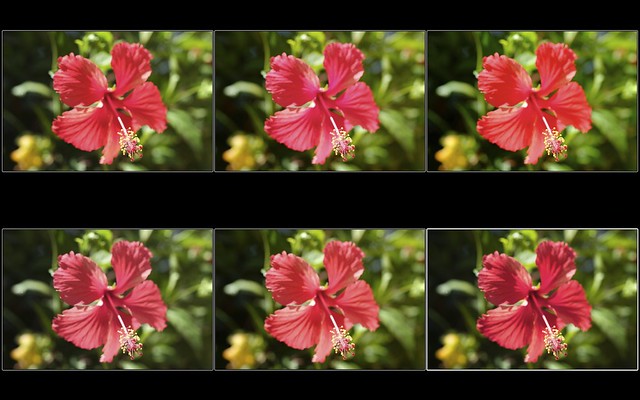
This example was shot with an X-Pro1 and the Fujinon XF 60mm Macro prime lens at f/4.0, 1/480s and ISO 200. The top row is showing Provia, Astia and Velvia, the bottom row shows Pro Neg. Std, Pro Neg. Hi and a Lightroom development that looks like something in-between Provia and Pro Neg. Std. You can click on the image for a hi-res view, but even if you don’t, you can clearly see that Fuji’s different film modes can deliver quite distinct results. Remember, this is all the same shot, just developed with different film simulation modes in the camera’s internal RAW converter (aka JPEG engine).
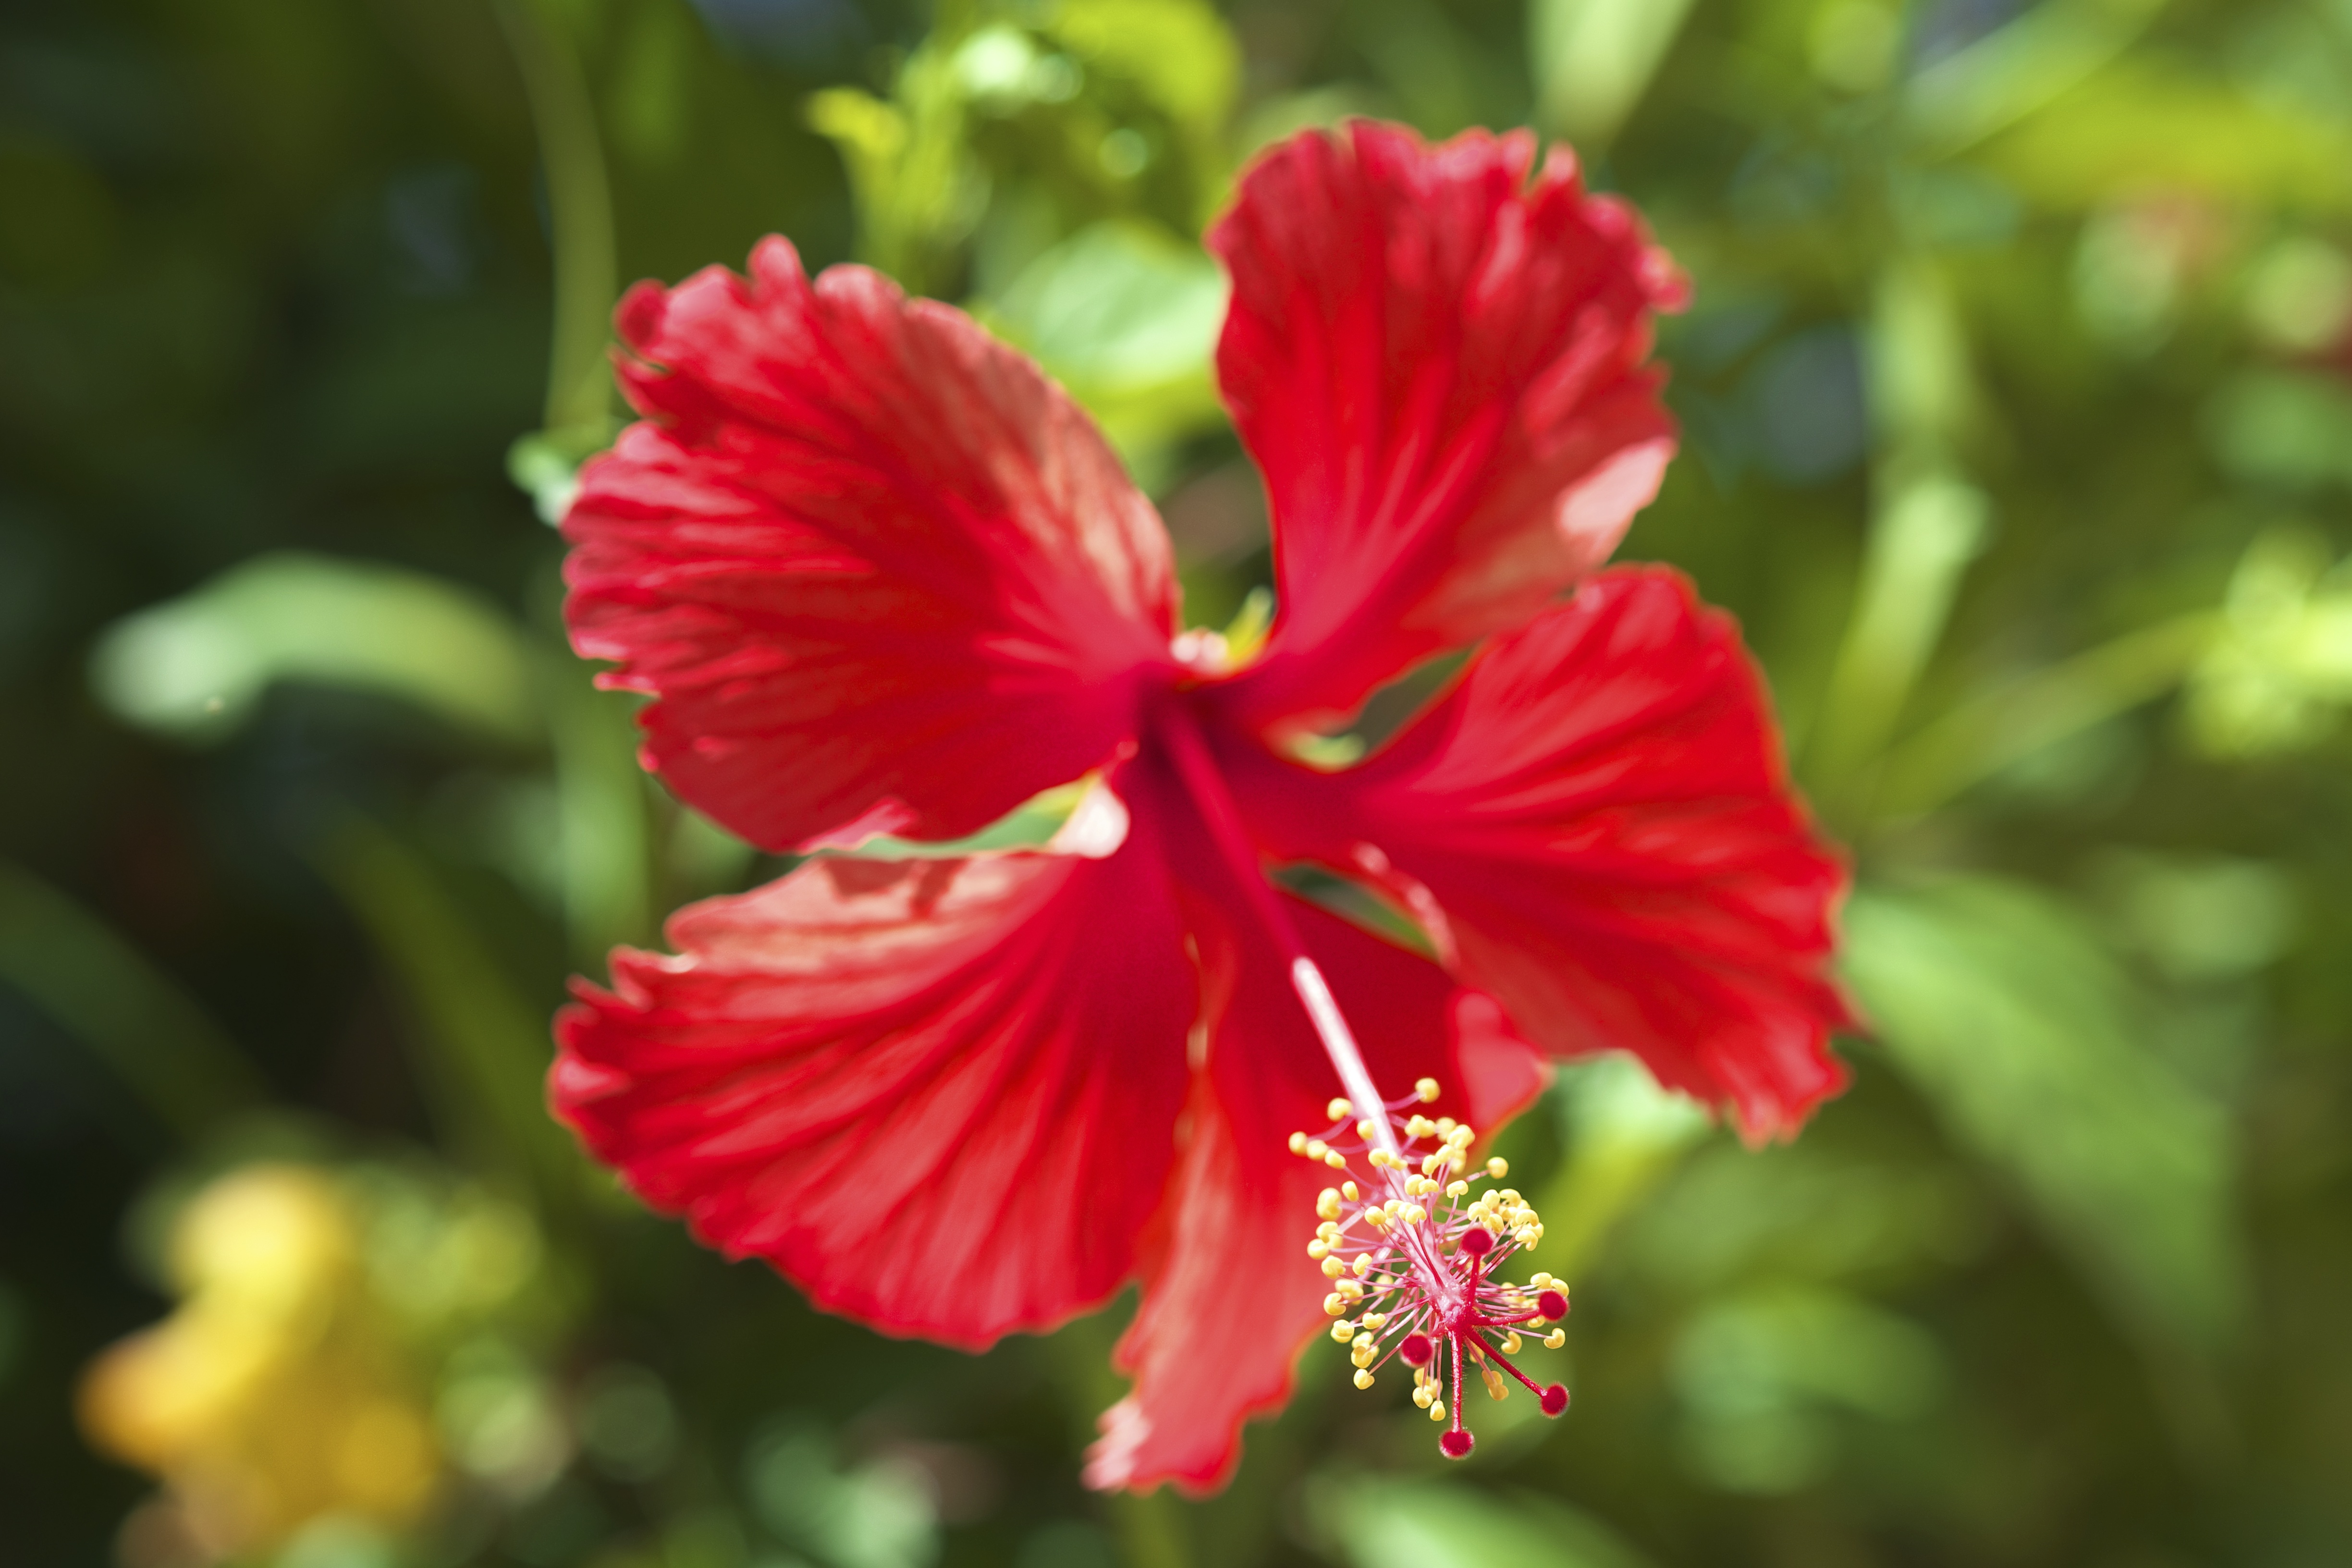
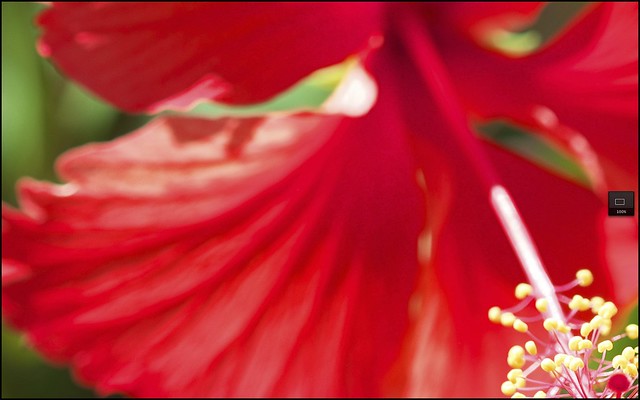
Let’s decide for Astia at this time, as it offers a very distinct purple-red rendering of the flower, with smooth highlights and nice contrast in the darker shadows. A typical problem of mono-colored subjects like this one are overflowing RGB color channels, in this case the red color channel. Here’s a magnified view of our Astia shot, showing three different color saturation level settings that can be applied either in the shooting menu or when (re-)developing the RAW file in-camera:
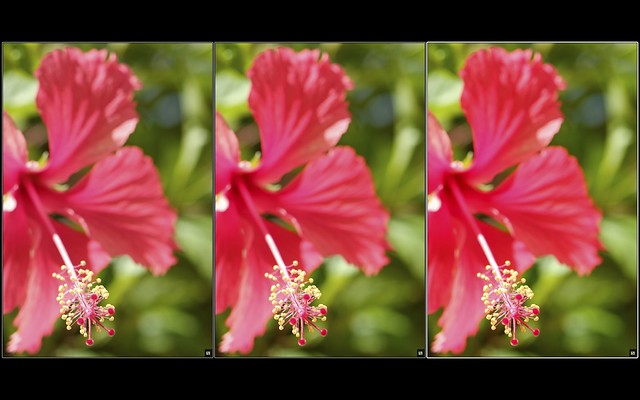
The color settings used here were -2 (left), 0 (center) and +2 (right). Clearly, too much color saturation in the reds goes at the cost of image detail, so we are better off using a saturation setting of -2 (aka “low” when you are using the internal RAW converter). Here’s the less color saturated Astia JPEG of this shot, straight from the camera’s built-in RAW converter:
As usual, click on the image for a full-size view. This was a hand-held macro shot, so I used the smallest available AF field size and moved it precisely over the area I wanted to be in-focus.
So far, so good. We now have an image with quite distinct “Fuji Colors”. Some people may like it, some may not, it doesn’t matter. What matters is that many of those who like their own JPEGs with Fuji colors would often also like to achieve similar looking results with external third-party RAW converters like Silkypix or the free RAW File Converter EX (which is an older version 3 of Silkypix).
How can we do it? Let’s play it through! Here’s the RAW file as it looks in Silkypix 5 with the software’s default settings:

Uh-oh! While this default rendering proves that claims about X-Trans sensors being incapable of delivering saturated reds are wrong, this is obviously not the result that we had in mind. In order to emulate the Astia rendering of the in-camera JPEG engine, we need to make some changes. But there’s more! If you click on this image for a full-size view, you will see ugly artifacts in the deep reds, almost like dirt soiling the colors of the flower. Here’s a zoomed-in view of this phenomenon, just click on it to see it in full size:
This doesn’t look nice, not to mention that the red is somewhat over-saturated and obscuring image details. So let’s correct this, shall we? After a few modifications in Silkypix, the image looks like this:

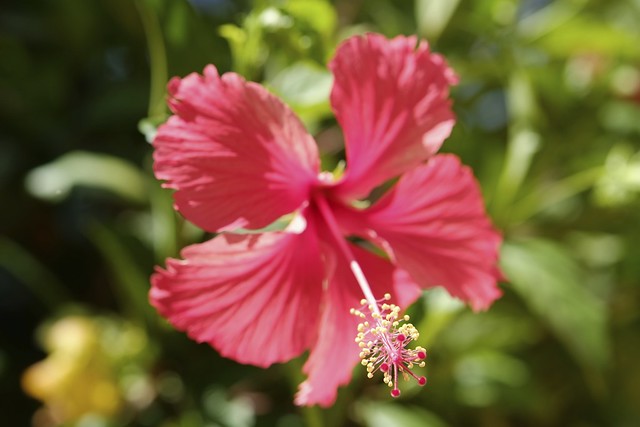
To make the comparison a little easier for you, here’s the original Astia JPEG again:
It’s not exactly the same, but it’s close enough for me. Of course, you could achieve a perfect match with a few further adjustments in Photoshop, Lightroom, Aperture or any other powerful image editor, but maybe an exact match wouldn’t really improve the image, anyway? Also note that the “dirt” and other color artifacts in the red flower are now gone.
So what exactly did I do to make it work?
Well, buy my next book to find out.
Good night, and good luck!