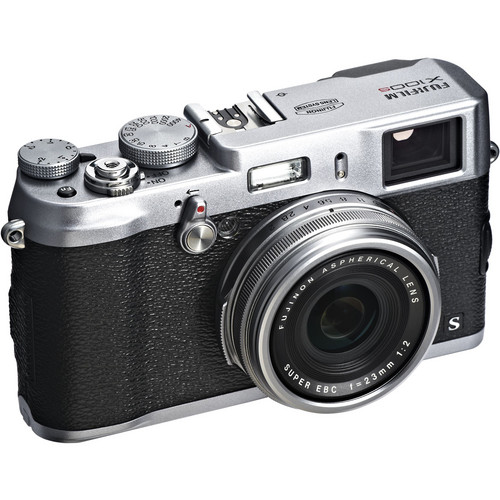
by Rico Pfirstinger
It’s another X-PERT Friday! Before we begin, please let me thank all those of you who have already read Mastering the Fujifilm X-Pro1. If you find the book (and hence this column) any useful, I’d be honored if you spent a few minutes of your time dropping a brief review on Amazon.com. As you may already know, the book is just as useful for X-Pro1 users as it is for users of the X-E1. I have also set up sample photo sets on Flickr, showcasing hundreds of pictures I took with both cameras. Click these links for sets of my X-Pro1 and X-E1 samples.
Now, let’s get into this week’s topic. The settling of dust and dirt particles on the sensor is a fundamental problem for all digital cameras with interchangeable lenses. These particles can mar images by showing up as distracting spots in the light areas of an image (e.g., sky, clouds, walls).
To minimize the effect of this problem, the X-Pro1 and X-E1 offer an integrated cleaning mechanism that runs when you turn your camera on or off. Navigate to SETUP MENU 2 > SENSOR CLEANING to control this setting. You can choose to run the cleaning manually (by selecting OK), or you can choose to have the cleaning process run whenever you turn your camera on and/or off.
I have my camera set to clean the sensor both when I switch it on and when I turn it off—it’s best to shake the sensor up a bit as often as possible. With the help of high-frequency vibrations, the dust particles loosen from the sensor preventing them from becoming permanently attached.
See, problem solved! Well, just kidding. Don’t put too much stock in the sensor cleaning function. If any dirt particles have set on the sensor, they’re likely to remain stubbornly attached even after running the cleaning mechanism.
Accordingly, the most important strategy for maintaining a clean sensor is the active and passive avoidance of dust:
- Don’t leave your camera unnecessarily open without protective housing covers.
- As much as possible, avoid changing your lenses in dusty or dirty environments.
- When changing your lens, hold your camera pointed downward, not upward.
- When attaching a lens, make sure that the rear lens opening and the optics are clean and free of dust to prevent transferring dust to the sensor inadvertently.
- Don’t touch the sensor!
Despite diligent preventative measures, it’s unavoidable that the sensor of your X-Pro1 or X-E1 will collect dirt or dust over time if you use it regularly. So don’t deceive yourself—the question is not if, but when!
Dig the dust!
You can run a test to check whether dust has already settled on your sensor. Take an exposure of a blue or white sky, a bright wall, or a white piece of paper with a fully dimmed lens (= the highest f-stop possible). It’s best to use the camera’s automatic exposure bracketing feature (DRIVE button > AE BKT) and to manually set the lens to be out of focus—for the sky, set the focus for a short-range shot, and for a piece of paper, set the focus to infinity. If you then transfer your images to your computer and maximize the contrast, any flecks on your sensor should be readily visible.
The illustration below shows how the sensor of my preproduction X-Pro1 looked after three weeks of use in Asia. This exposure of a piece of white paper reveals (with the help of stark contrast settings on my computer) over a dozen flecks on the image sensor. Something no amount of shaking and vibrating will remedy…

Perform a blow job!
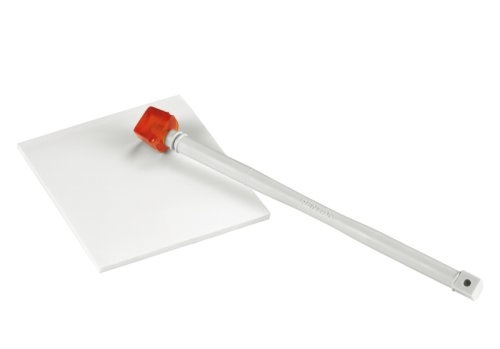
Using a cleaning bellows is one safe method to remove dust particles from the lens and sensor. Many photographers are using Rocket-air Blowers from Giottos. These blowers feature an air valve which prevents dust from entering their bellows—the last thing you want to do is blow additional dust into the camera’s chamber! The goal is to loosen and remove the existing blemishes with a clean stream of air. For the best results with this tool, blow from below into the sensor chamber of your open camera.
This Super Rocket-air Blower from Giottos not only looks comical, it also effectively removes dust from cameras and lenses:

Don’t use compressed air from a gas duster! These products contain propellants, whose particles can end up sticking to the image sensor, causing exactly the opposite effect of your intended result. Additionally, the stream of compressed air can harm the sensor by turning these particles into tiny and harmful projectiles. Not good!
Have a snack!
What about when the flecks on the sensor simply won’t go away? My colleague Michael J. Hußmann, who’s a legend when it comes to photo technology, recommends a “fruit snack on a stick”. This is his nickname of the Pentax Sensor Cleaning Kit—and you’ll see why people call it that at first sight:
Pentax’s Sensor Cleaning Kit includes a specially coated cleaning head that collects dust from the sensor. After every time you dab dust off of the sensor, you’ll need to clean the head with a special piece of sticky paper that comes in the kit. To clean the entire area of the APS-C sensor, you’ll need to blot off the cleaning head approximately six times.
If Fujifilm can do it…
I also asked Torben Hondong, the service manager for Fujifilm in Germany, how he handles dust removal from the X-Pro1’s sensors.
Fuji depends (as do countless other camera manufacturers) on the products from the U.S. company Photographic Solutions. The basis of every damp cleaning is the so-called Sensor Swab (for the X-Pro1 or X-E1 you’ll need size 2) that is soaked in a cleaning solution called Eclipse and then wiped like a windshield wiper across the sensor—one side of the swab from left to right, and the other side from right to left. It’s important that these swabs (which aren’t cheap, to say the least) are used only one time and that each side of each swab is wiped across the sensor only once. Otherwise the dirt and dust collected on the first pass can scratch the sensor on the way back.

Specialist Torben Hondong doesn’t rely on just this standard solution (available for anyone to purchase in camera stores). More commonly, he replaces the original cloth on the swaps with special “Cleaning Wiper” cloths from Japan, which he finds work better because they smear less. In particularly difficult cases, he treats the affected area of the sensor with a drop of Zeiss Optical Cleaning Mixture. Hondong cautions, however, that this relatively aggressive solution is NOT recommended for home use.
…so can you!
That being said, it is usually possible to take care of the normal dirt and dust buildup on the X-Trans sensor by yourself with products for DSLR cameras that are readily available in retail stores. The Canadian company Visible Dust offers a similar (and in fact more sophisticated) line of products, such as swabs and cleaning solutions, at prices that aren’t any higher than those of Photographic Solutions.
As a last resort for particularly stubborn sensor dirt that won’t come out, you can always send your camera in to be serviced. In Germany, Austria, and the Netherlands, this option currently runs at a cost of 72 Euros plus value-added tax and shipping.
There’s good news too, though: Fuji will perform the first sensor cleaning of an X-Pro1 and X-E1 for customers in these countries at no cost. This may be one of the best-kept secrets surrounding current X-Mount cameras. I wonder why? ;)
For your convenience, here’s a TOC with links to my previous X-PERT CORNER articles:
Rico Pfirstinger studied communications and has been working as journalist, publicist, and photographer since the mid-80s. He has written a number of books on topics as diverse as Adobe PageMaker and sled dogs, and produced a beautiful book of photographs titled Huskies in Action (German version). He has spent time working as the head of a department with the German Burda-Publishing Company and served as chief editor for a winter sports website. After eight years as a freelance film critic and entertainment writer in Los Angeles, Rico now lives in Germany and devotes his time to digital photography and compact camera systems. His book “Mastering the FUJIFILM X-Pro1” (Kindle Edition) (Apple iBook Store) (German version) is available on Amazon and offers a plethora of tips, secrets and background information on successfully using Fuji’s X-Pro1 and X-E1 system cameras, lenses and key accessories.